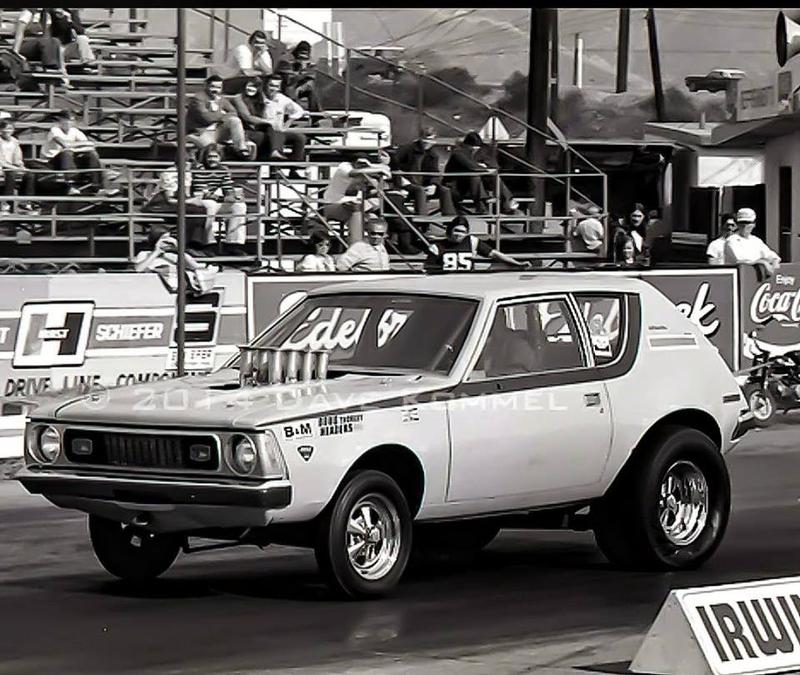
For years I have been looking for Paul Sassy Gremlin. I knew it was probably in Southern California somewhere, but not a single clue. While looking through some old magazines a few years ago I saw a Gremlin running out at Irwindale that looked alot like Paul's car except it was a different color and ran injectors. Thought that the rear fenders openings and Cragar's look just like Paul's car. It wasn't until much later when speaking to Jim he told me that when Paul sold the Gremlin, he pulled the Turbos off the car and sold it with injectors. I was now convinced this was Paul's car that I saw. I now know that Paul sold the car to Carl Smith and it became the Smith & Bruhn car. It ran out of Irwindale Raceway in the mid-1970s and early 1980. It was during that time it got a big block Chevy instaqlled.
From time to time I would do some internet searches and it never appeared. Some time had passed and once again I was looking for the car and there it was. It was purchased by an editor at Hot Rod Magazine Phillip Thomas. I was correct in assuming that the car was still here in Southern California. I contacted Phil to fill him in on all the information that I have on the car. Phil told me he had purchased it off Crags List. More story later...
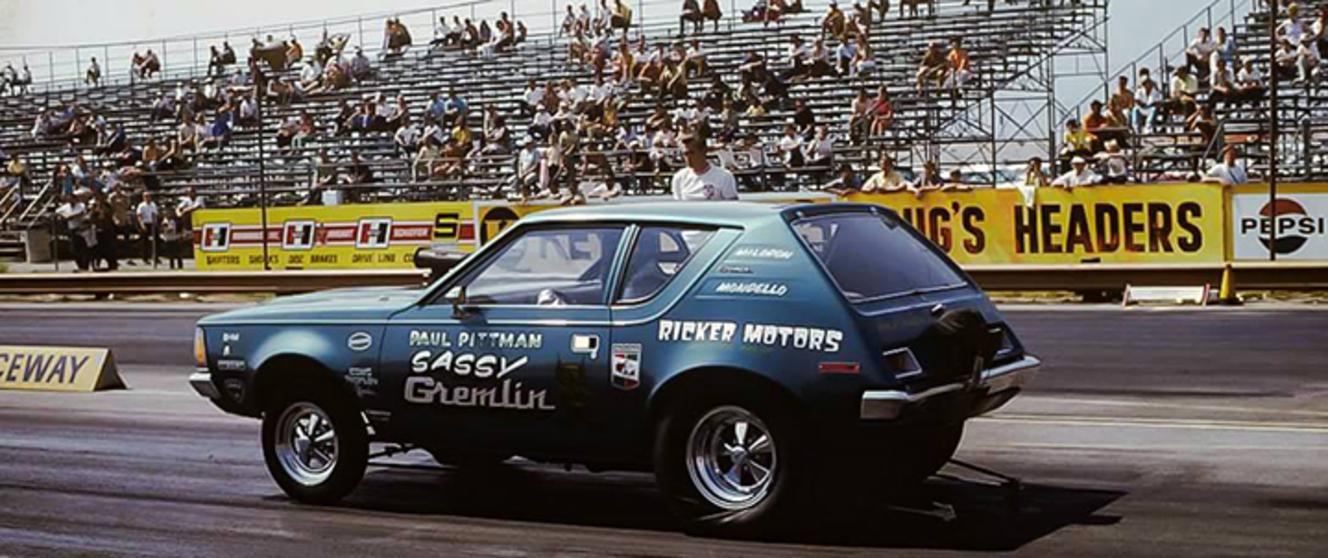
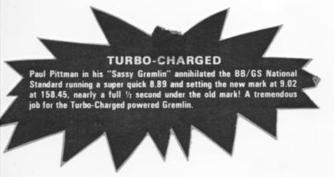
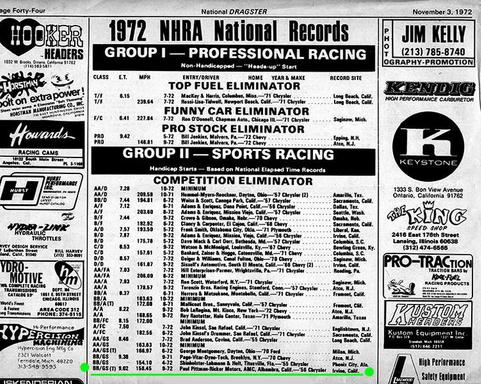
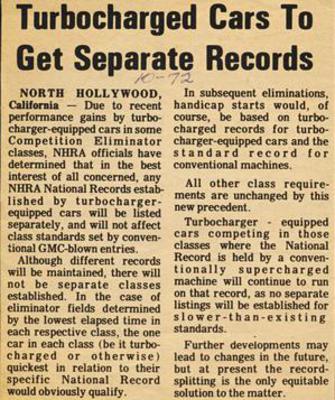
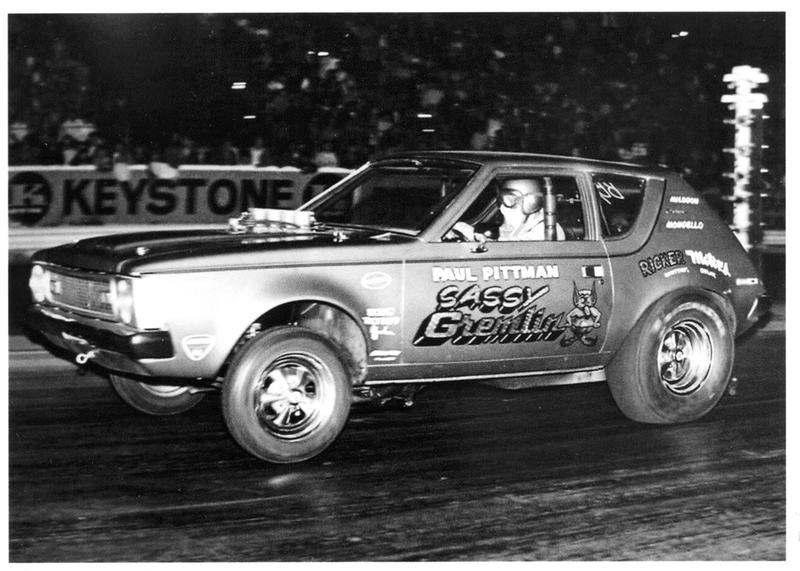
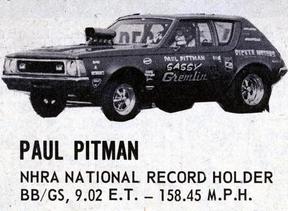
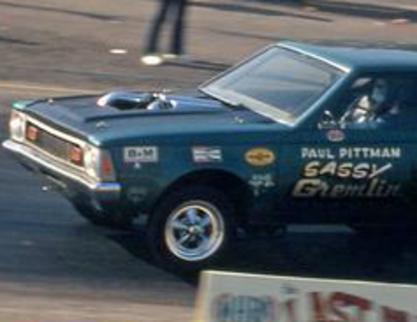
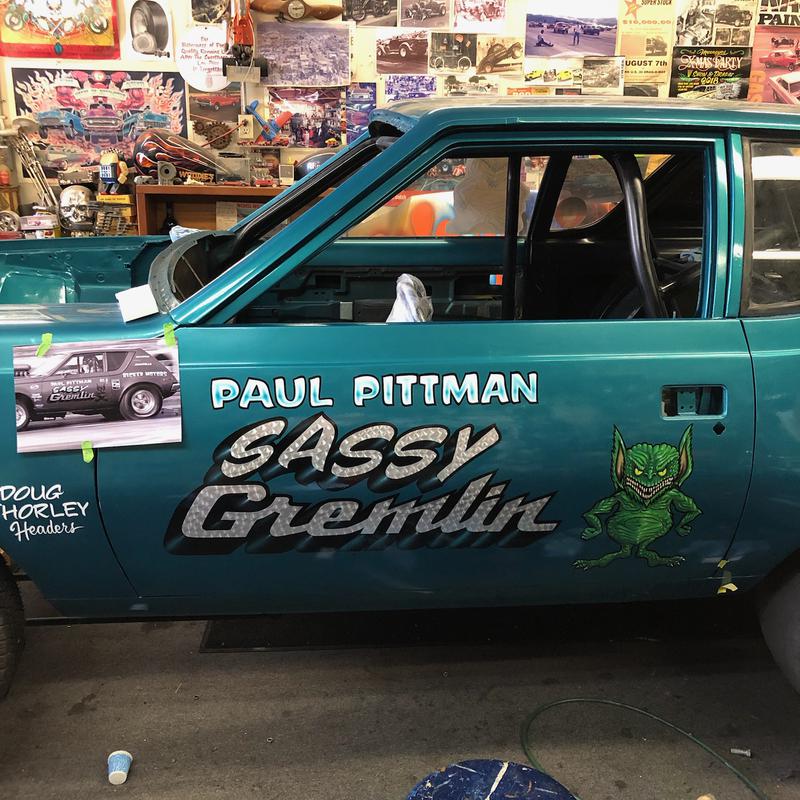
NHRA Record Holder in BB/Gas & BB/Gas/T, Paul Pitman's Historical Ricker Motors Sponsored"Sassy Gremlin"
Pictured Left: Jim Bridgewater my friend and Army buddy was a crew member on Paul’s car and knows all about the car. I will bring you his reflection in a story later.
After Jim and I returned from Vietnam we met each other at Fort Huachuca Arizona. We were wheel vehicle mechanic’s and were attached to Combat Surveillance School along with other returning veterans and assigned to the company’s motor pool. As strange as it seems my cousin Ed Helmer was also there with us. Ed and I were stationed together for three years.
All of us would race off base on Charleston Road outside town during the week nights and go to Tucson and race at Tucson Dragway on the week-ends. We all had pretty bad ass cars that most of us purchased after returning Vietnam. Jim' had a new 1966, 396ci Chevelle, Ed's 1964 Plymouth 383, My 1963 Pontiac 421, others had Vettes, Pontiac’s, Camaros, Fairlane’s.
.
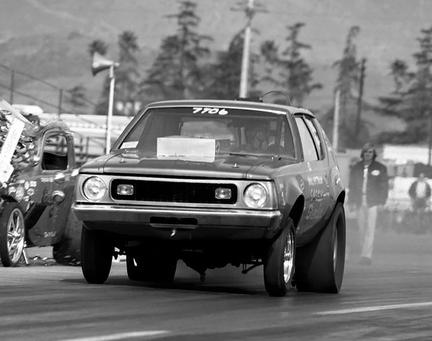
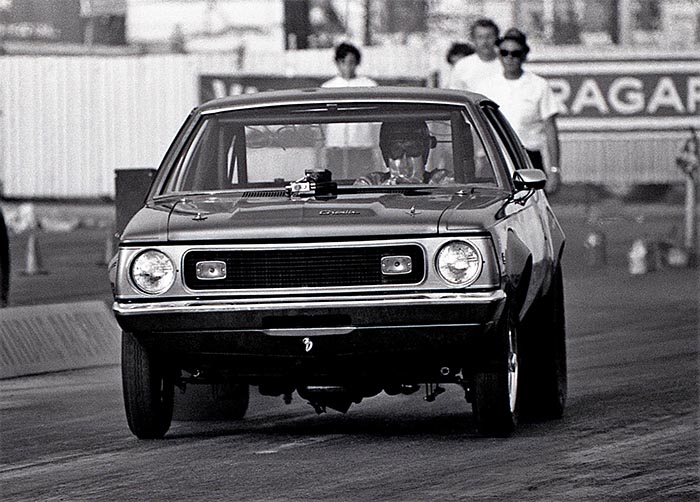
Jim and I stayed in contact after the service and from time to time would be racing out at Irwindale Raceway and I would run into him and Paul while they were working on the Gremlin. Jim also stopped over at the house occasionally while I was working on Project Javelin. On one occasion while out at Irwindale I was standing near the starting line watching Paul’s car stage. When the light when green the Gremlin with that Hemi had so much power it pulled the wheels and broke the wheelie bars then slammed the front end down on the track and bending the front suspension. Paul went on to capture the Record in later years and because of rule changes that NHRA made to his class he decided to retire the car.
1974 - Best times 8.89 et 162.45 mph 1/4 mile
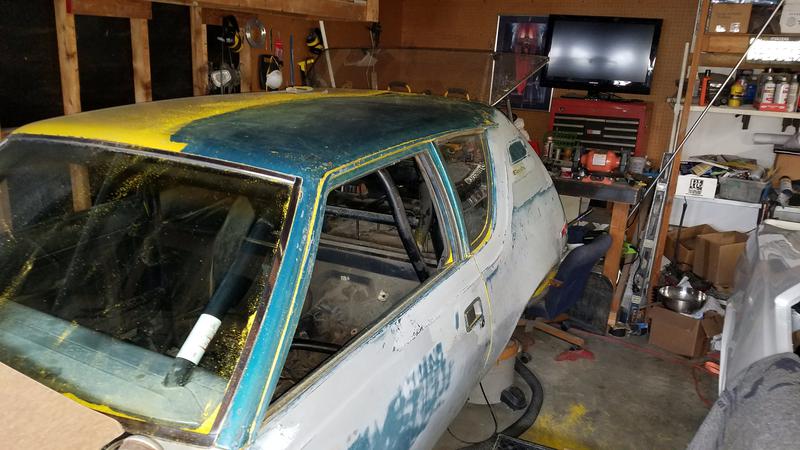
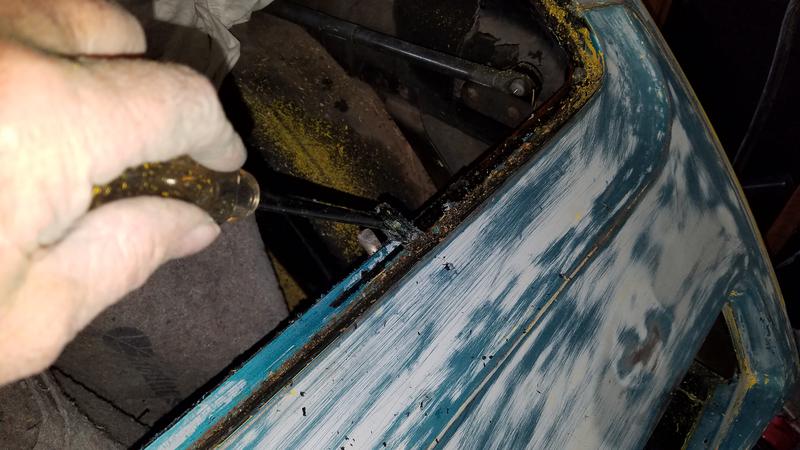
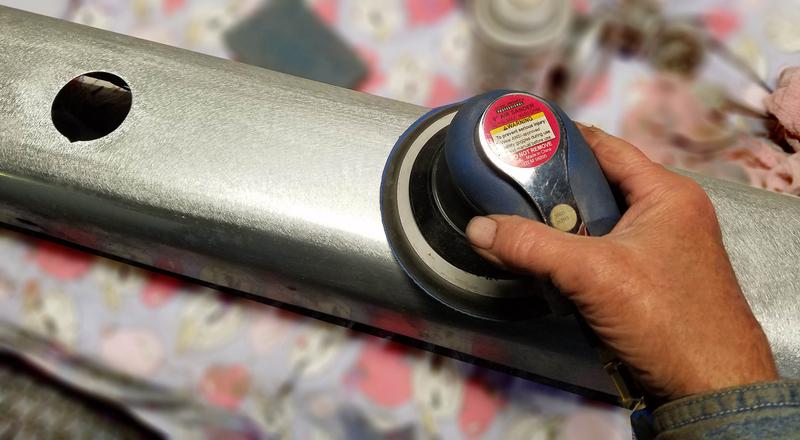
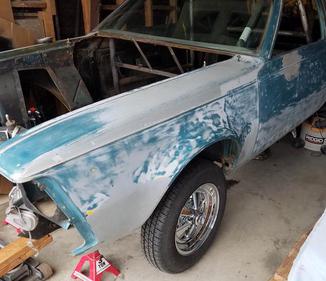
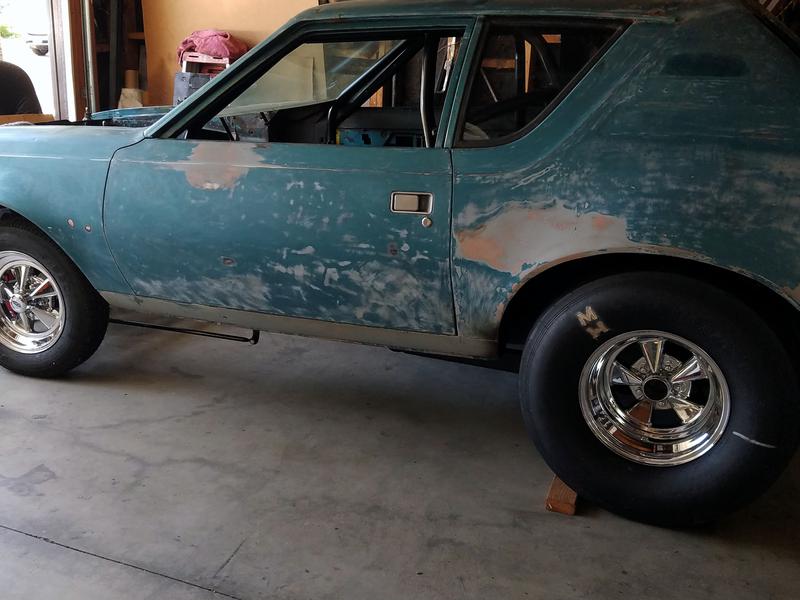
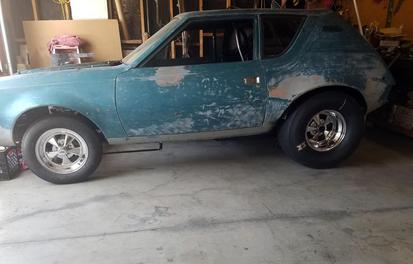
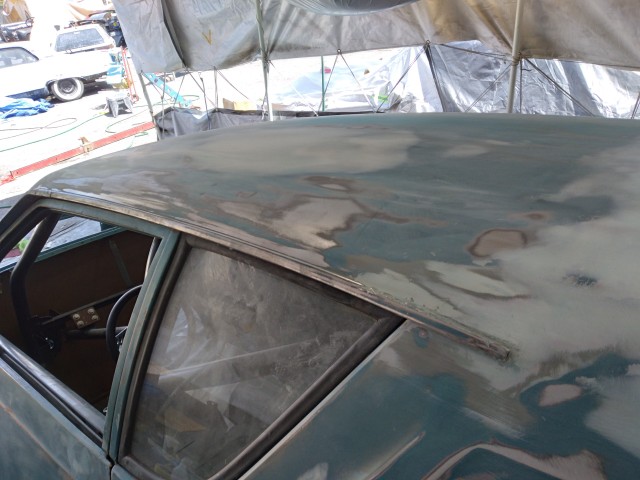
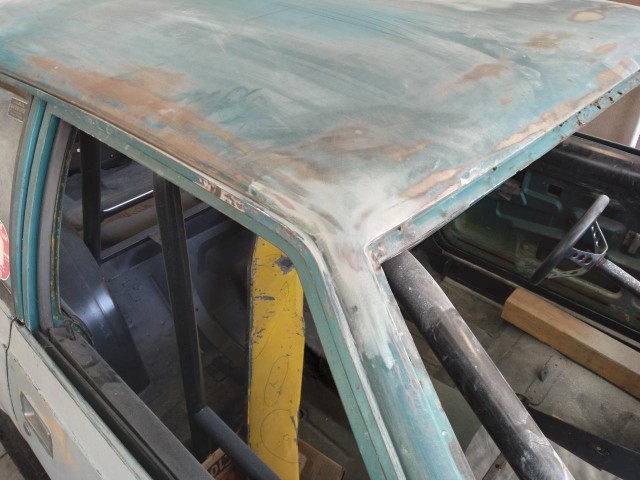
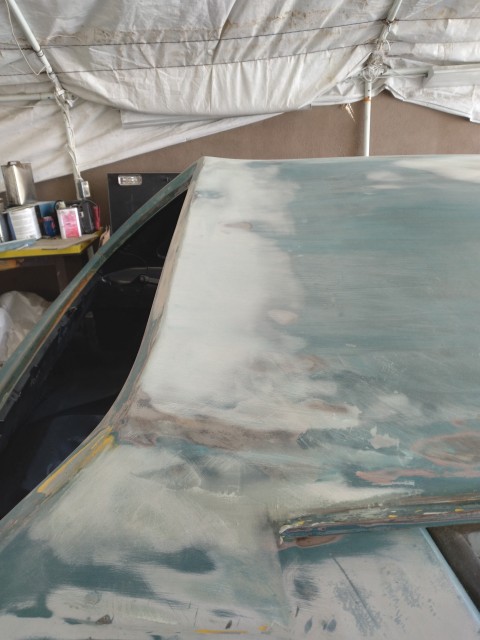
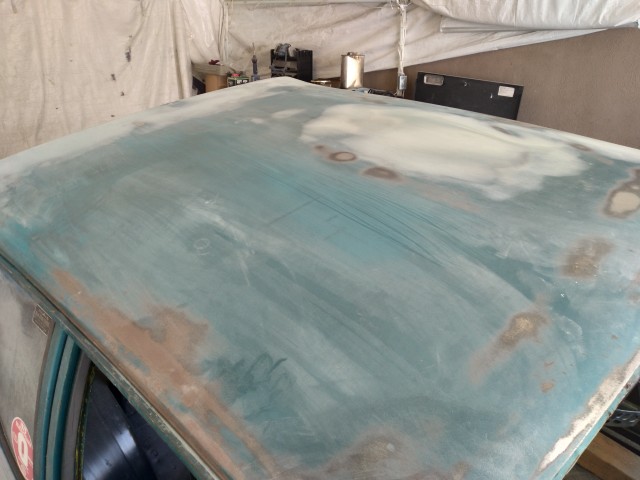
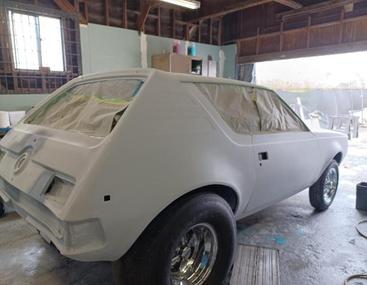
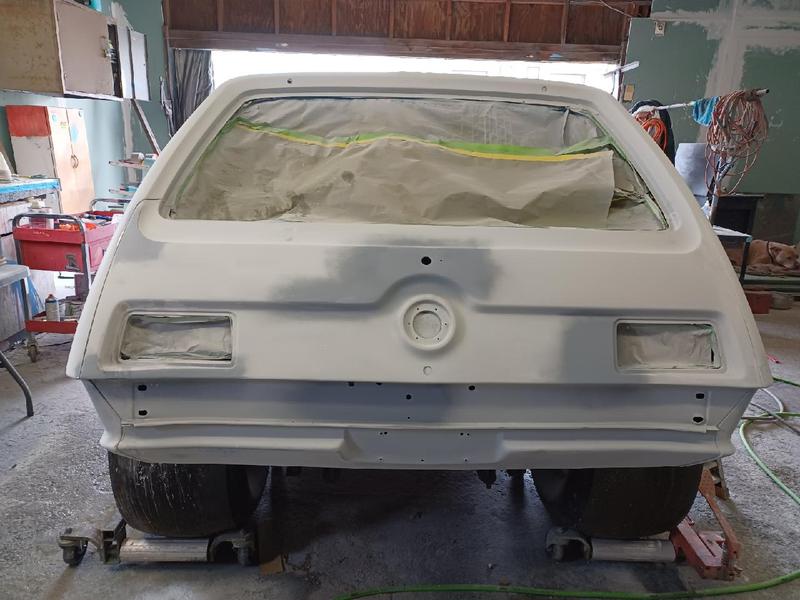
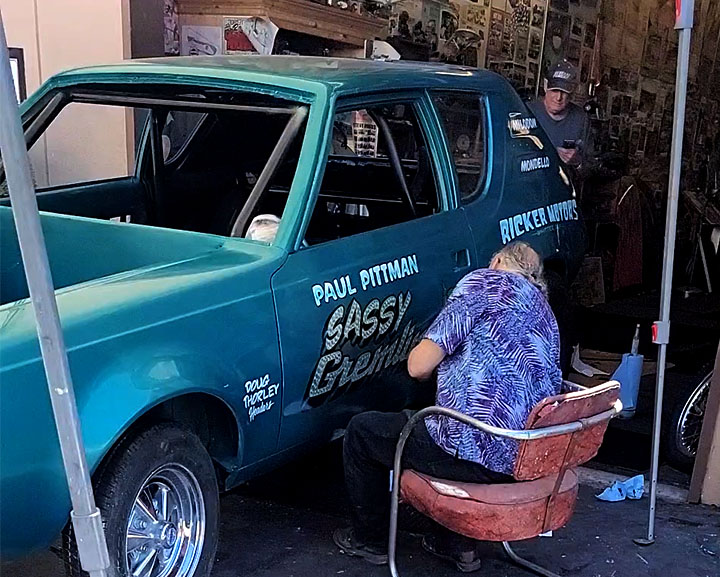
Pictured Left & Above: Started the long process of stripping the car down to its original paint with a razor blade scraper. This way when I repaint the car in it original color (1970 Seafoam Aqua) it will still have its original paint under the new paint job to preserve its originality. You can see under the weather stripping that the original paint was never painted yellow. Still more to go.
Last Updated on 08/06/2022
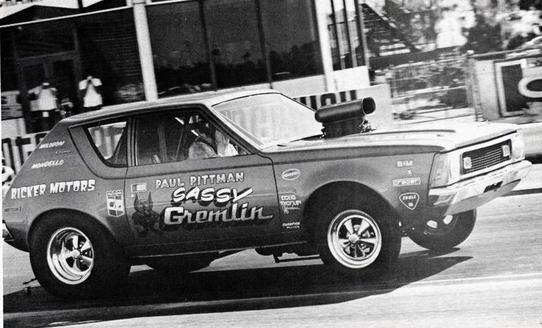
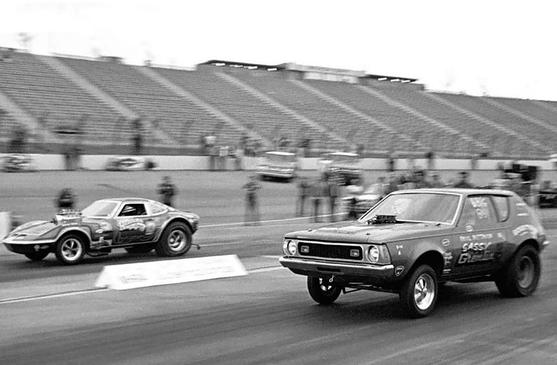
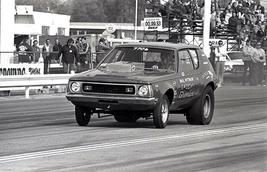
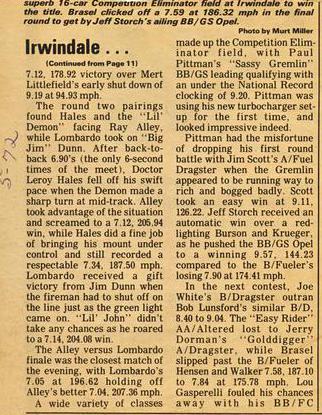
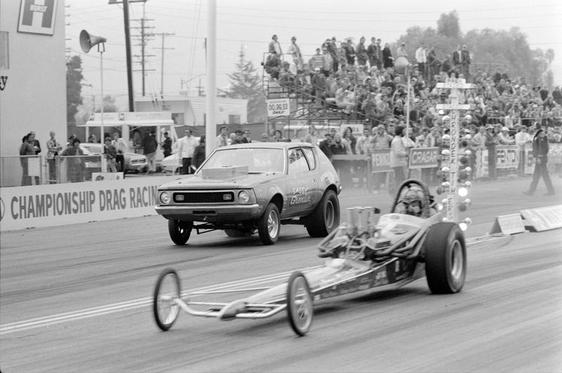
Sassy Gremlin at Irwindale Raceway
Paul Pittman Sassy Gremlin at Ontario Motor Speedway
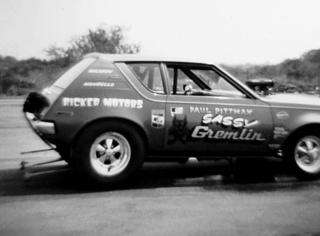
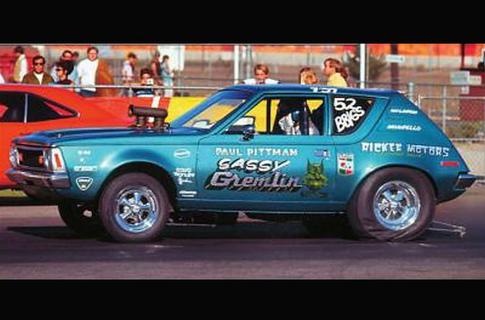
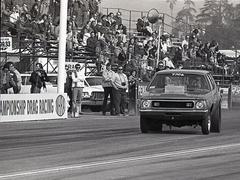
Paul Pittman Sassy Gremlin at Orange County International Raceway

Another shot of Paul Pittman Sassy Gremlin at Ontario Motor Speedway racing against his brother K.S. Pittman AA/Gas car.
Paul Pittman Sassy Gremlin 1972 Winternationals, Pomona
Check out this vedio of the Sassy Gremlin running at the last drage race held at Lions Drag Strip om December 2, 1972
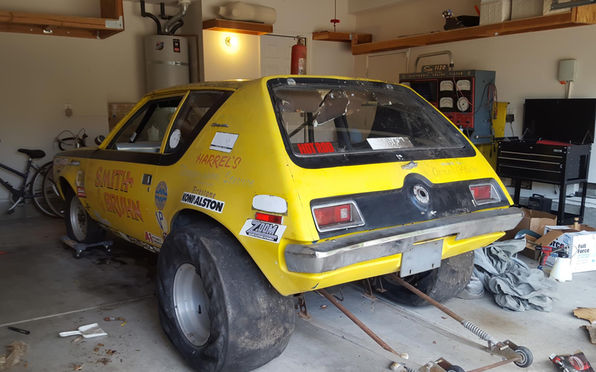
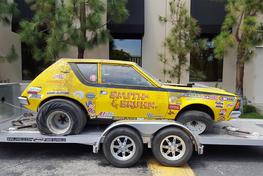
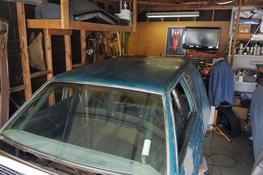
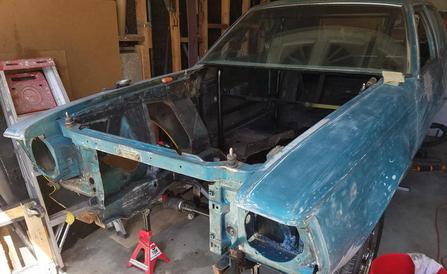
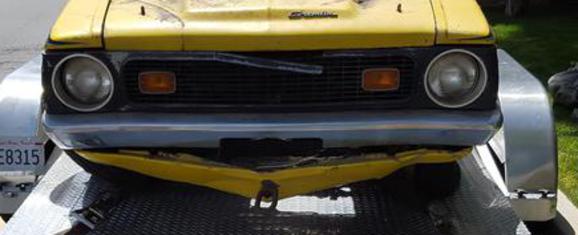
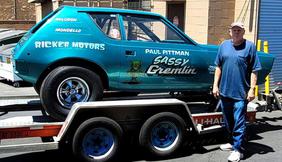
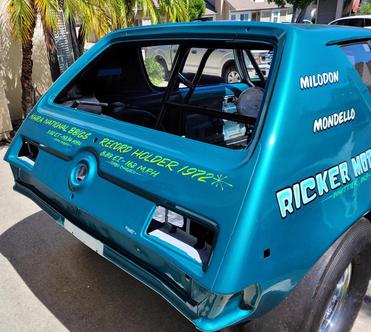
Pictured Above and left: The way Phillip Thomas purhased the car. Phil at the time was a writer for Hot Rod Magazine and the photo on the trailer is in the parking lot at Hot Rod Magazine on Douglas Street in El Segundo, CA. The car is pretty complete less the motor and trans and is in rough shape from sitting around for almost 30 years.
The Restoration
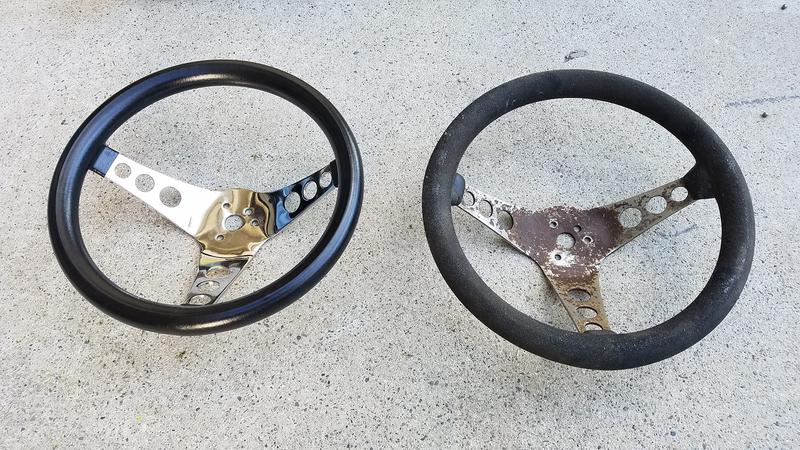
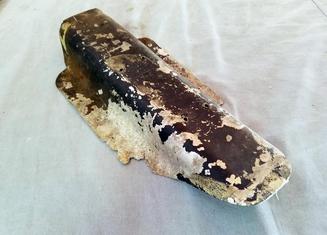
Pictured Above: Old wheel could not be saved replaced it with new one. I will keep all replaced parts.
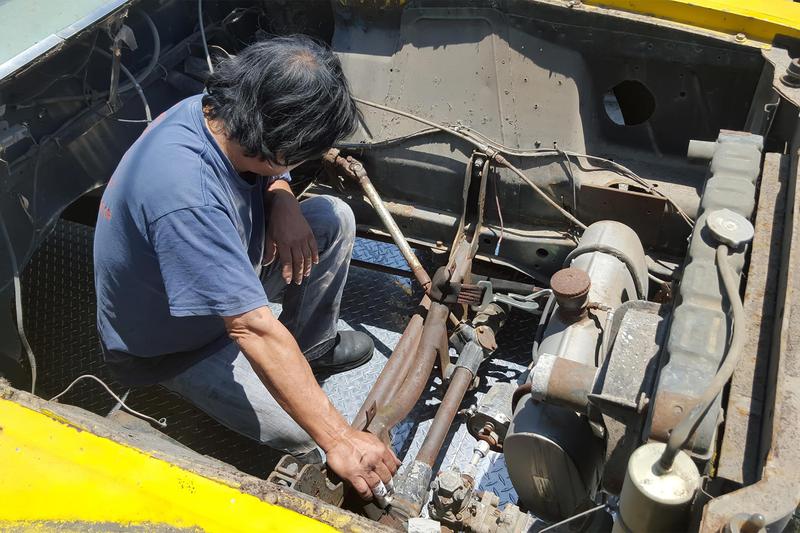
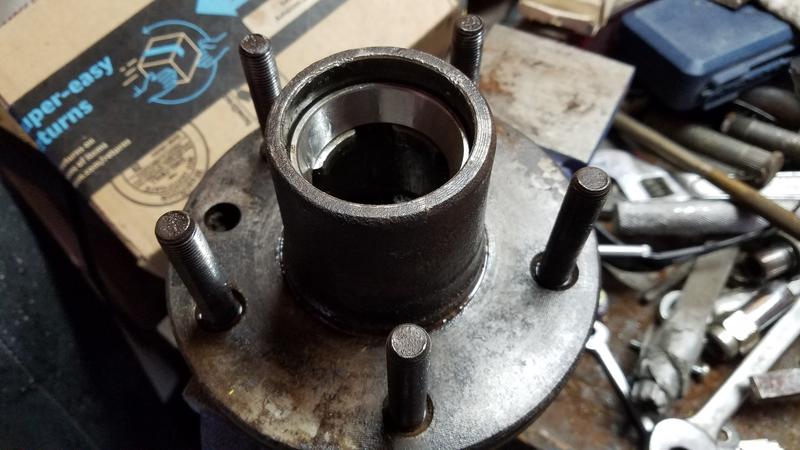
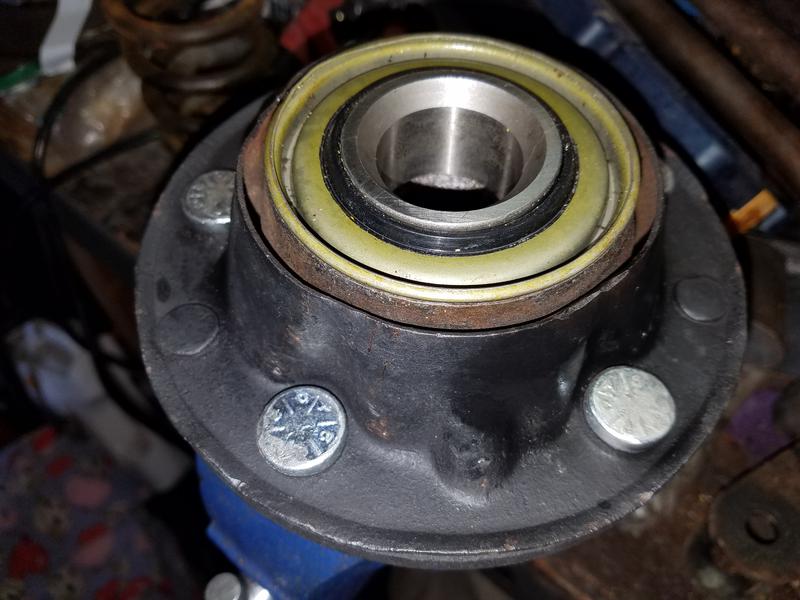
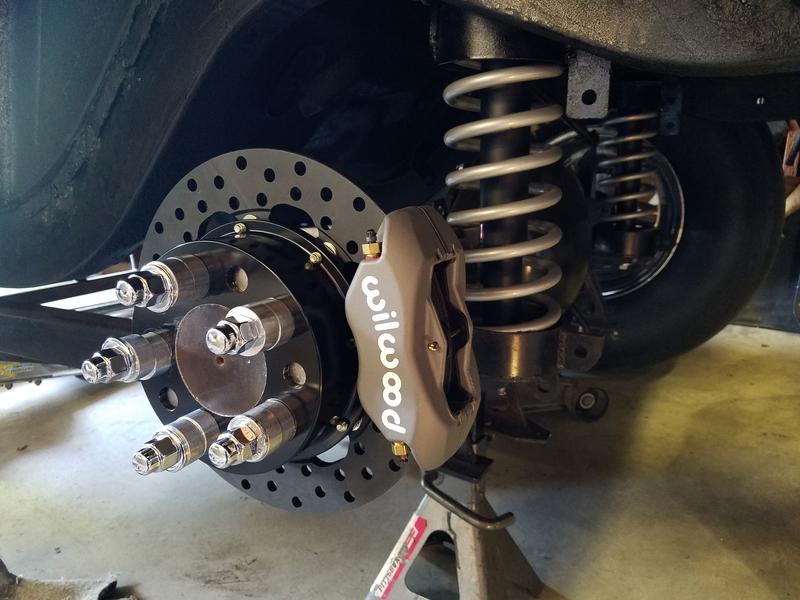
Paul's chassis shop used 1954 Chevy Truck spindles on a tube axel. It came at that time with roller bearings. It was pretty sloppy and the spindle had a lot of play in them. I decided to go with 1947-59 GM Tapered Roller Bearing Conversion kit with new bearings, races and seals. Pretty easy job took about an hour for both wheels. Need to get this done because the new SS Cragars should be here in the next day.

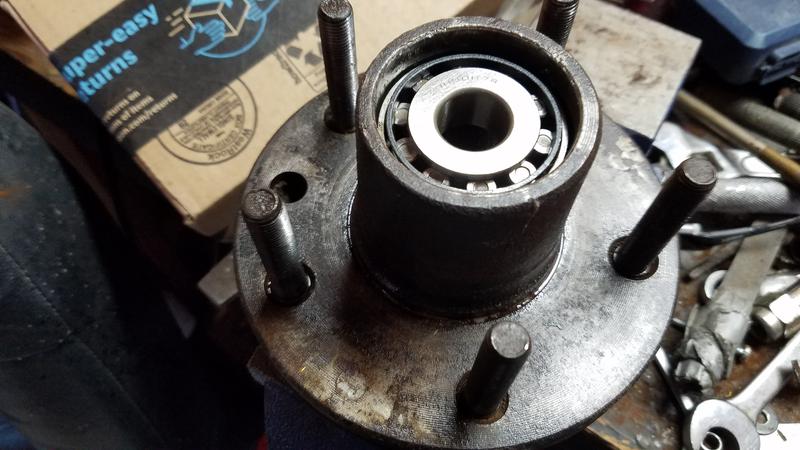
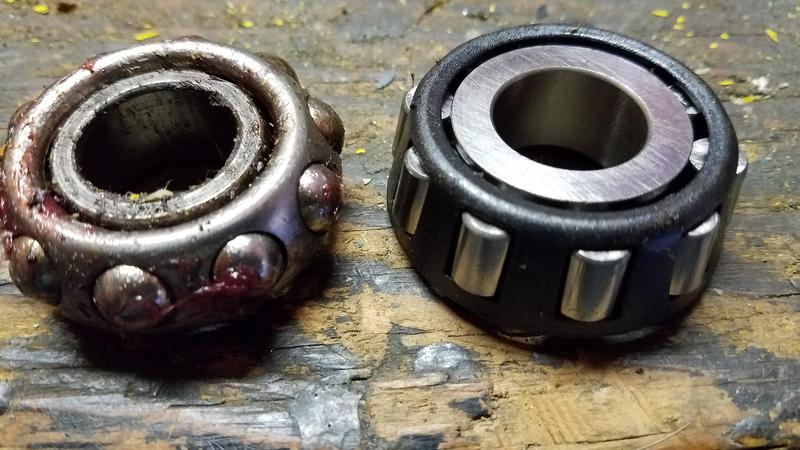
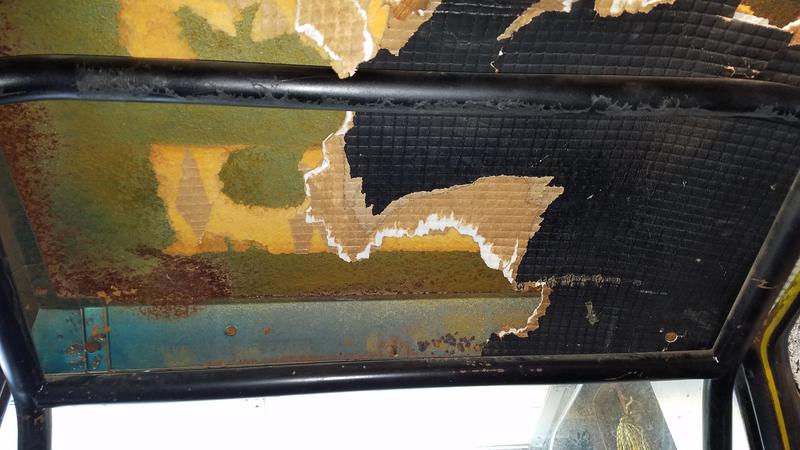
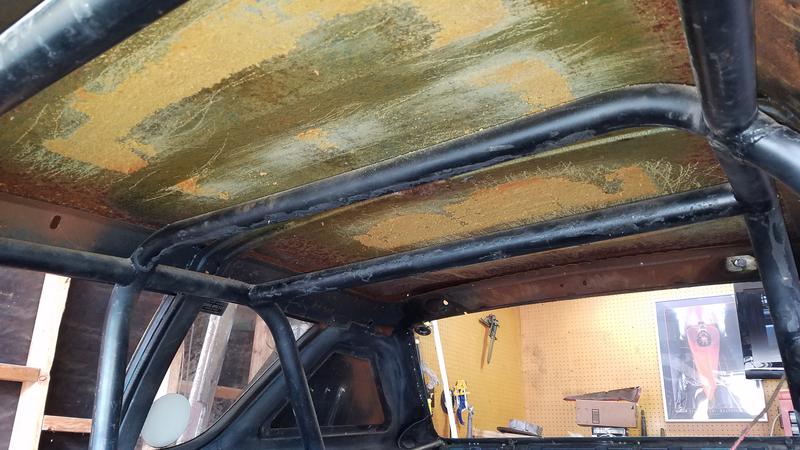
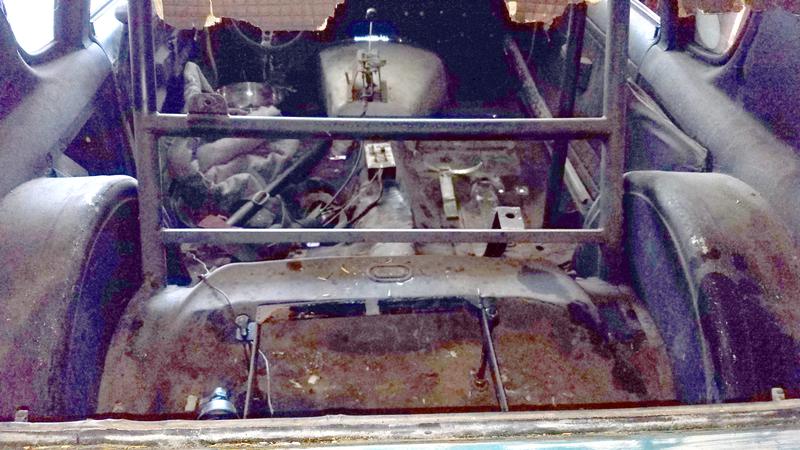
Pictured Left: This project is to preserve the car in much as its original form as possible but there are times that I will upgrade because of safety like the wheel bearings above. Other times there may not be available replacements parts available on the market. In those cases, I will find a temporary solution. Such as the photo on the left, the headliner. What a mess! The last foot of the headliner in the rear of the car was missing so the rest of headliner had to be removed. Picture on right is the removed piece. Really inexpensive was they had the headliner. glued sections of 1-inch foam with glued cardboard over that. It came out in pieces. In future I will used foamboard with embossed black vinyl over the top.
Sassy Gremlin at Orange County International Raceway.
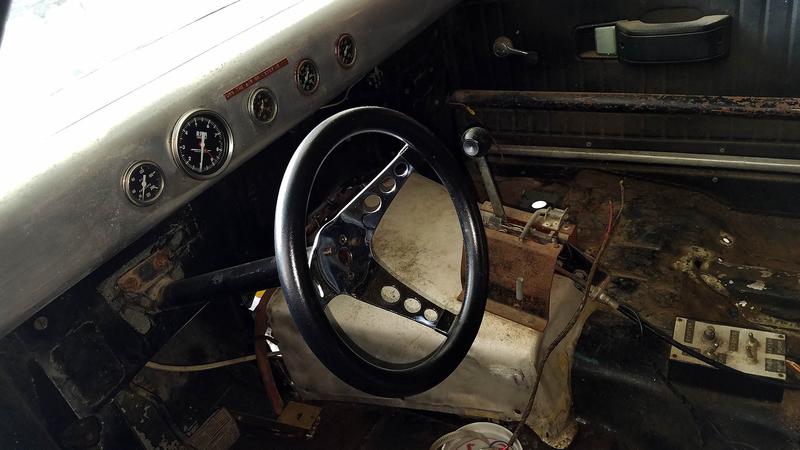
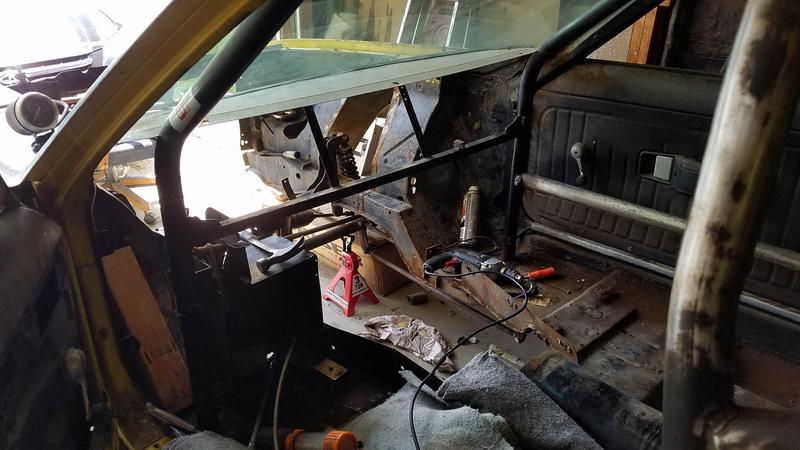

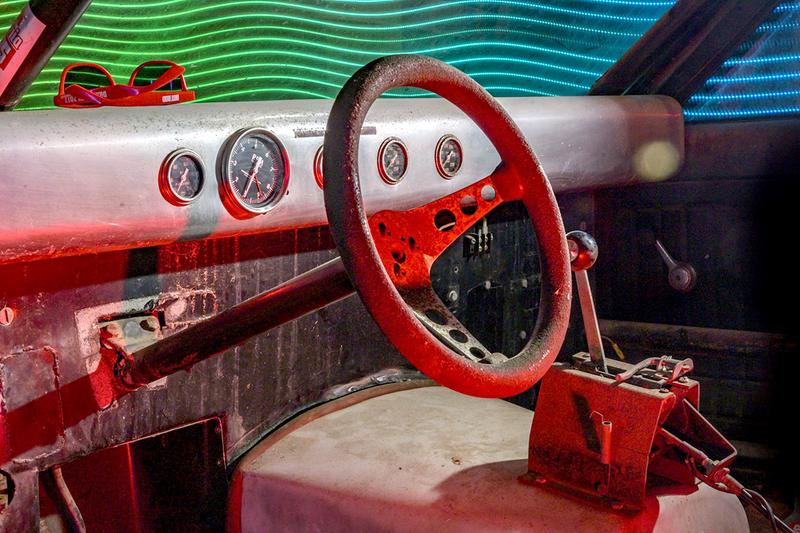
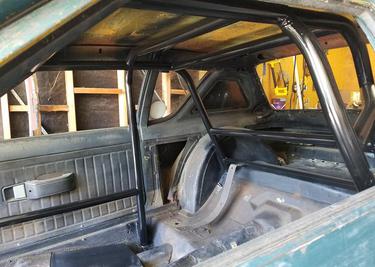
Pictured Above: Three photos showing the dash in the car, removed then out. The dash will be cleaned, polished and reinstalled. The other aluminum parts like firewall, trans tunnel will have the same done. With the removal this will allow me to sand and repaint the roll bar and support structures.
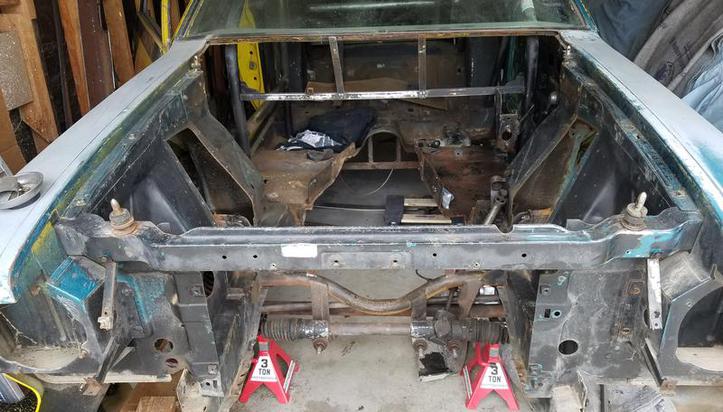
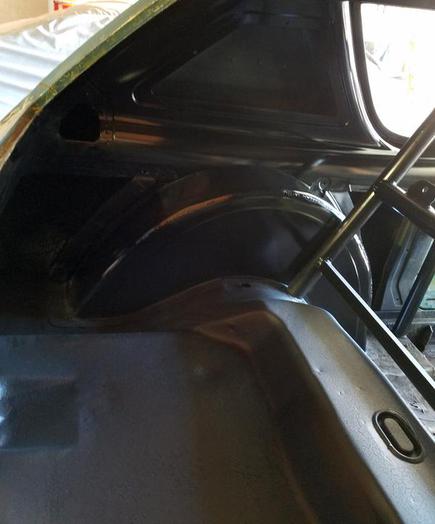
Pictured above: The aluminum panels covering the original spring & shock towers had the rivets removed and saved. This will give me the opportunity to work on the front suspension and to polish the aluminum and paint the engine compartment correctly in the Seafoam Aqua that it originally had.
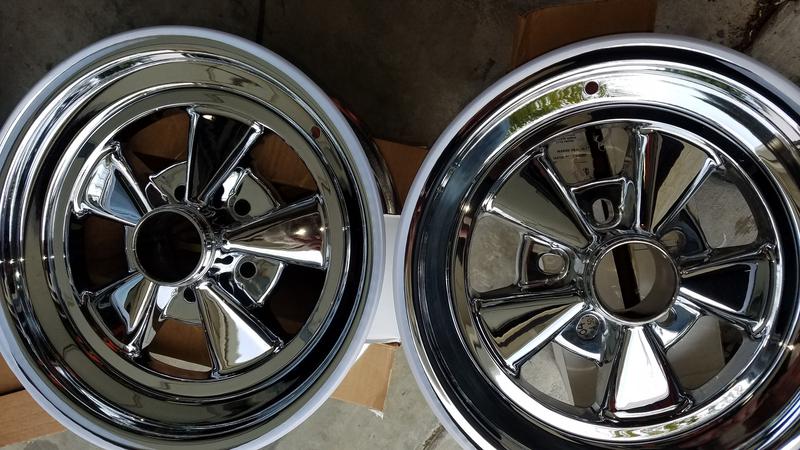
Pictured Above: I had to return one of the Cragar SS 4.5 x 15 front rims to Jags because they sent me two different bolt patterns. One on the left a 4.5 pattern and the one on the right a mult lug pattern. Just a part of building a car. The sad part is that I waited a month to get them now another month to replace it. I just received an email from Jegs saying my rim will be here by 4/30/20
Above photos: Pomona Winter Nationals 1972.


Who will ever forget the first AMC Gremlin or even think it was possible to use this body for a NHRA BB/Gas drag car back in 1970. Paul Pittman did and the proof was with a NHRA Nantional Record for the car in 1972. The restoration of the car below was started in February of this year.
Above photos: Pomona Winter Nationals 1972.
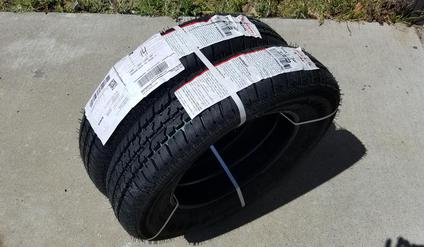
Two Firestone 165/15 FR560 front tires
1957 Chevy front truck hubs with new bearings and seals installed.
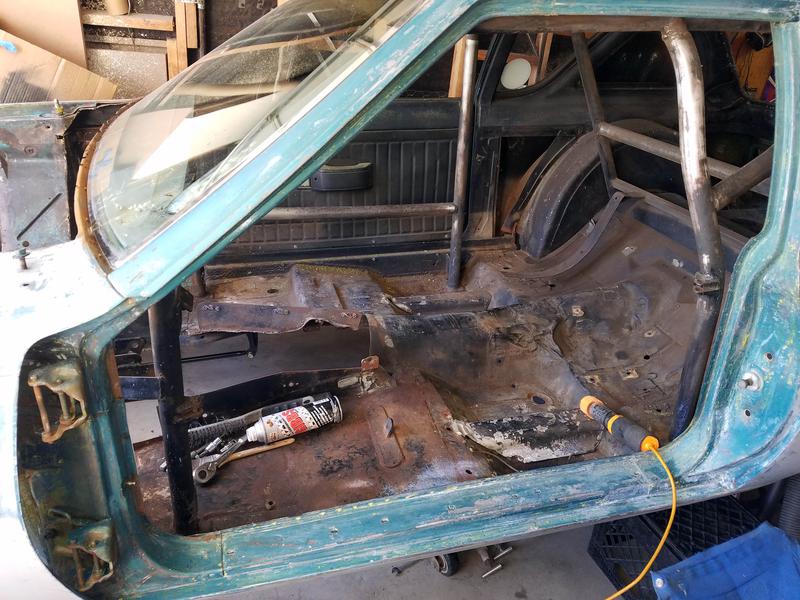
Stripped down engine compartment and interior. Cleaning and sanding everything before new coat of paint is applied. Even found the original sticker or the front radiator support and cleaned the black paint off it.
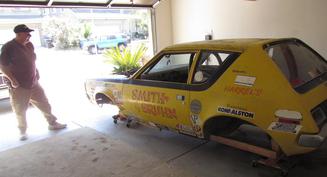
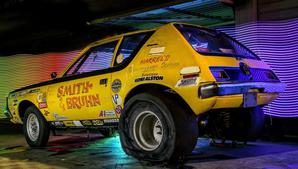
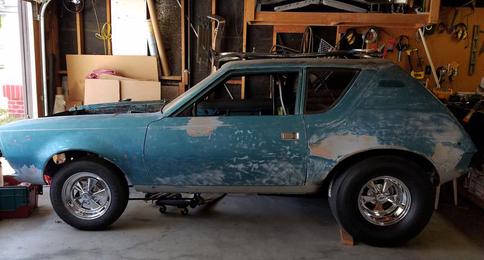
Sassy Gremlin Found after 35 years.
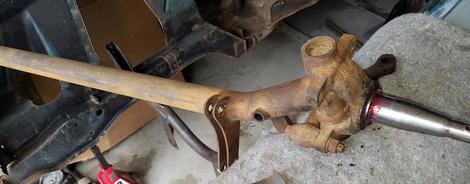
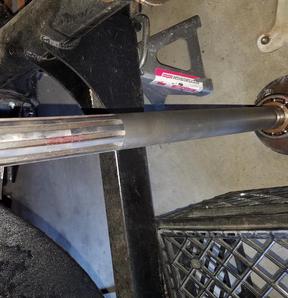
Top: axel pulled out of the car to be cleaned and repainted.
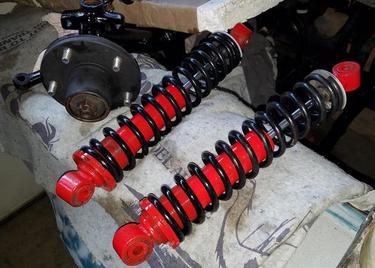
Right: All the dirt and surface rust removed from the hubs, axel, shocks and springs. Worn parts replaced, then new coat of paint and ready to be reinstalled.
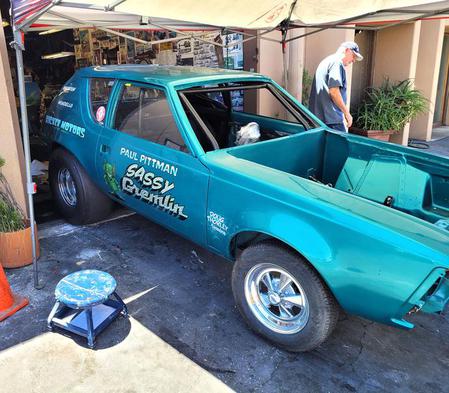
Pictured Above: Former Smith & Bruhn Car. Which was verified my Jim Bridgewater and myself as the pittman car. This is my starting point.Jim
Phillip Thomas purchased the car in 2016 then I purchased it in February 2020

The Sassy Gremlin dash is pretty rough from sitting in the dust and moisture through the years. I started sanding it down from using100 grit to 600 grit. Once completed I will buff it out.
Label on the dash
Front-end installed and one Cragar SS wheel and tire installed. Still waiting for the replacement of the other front rim.
Have a small issue with the rear axle bolts. I'm having trouble finding the larger size holes with a step-down to a 1/2 20 bolt. These are vintage 10 spline Henry's Axles with 5.13 gears from a 1963 Pontiac/Olds rear end. More later...
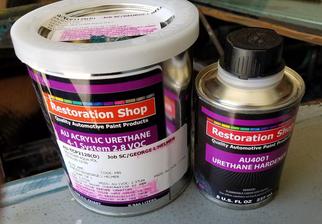
Picked some original color Seafoam Aqua paint that I will be using for the engine compartment and door jams.
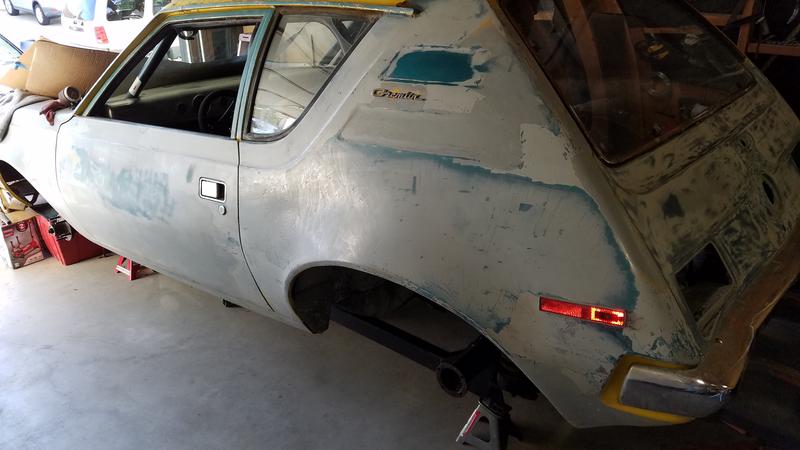
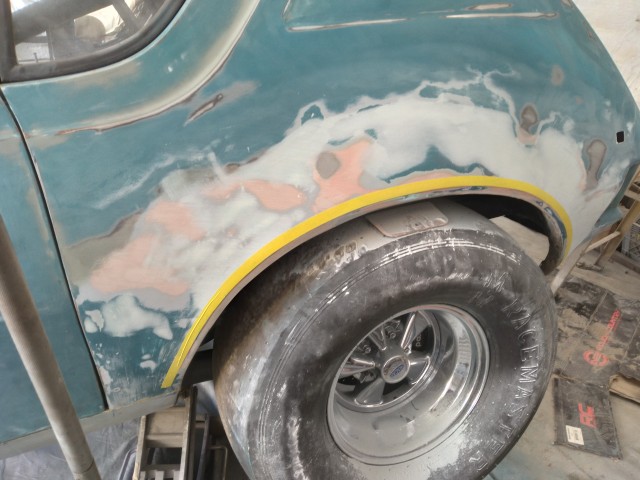
Finished with the driver door opening carefully removing just the yellow paint back to original color.
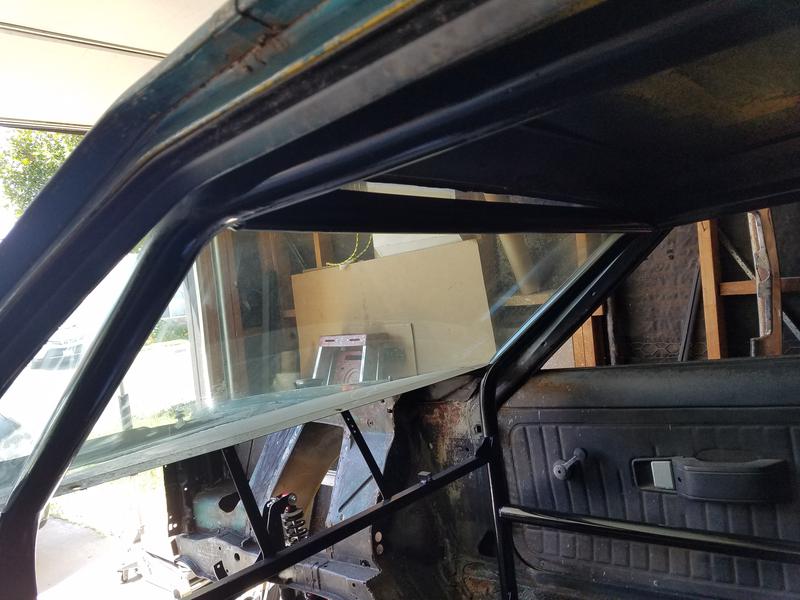
Sanded and painted the roll bar. Here are three different views of it in the photos above. You can see some of the work I've done on the front of the engine compartment and outside. That yellow paint is long gone. Will paint the engine compartment back to its original color Seafoam Aqua when completed.
Photo taken at Irwindale Raceway 1970

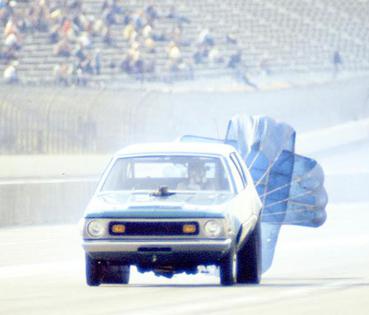
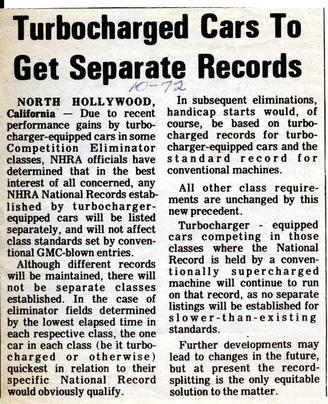
Racing out at the Winternationals 1973, competition Eliminator.

Finally my second rim showed up and installed on the other side. When I have a little time I keep removing the primer down to the original color.
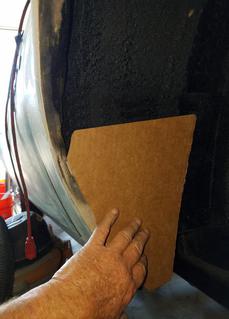
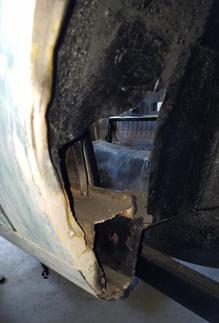
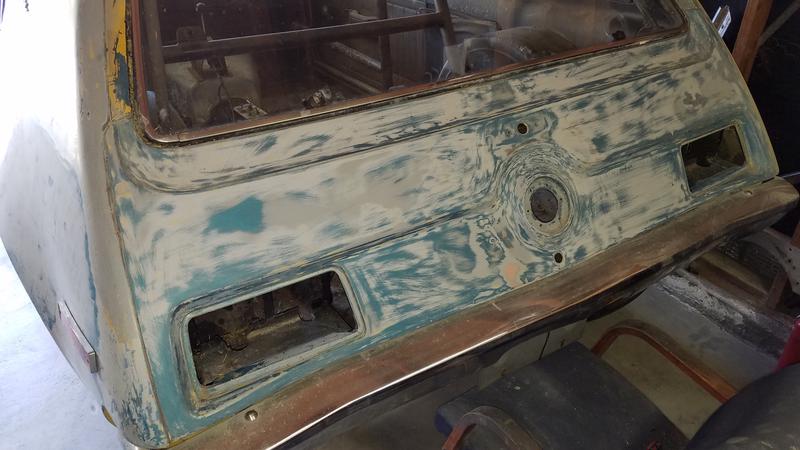
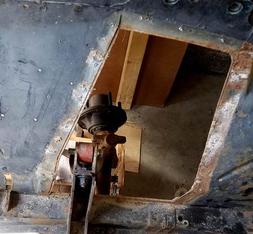
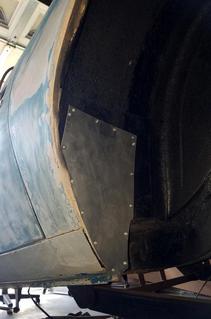
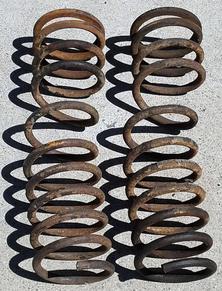
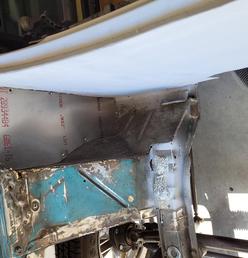
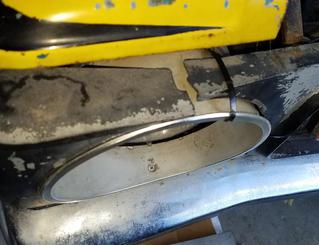
Before the tires arrive, I need to replace the torn patch panel in the rear wheel openings. It had a piece of beer can thick aluminum covering the space. Here you can see the hole and the templet I' have made. Next came cutting the .025 piece of aluiminum and pop riveting it in. Sprayed some undercoating to complete the project. I also dealing with the rear spring. As you can see someone heated the springs and stretched them. The springs will be replaced and new shocks will be installed. At the same time I’ll clean and paint the chassis.
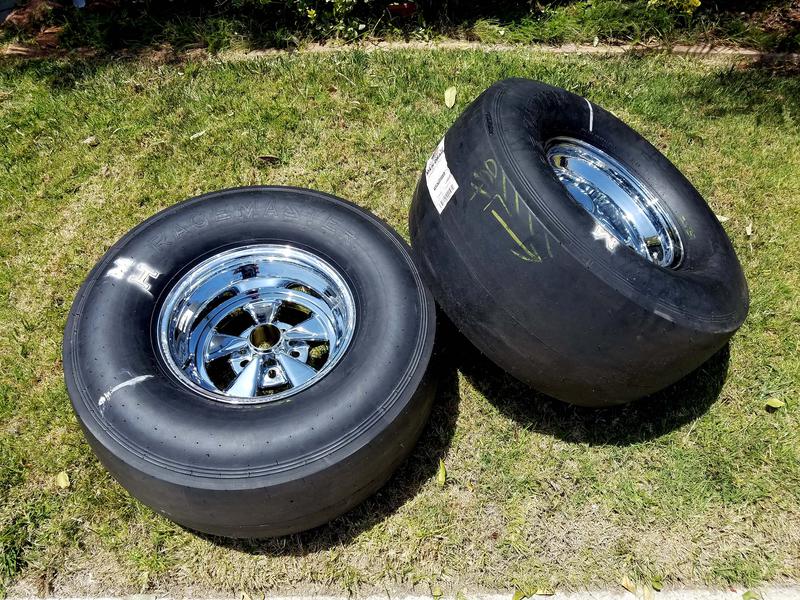
New 10-inch Cragars with M&H nostalgia 12 x 33 tires should arrived mounted with racing tubes and installed perfit fit.
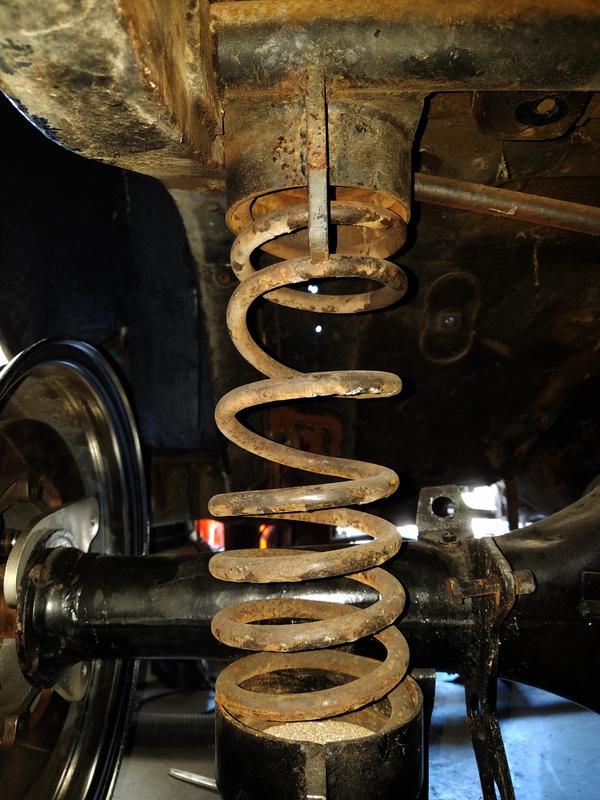
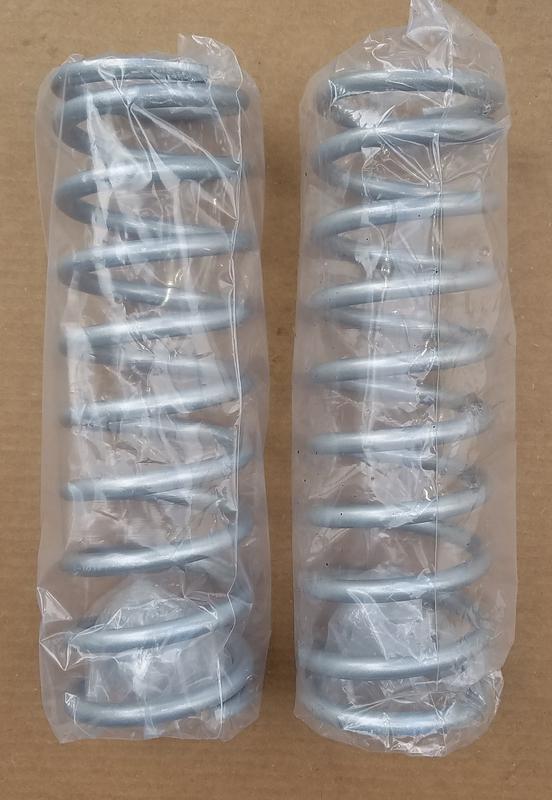
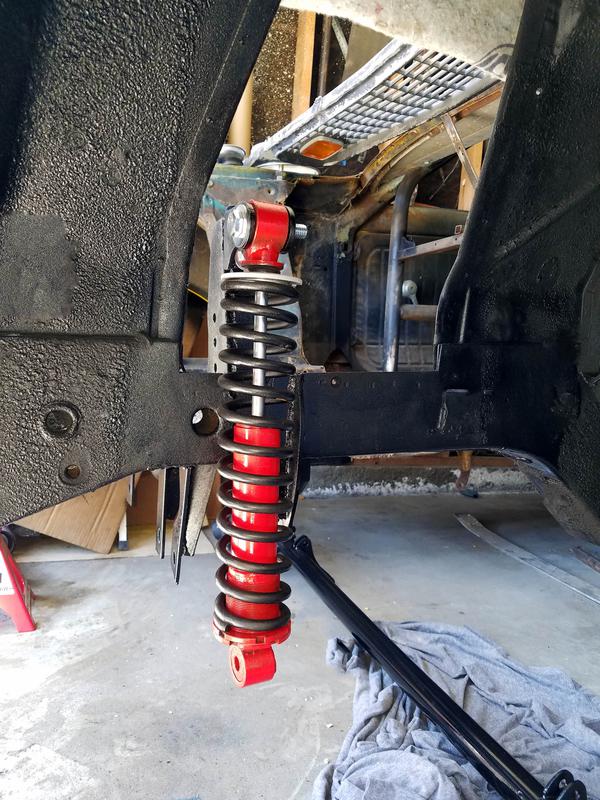
The original springs (above left) have been stretched to raise the back so as to fit the tires outside the fender because of the rims that were used. The new springs (above right) will bring the ride height back to its original 14 inches like Paul had on the carto start with.
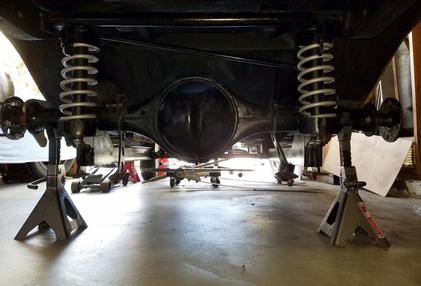
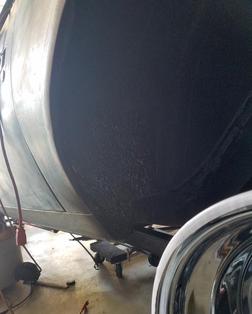
The Back view of the new shocks and springs. The underneath of the car has been cleaned and undercoated then sprayed with bedliner.
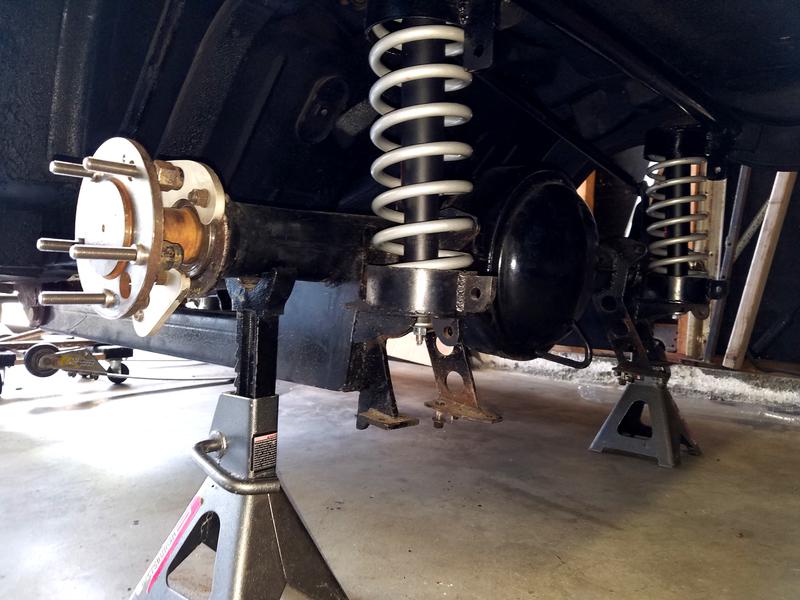
The new Shocks and coil springs installed. This makes the geometry correct whereas the stretched springs made the springs bind and curve, it was unsafe.
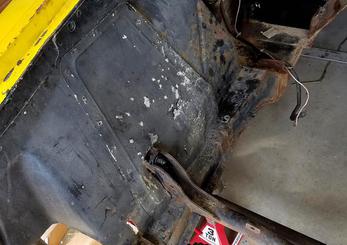
Working on the interior painting. The moldings in semi-gloss black, rollbar gloss black and the floors in black bedliner. Working towards the front of the car. It sure made a difference in its appearancer.
This is what the interior was like when it arrived here.

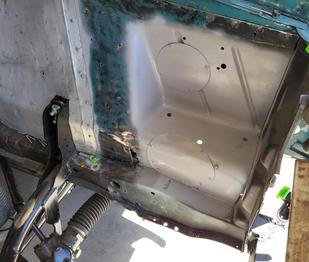
You can see the replacement tin I made to replace the one above right. This covers the rear end lift bars one on each side. They are made of aluminum and the driver side had major corrosion issues. Like other Items that need to be replace I will keep the original.
I have purchased some racing light weight carpeting to cover the floor. Photos to follow.
Updated on 5/03/2022
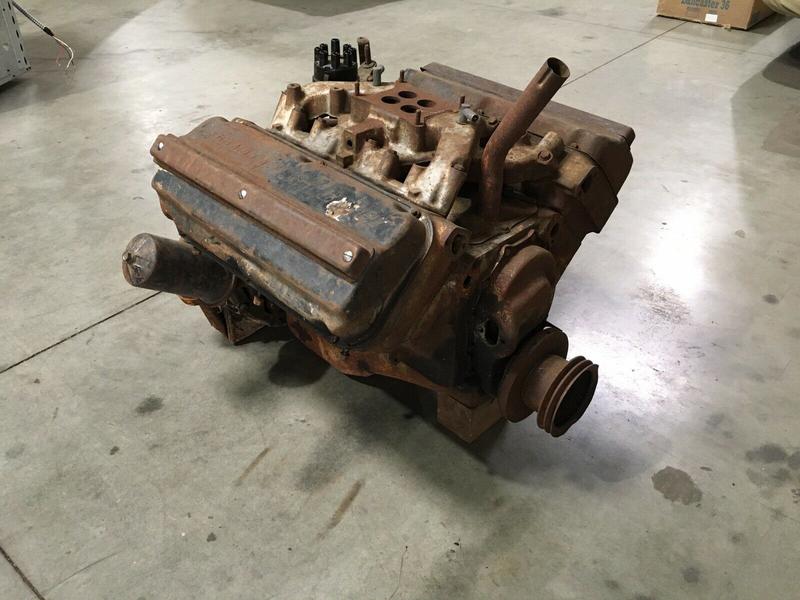
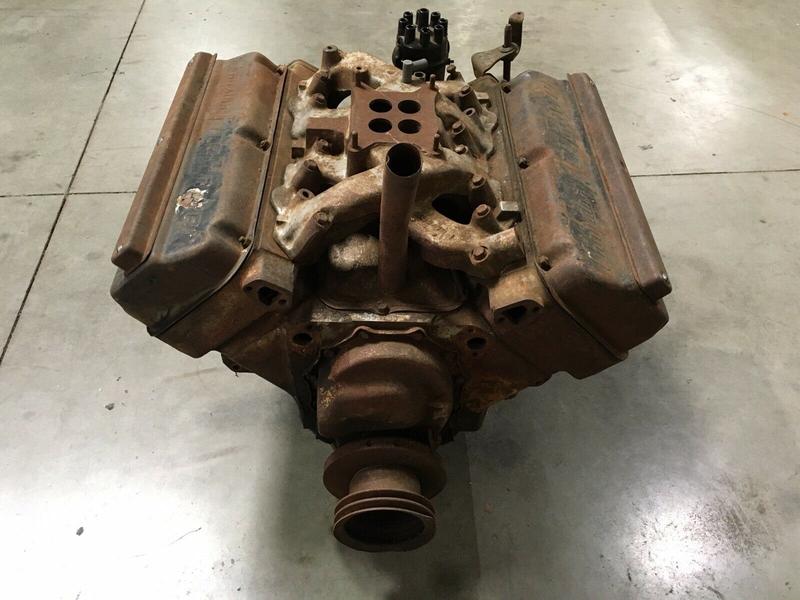
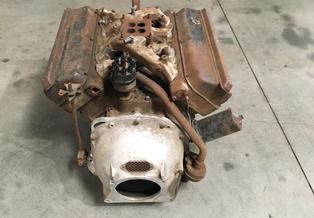
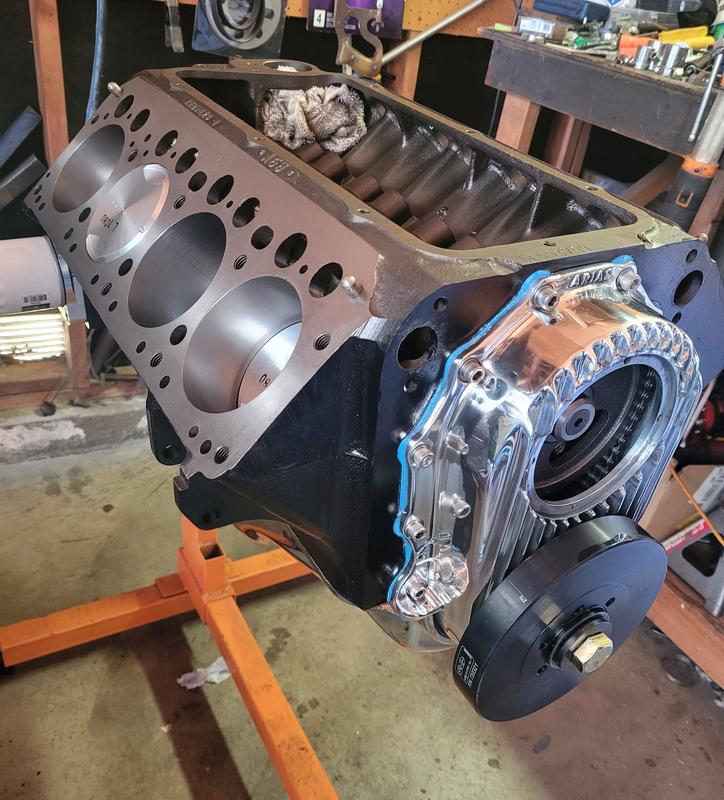
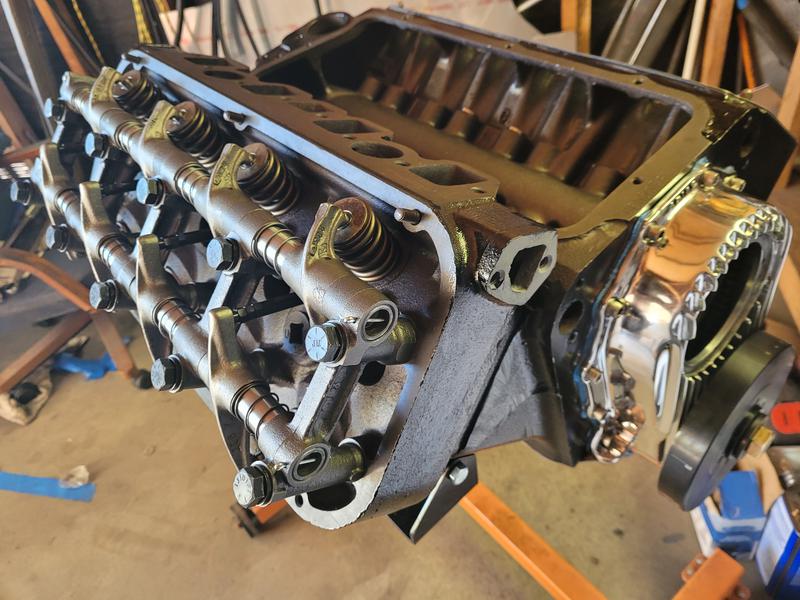
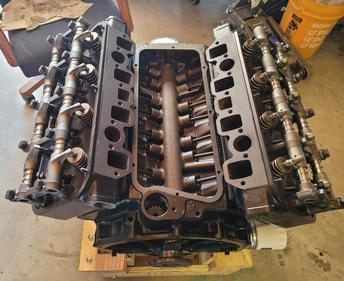
331 HEMI Motor
I have been looking for correct block and have just purchased this unmolested motor out of a 1955 Chrysler Imperial. This motor sported the highly sought after 555 heads. In the next few days, I'll be pulling it apart and make necessary motor mounts off the original location. The issue is that I not sure with that Chevy engine mounts where everything is located for the Hemi

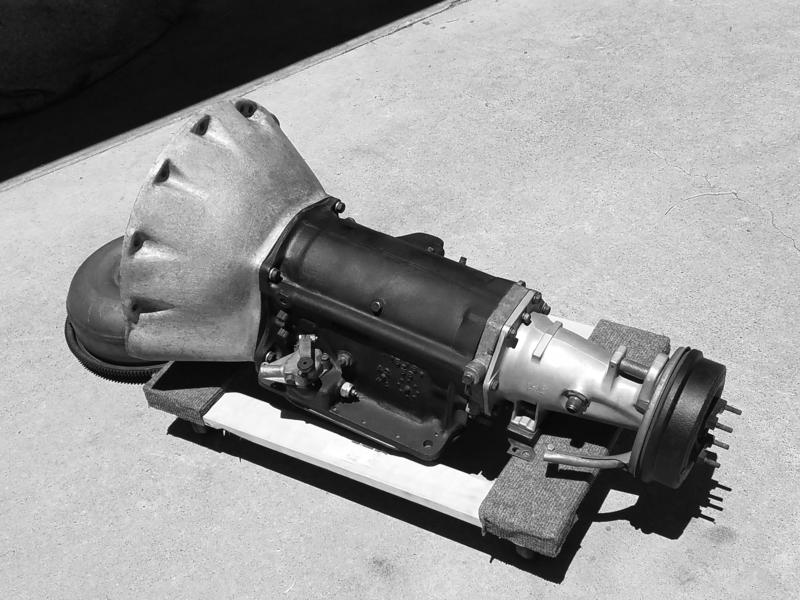
After puchasing the engine from Larry in Redlands he also had this race read rebult 1858 Chrysler Imperial 3 speed Torqurflite iron case trans. This trans has 5 discs vs the lighter duty trans with 4 diacs. Trans number 1736413 1, DD58, CD 58. Pan rail number 1738227. I also came with the better bellhousing and a rebuilt torque converter.
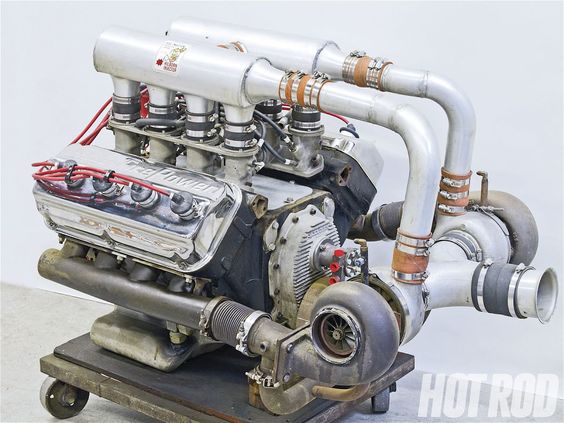
This is about what the motor looked like when Paul put the duel turbo's on his 331 Hemi. The above motot is also a 3331 Hemi.
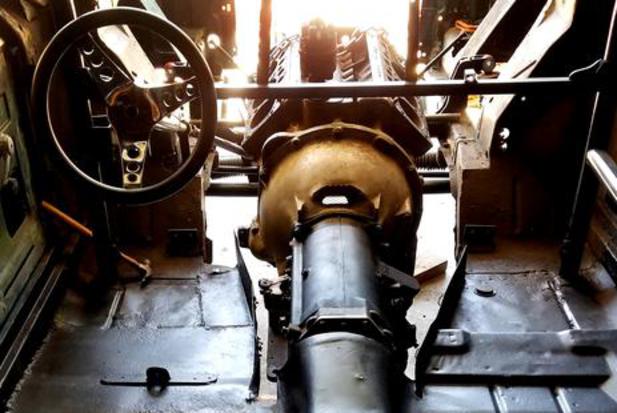
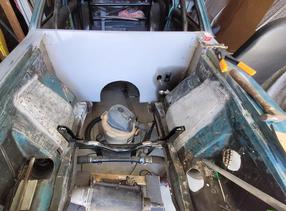
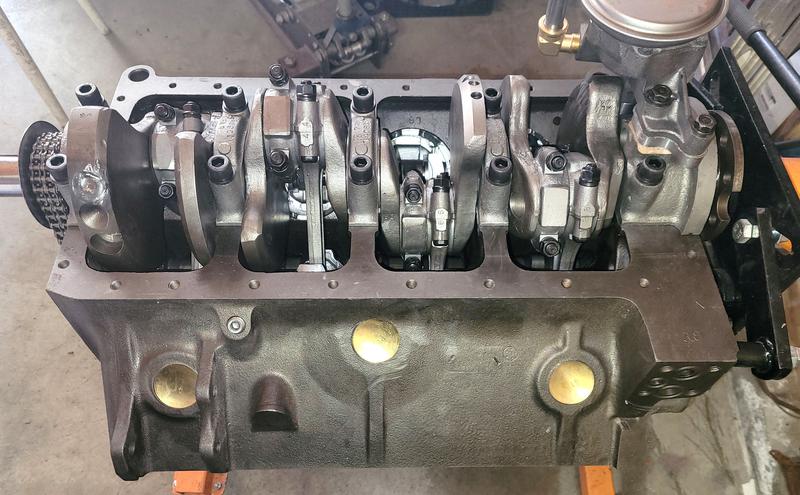
Stripped down the hemi 331 block and installed the 1958 steel Torque-flite 3 speed trans for mocking-up the motor and trans mounts in the Gremlin. The 1958 bellhousing that came with the trans will not fit so I put the original 1955 bellhousing back in and everything went together correctly.
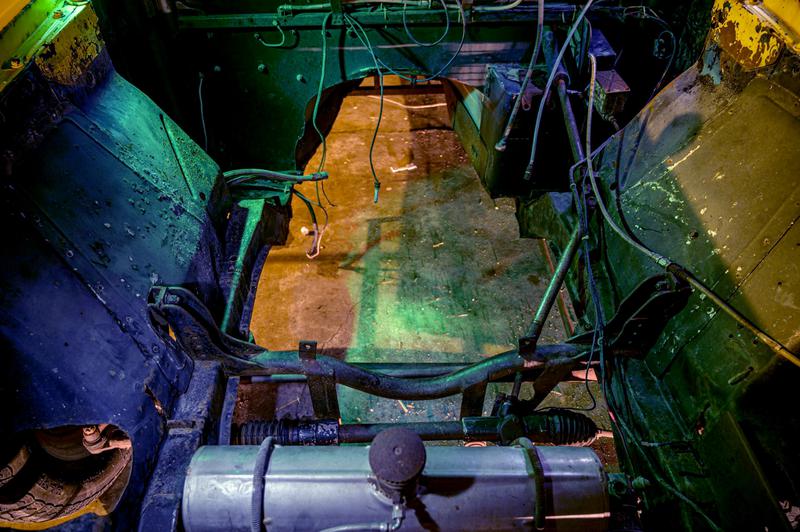
This view you can see the Torque-flite and if you look at where it goes into the tunnel you ca see I removed the trans parking brake because the drum was too large to fit properly in the tunnel.
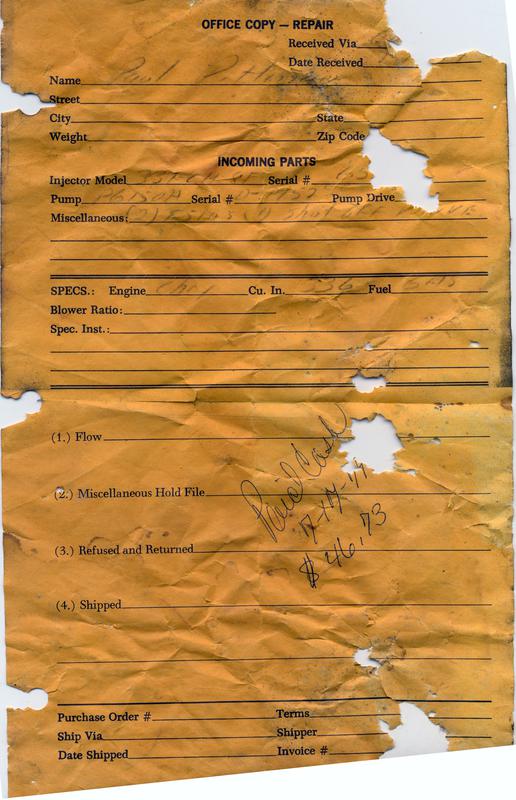
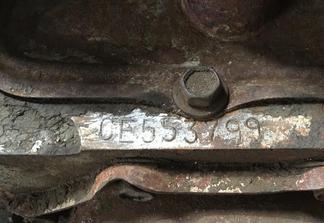
Here's one of the last recepts that Paul Pittman had on the car before he sold it. Some of the information reads: Name: Paul Pittman, Incoming Parts: Injector Model: 331-CH-8F, Serial number: 65 the hole in page, Pump: P6-150 H, Serial #: 0-1757-0, Miscellaneous: (2) F5 160 5, (1) Shut Off Volve, Engine, Chry, c.i. 336, Fuel: Gas, Paid: Cash 7/17/74, $46.73.


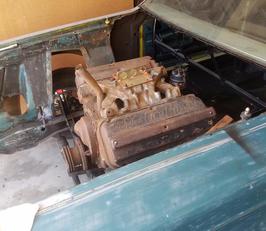
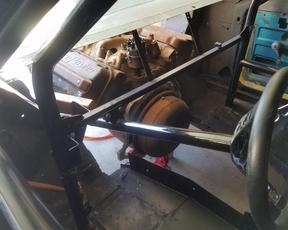
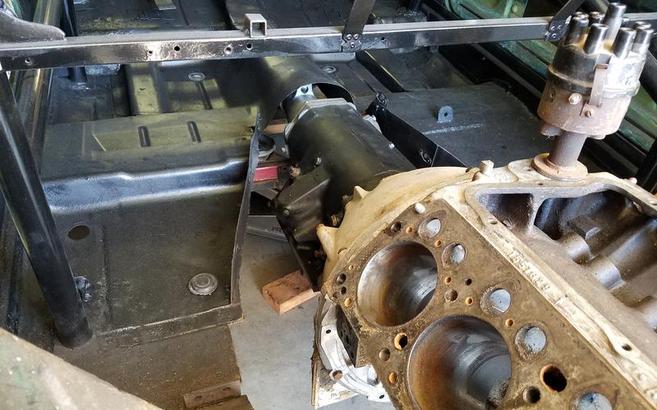
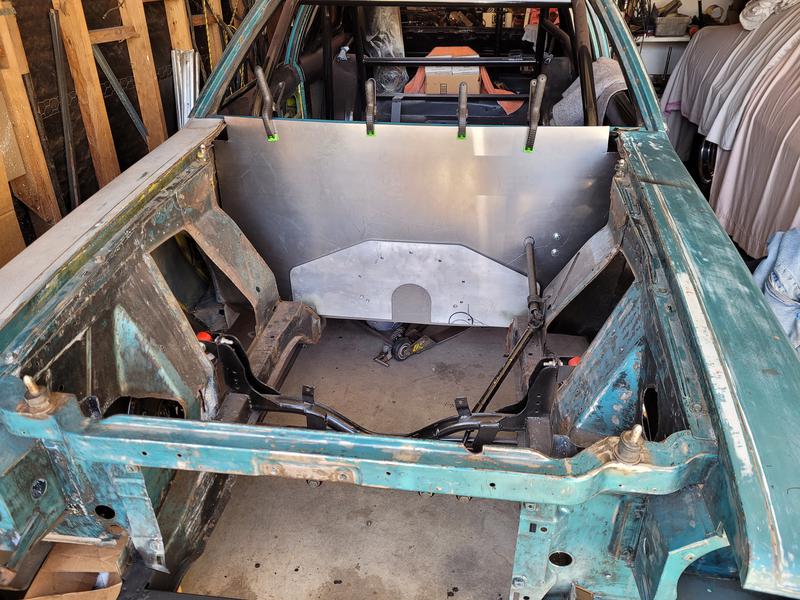
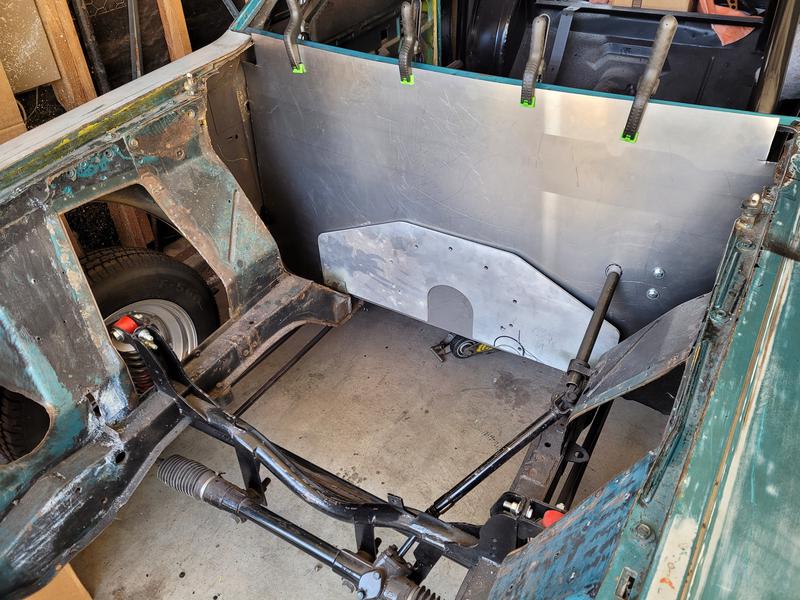
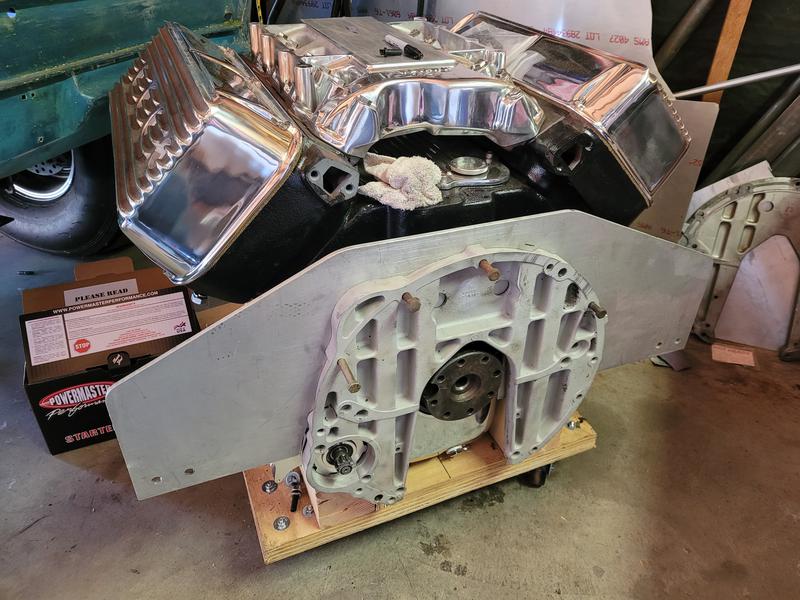
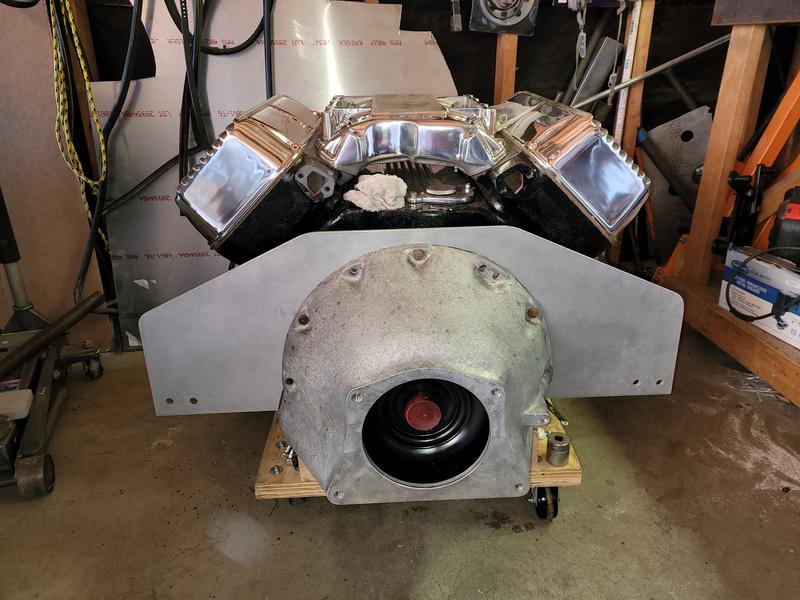
From inside the car you can see the new motor plate I made from 3/8 aircraft Aluminum. The 331 Hemi and trans sits perfectly in the original floor mounts. After measuring everything many times I’m happy with the angle and heights of the engine, trans and rear-end.
From the engine compartment you can see the new motor plate and the original floor mounts at the bottom right.
As you can see this is how how the front-end was when I got it. The lower valance and crossmember was totally destroyed from towing it to and from the starting line and loading the car onto the trailer. The crossmember was part of the lower valance and I separated them hoping to repair them separately. The grill was broken in many places and was in really bad shape.
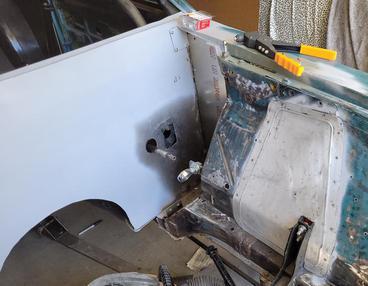
I’m using 18 gage cold roll steel for the firewall. It will be welded directly to the bottom windshield gutter.. This will give extra strength to windshield and proper protection to the engine compartment.
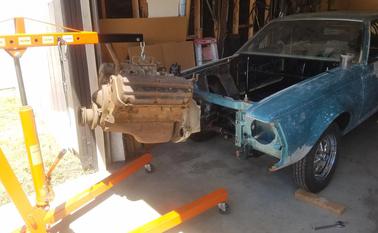
Getting the engine compartment ready for the Hemi motor which is at the machine shop being prepared. More on the motor later.
Current BB/GAS/T Record Holder
History of the Sassy Gremlin
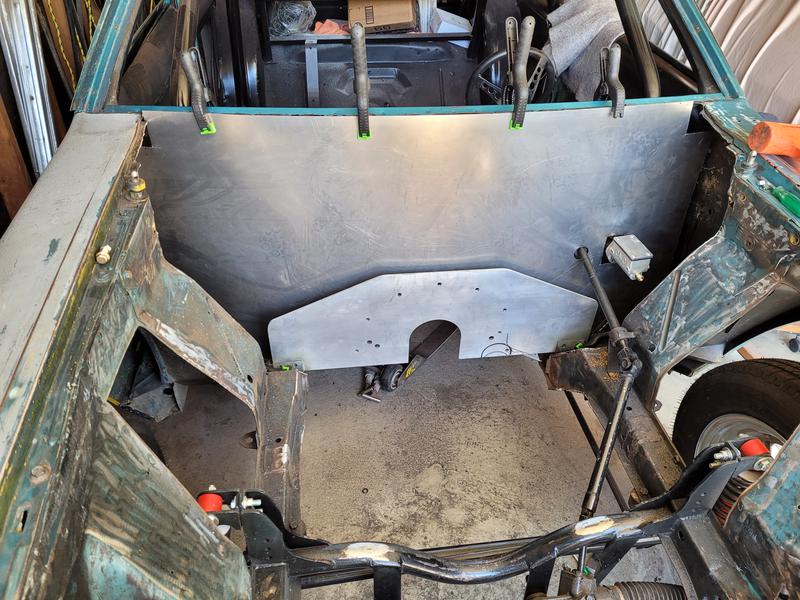
Here I have installed the master cylinder (left side of photo) and cut the firewall out to have an opening to the bell housing.


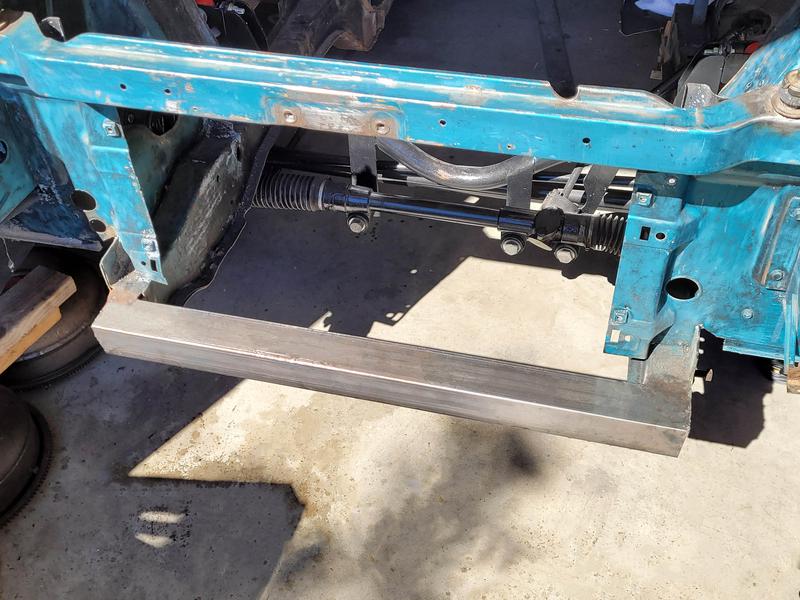
Left: The crossmember was too far gone so I replaced it with so square tubing and welded it in place.The valance was straighten good enough then I sent it out to the body shop for more work.
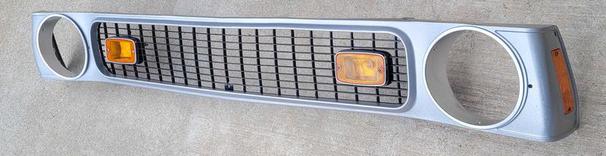
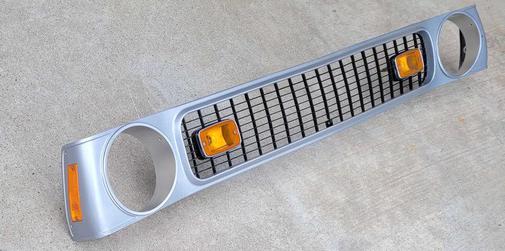
Restored the grill, above and left. This was a lot of work but it's almost impossible to find a replacement. Used the same plastic repair kit that I used on my other projects.
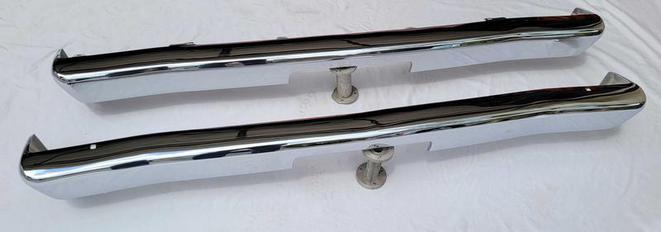
Above: Both front and rear bumpers were bent due to someone tying a rope to the center of them and towing or moving them They can't take that king of abuse. L&M Chrome at 654 E. Young St., Santa Ana restored them to better then new condition. They still have my tail light housing which I should get back in a couple weeks. The pot metal is very difficult to replate.
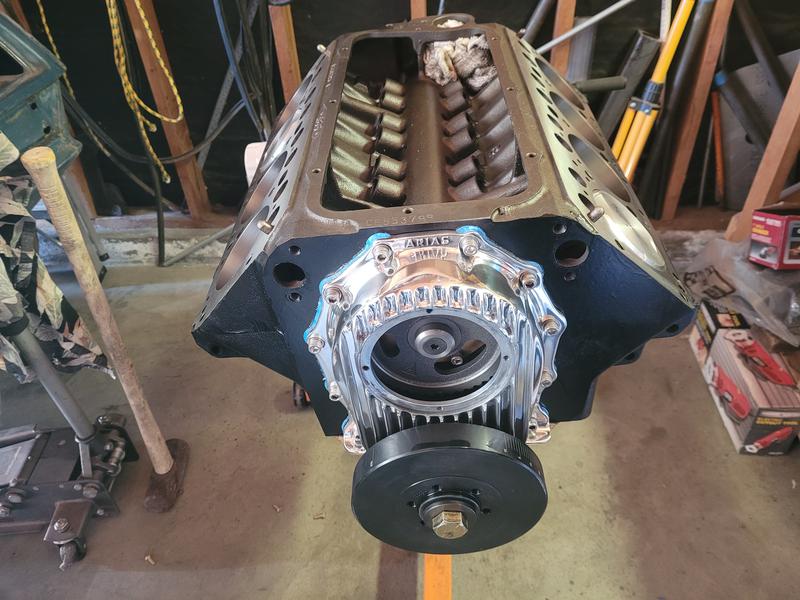
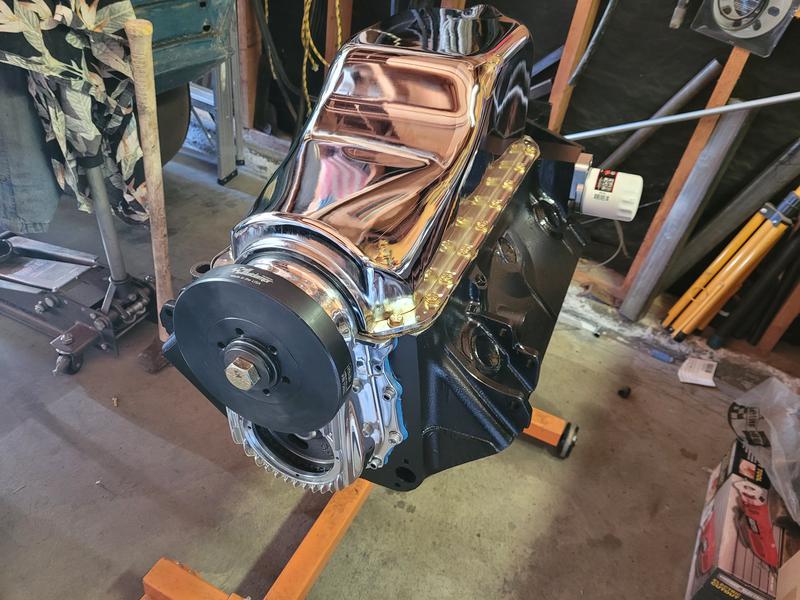
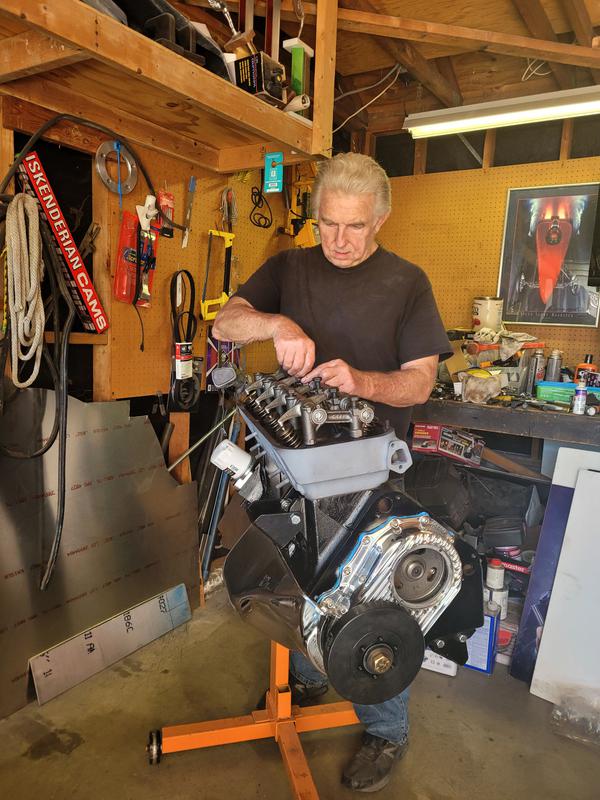
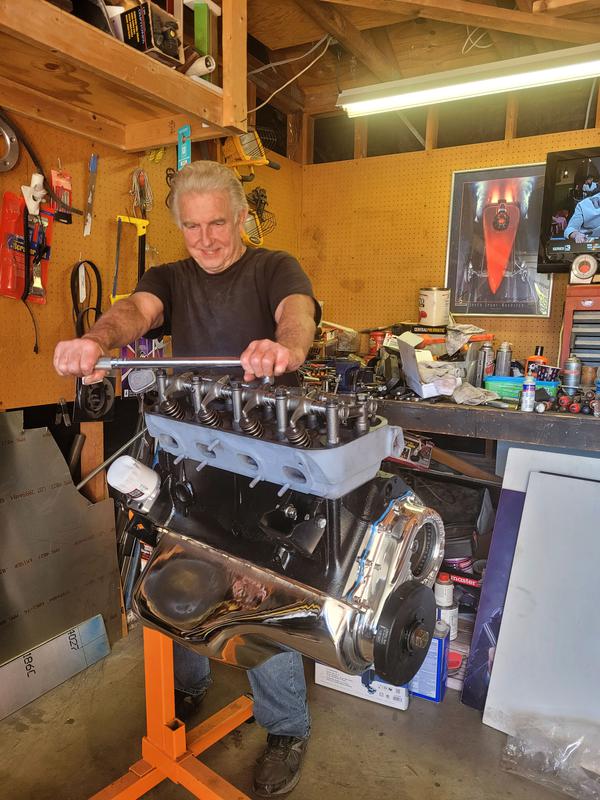
HEMI Engine
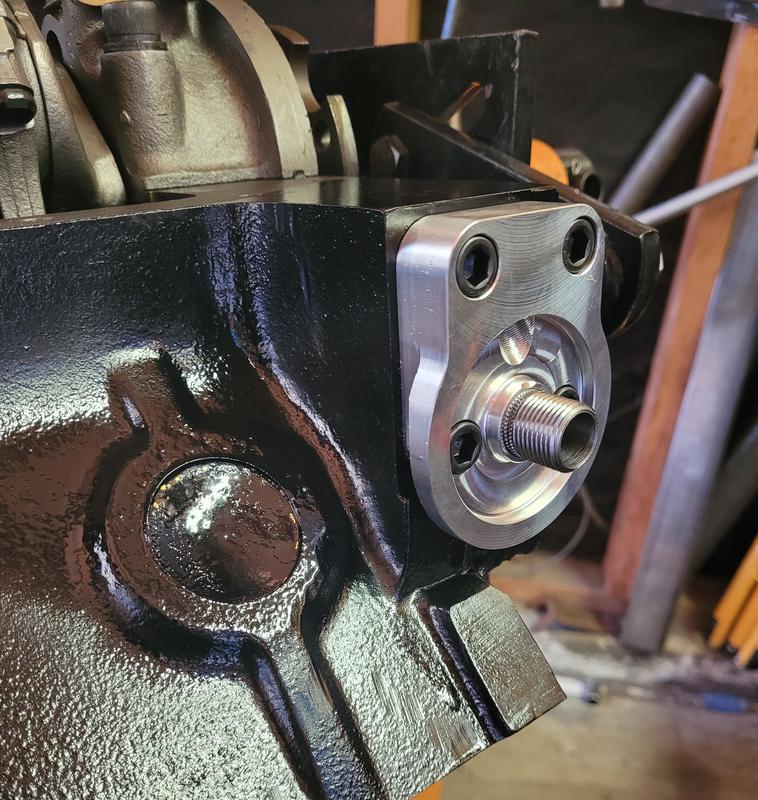
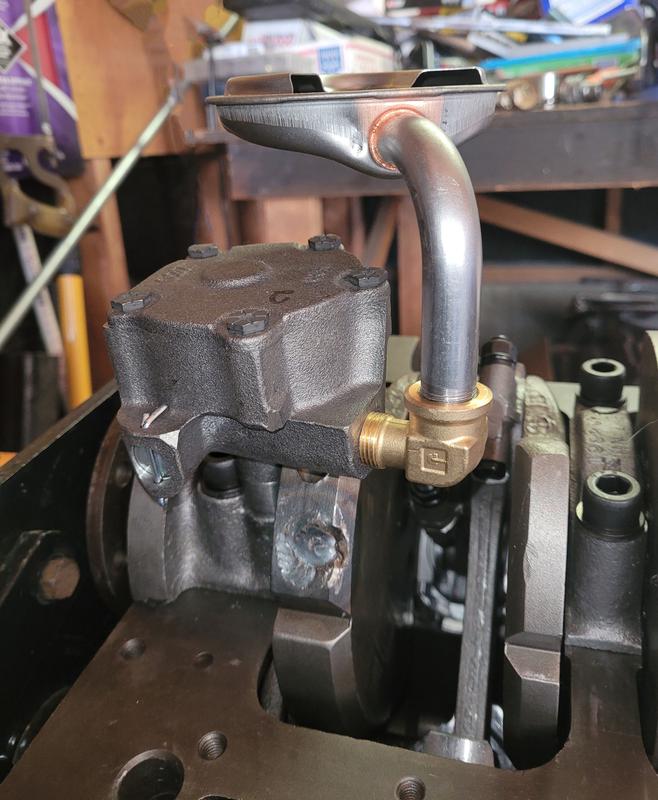
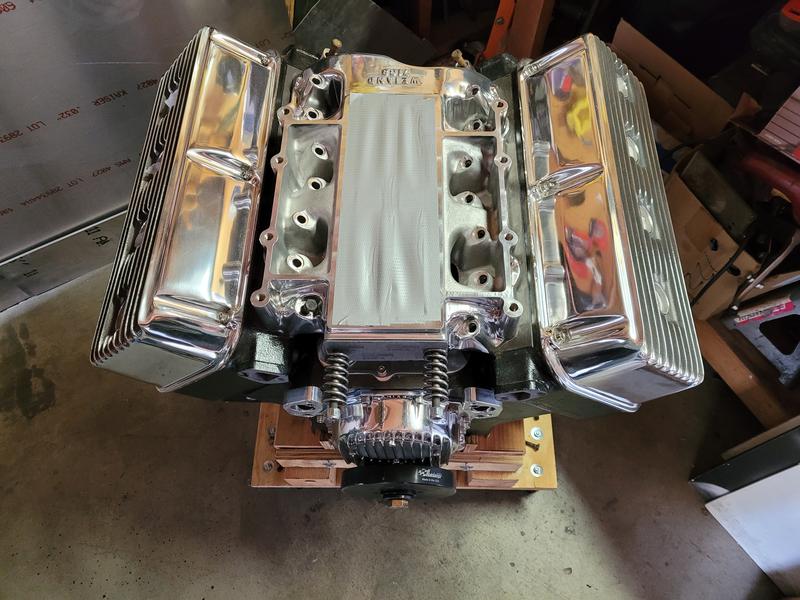
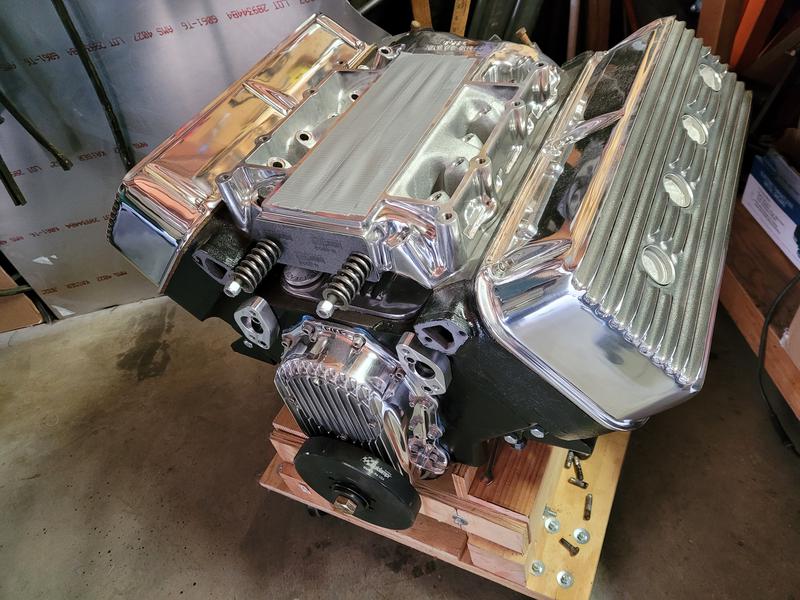
331 c.i. Hemi from a 1955 Chrysler. Here's a listing of some of the part suppliers and companies involved in the build: Machine work done at Engine Supply 304 East Dryer Road, Santa Ana, CA. Cam and lifters from Iskenderian Racing Arias Components for valve covers and front timing chain cover. Fluidampr for crankshaft damper. Stanke Motorsports for Spin on oil filter adapter. Hot Heads too parts to list. Egge Pistons for 10.5 pistons. Rocker Arms Unlimited 16575 Clear Creek Rd, Redding, CA for high performance rebult rocker arm assembly. Joe Hunt Distributor 11333 Sunco Drive Ste. 100 Rancho Cordova, CA for Mag looking Hi-performance Distributor. Summit Racing spark plug tubes. Holley for 331 Hemi polished blower intake manifold. Summit Racing, 35 GPM Chrome Aluminum Eclectic Water Pump for Big Block Chevy. Powermaster Performance, 9531 Xstrq Starter for 392 hemi. Aluminum spin-on Oil filter adapter. Chrome racing oil pan. Hot Heads, Newer style oil pumd and adapter.
The former owner of Seaside Body and Paint took in my car and I paid him a deposit of $2,250. As months passed I grew concerned of what was going on. His shop was 40 miles away from my house so I couldn't run over there all the time to see what was going on. After leaving a couple voice messages with no reply I drove down there. He had closed up shop and I was out the money and very little work was done on the car.
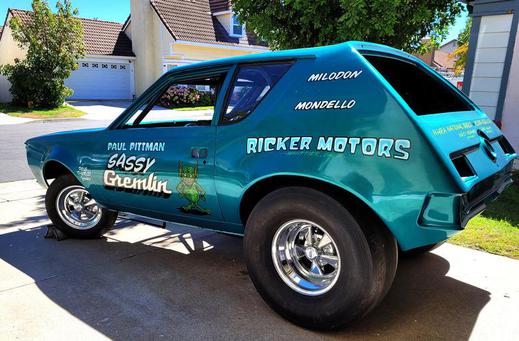
To my rescuse was the new owner of the shop now called Pro Collision Works of Ocenside California. Daniell Todd the owner finished the bodywork and paint for me. They did a great job and I'm very pleased how it turned out.
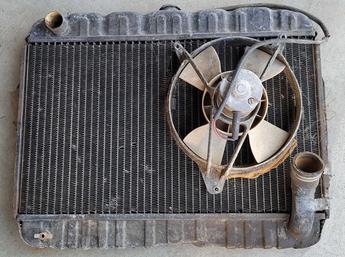
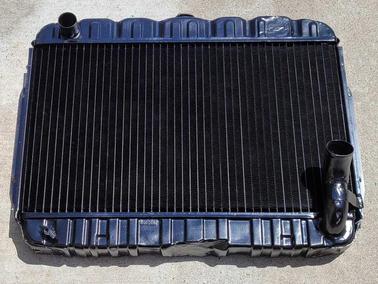

Radiator
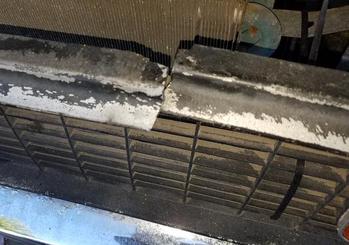
Left: Original Radiator with fan. has been sitting for years and had bent fins from the fan hitting it.
Right: New core and restored at Tom's Radiator at 828 West Chapman Ave. Orange Ca, 92868 (714) 332-6771.
Bob does great work and works on regular cars, hot rods, classic and race cars.
Left and below: New firewall and other engine compartment pieces. Car taken back to its original firewall. When the former Chevy motor was installed, they cut it out and used and step one which was not safe because it had large gaps to the driver’s area and a blown engine would cause a fire in the driver’s compartment. I also had sheet metal pop riveted over the holes for when the turbos were used. Since I'm taking it back to the blower configuration, I wanted to keep the original holes so if someone wants to put the turbo configuration back, they just have to drill out the holes.
Two holes in the firewall, one for the sterring shaft and the other for the brake cylindar.
Two of the panels covering the turbo holes. There was one more on the other side across from these.
Two panels one on sach side with 18 gage to complete the engine compartment.
Left: I'm assembling the Hemi.
Left: New 1957 Torque converter, spacer and bellhousing. Machined off 1/2 inch from the spacer so I could use the 1/2-inch motor plate between them.
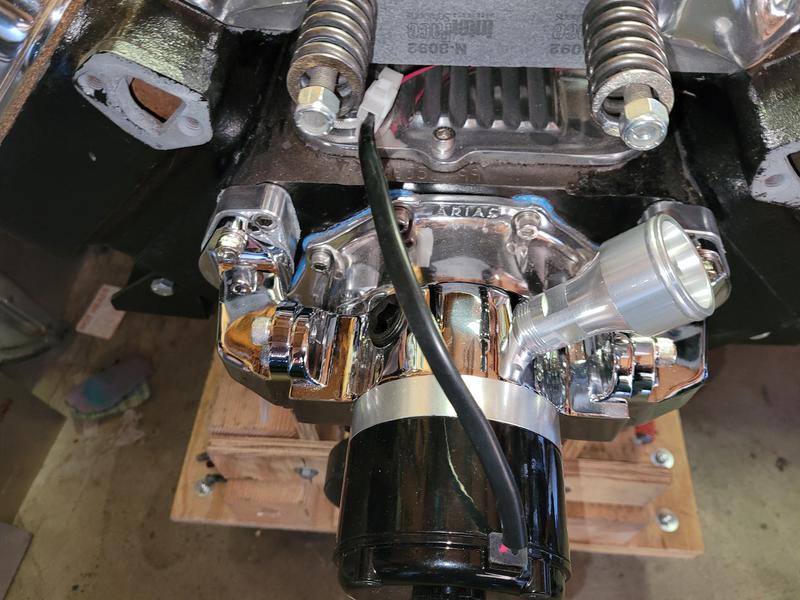
Above: New big block Chevy Alumium water pump with special block to water pump adapters.
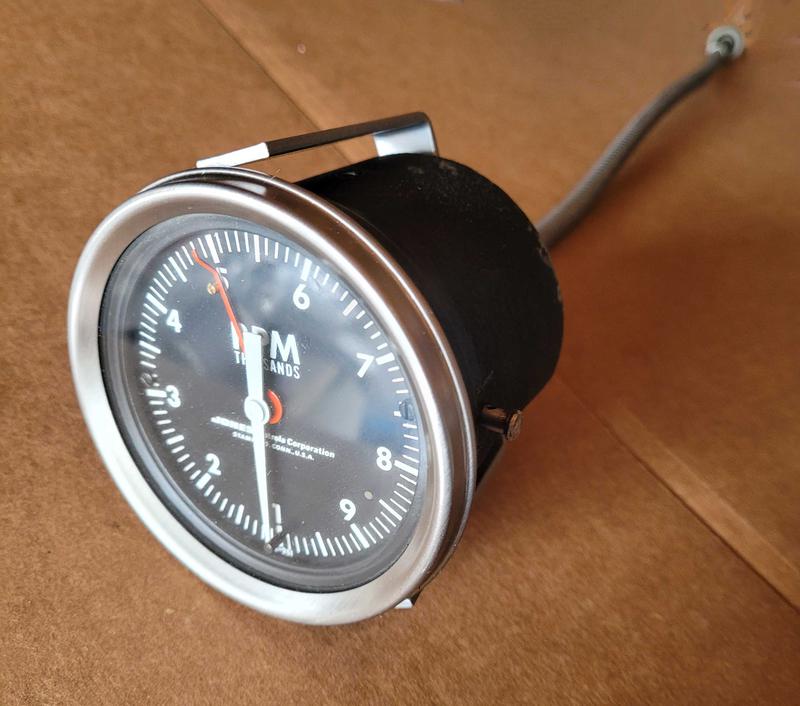
GAGES
Vintage Jones Motorola Mechanical Tachometer 0 - 10,000 RPM # 5101-113. Just cleaned it up and ready to put back into dash.
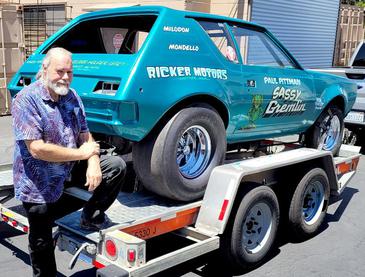
Above: My good friend and Army buddy Jim Bridgewater. We both serverd in Vietnam and were machanics at Fort Huachuca Arizona during the last part of 1966 and the first part of 1967. Jim was Paul Pittmans crew member when this car ran back oin the early 1970s. This was the first time Jim has seen the car since the start of the project.
Above: Larry Fator owner of Quicksilver Pinstripping in San Dimas doing the graphics on the car. His work was outstanding and brought the car back to its original look.