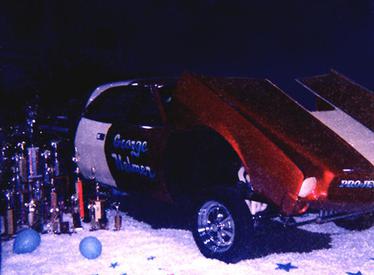
A/Gas Project Javelin


Here is the building of the new "Project Javelin". What I have is the totally running gear and some special parts which are impossible to fine from the original car, but have no body. In the section (about George) you read about how the car was built the first time. Now I'll tell you how I'm building the new car. So, lets start at the beginning.
Through the years I wondered what had happened to the car after I sold it to Tex Cox in 1977. I reached out to Tex one day and asked him what he knew about the location of the car. He told me that he removed the running gear from it plus the hand built radiator, Elco aluminum fuel tank and drive shaft. He then sold those parts to Doug a friend of his who put them into a gold Javelin which he was going to run on the street. Doug found that it's not that easy to run mechanical fuel injection on the street. At one point shortly after he got it running the bolt that was driving the fuel injection pump started backing out of the cam shaft drive and pushed the fuel injector pump clean off the front of the motor. Thus, it went into the garage and sat there for the next 25 years.
Tex sold the body to a guy who lived in the city of San Pedro, California located near Los Angeles and that was the last anyone had seen the body for awhile. When inquiring about the car Tex told me he believed the car was stolen then disappeared. That same year Tex's son Ray he told me that someone saw it somewhere up in the northwest part of the San Fernando Valley. One day I picked up Ray and we scoured street after street looking for the car in the back yards as we drove around. We were running into a wall trying to find it. We stopped at one of Ray AMC friends in the area and he said that it was sitting in the back of some yard and that a guy from Minnesota had purchased it a while back. At that point the trail went cold and I wasn't sure what to do. In 2,007 I was working with a client in Grand Rapids Michigan and by a stroke of luck the Detroit AMC Car Show was being held while I was still working at my client's office. I traveled across the state for the show and enjoyed seeing so many AMC car and talking with a lot of people. One person I spoke with, Dave Dante who owns the Cotton Candy SS AMX car told me he purchased his car from Greg at Greg's Restoration in Hayward, Wisconsin and said he saw my car there. I contacted Greg and talked with him a few times and he said he was going to restore the car but now its been many years and he still hasn't gotten around to start working on it. He's lacking my parts to restore it with original parts and if he would have started working on it I would have gladly let him buy my parts for the restoration. I don't know if he will ever restore it so I decided since I built the first one it's easy enough for me to fabricate a new body and use the original specialty parts I have from the car. So, we start.
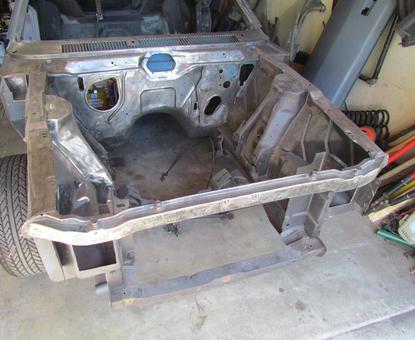
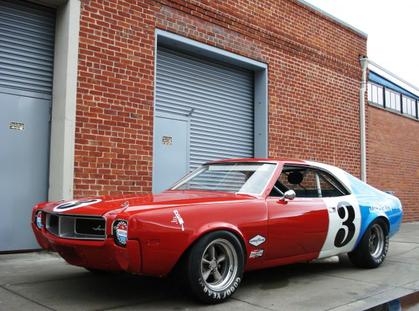
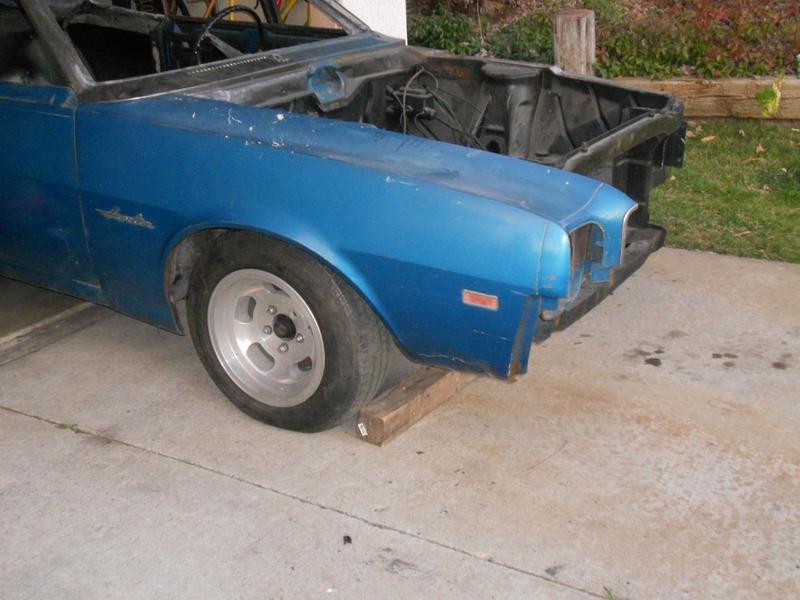
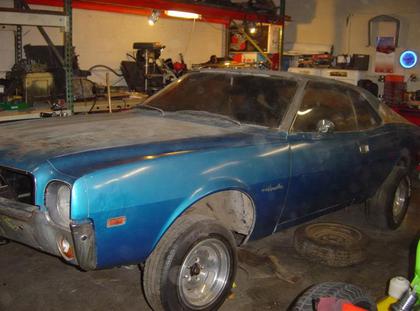
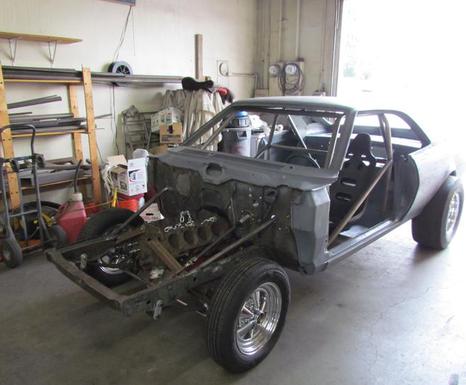
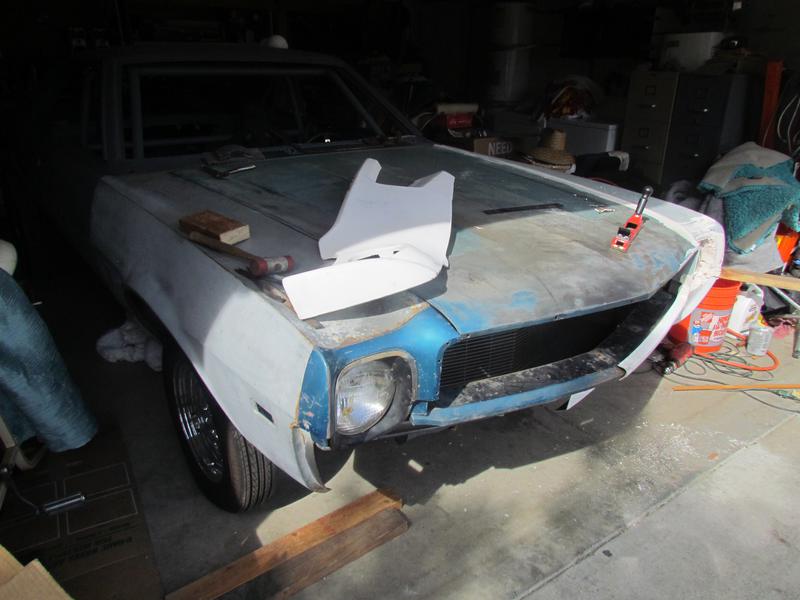
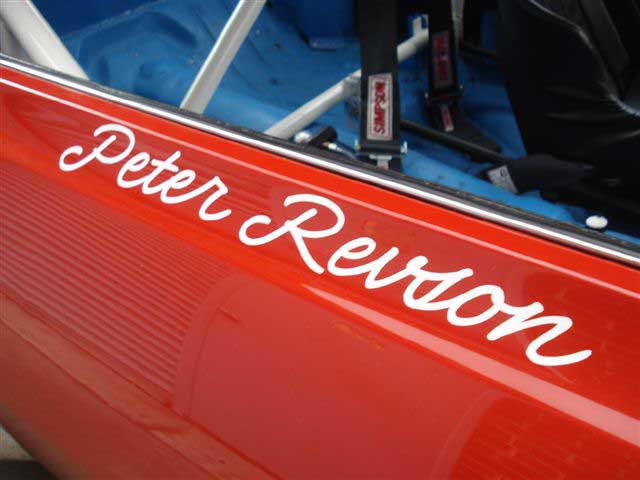
Before I started to build the new Project Javelin I started to build a clone of the Peter Revson # 3 Trans-Am car. I found a body in Glendora, CA that was sitting in a shop. My son was having some work done his 1970 390 4-speed AMX and he told me about the car and I picked it up for $1,500.00 with a motor but no trans. As you can see it was pretty rough.
Peter Revson's car above going through restoration. Notice air holes in front grill area and the trimmed enter fender wells. The open vents in the upper fire wall for air induction.
I performed the same work below and was ready to cut the firewall vents but my project changed to the Project Javelin and I didn't need to cut the fire wall vents now.
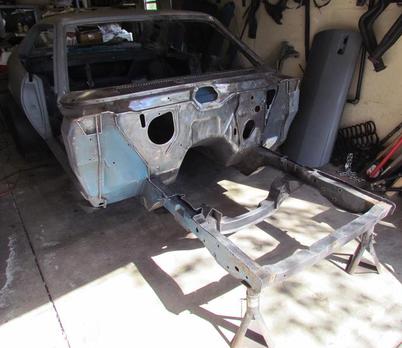
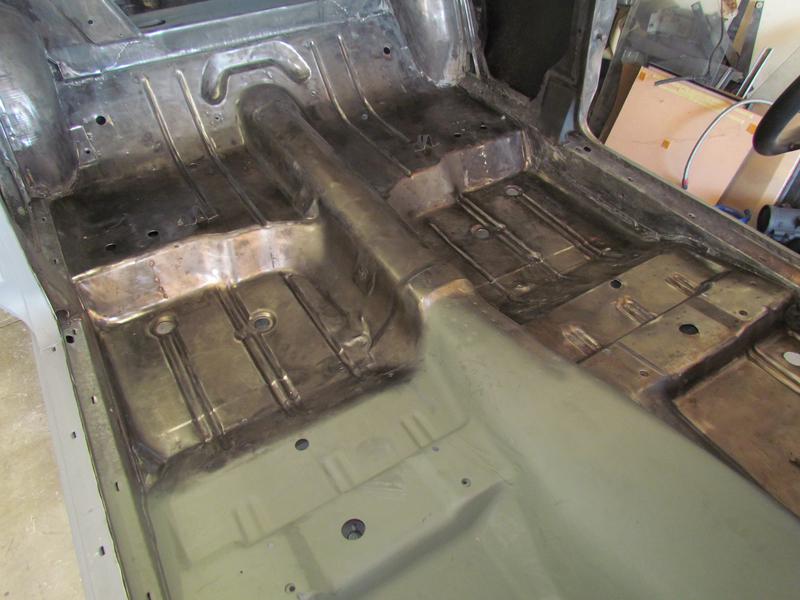
Pictured above is the inter fender well sides are being removed from the lower uni-body. This is how I did the first car in 1972.
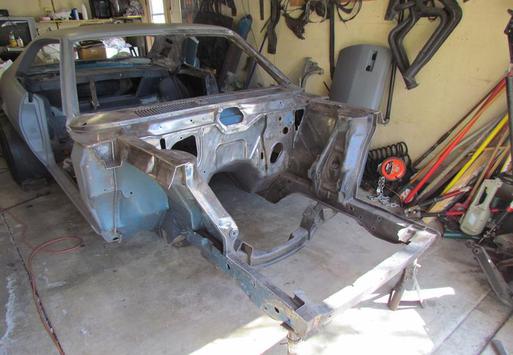
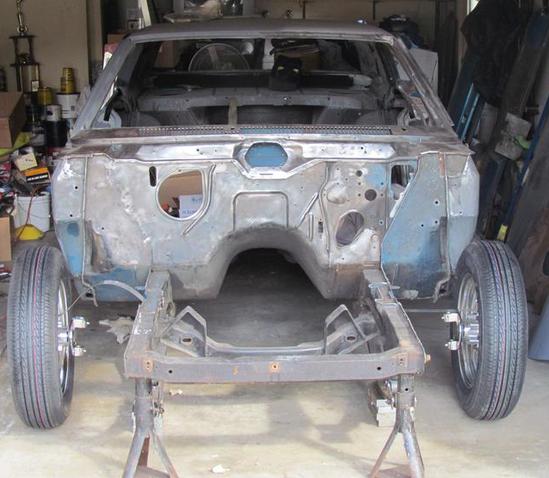
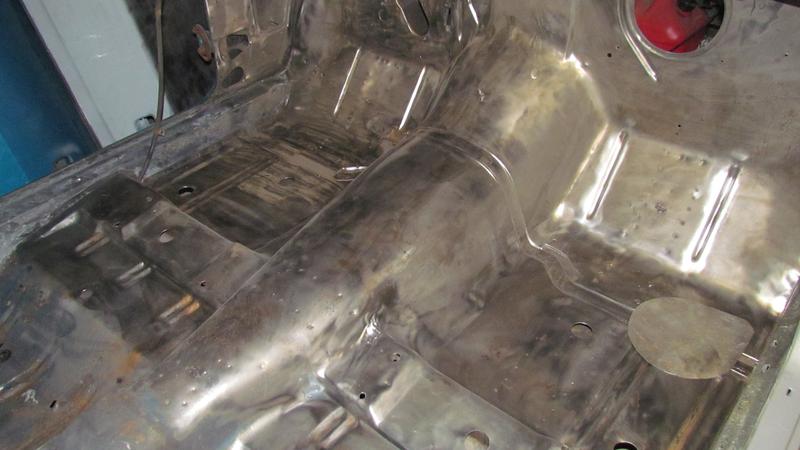
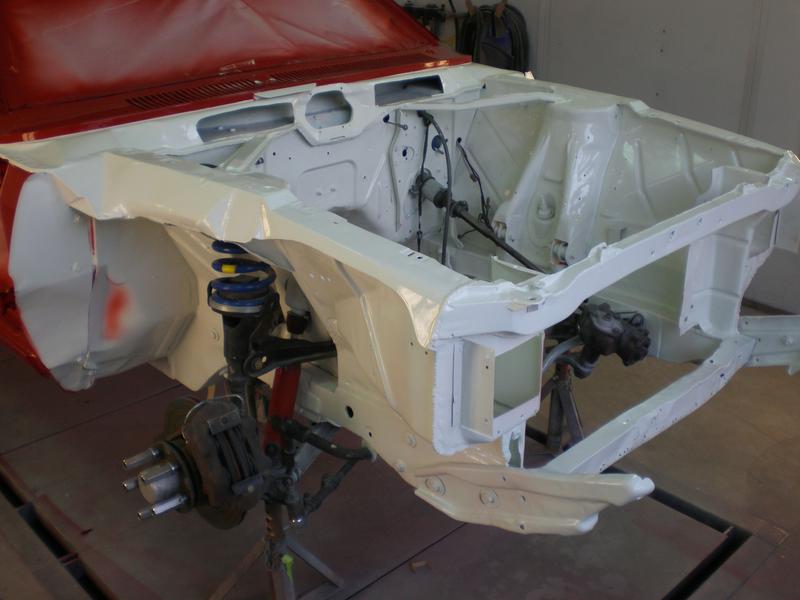
The complete car was stripped by use of electric wire brush, then etching primer and regular primer.
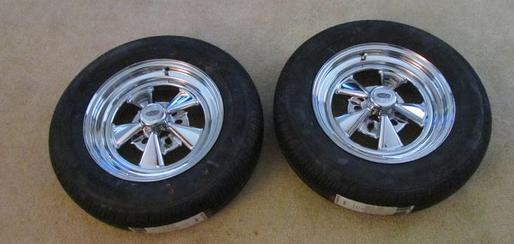
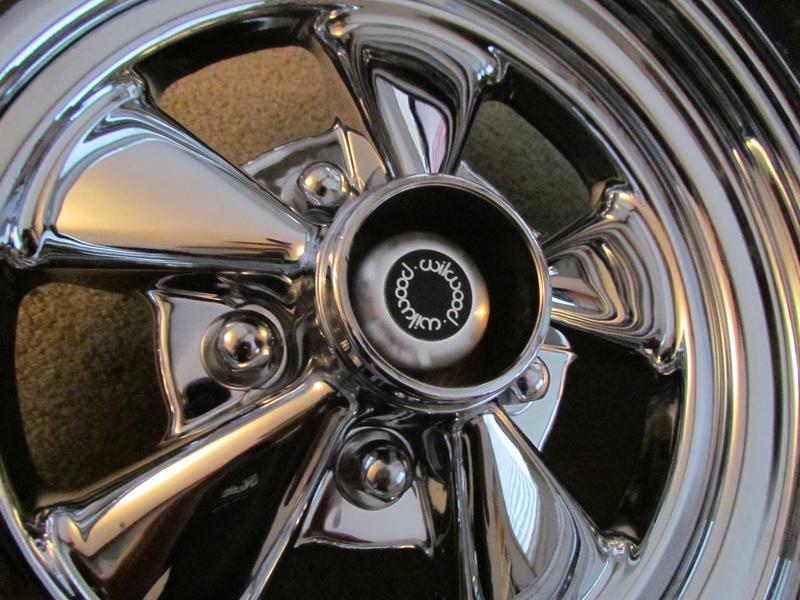
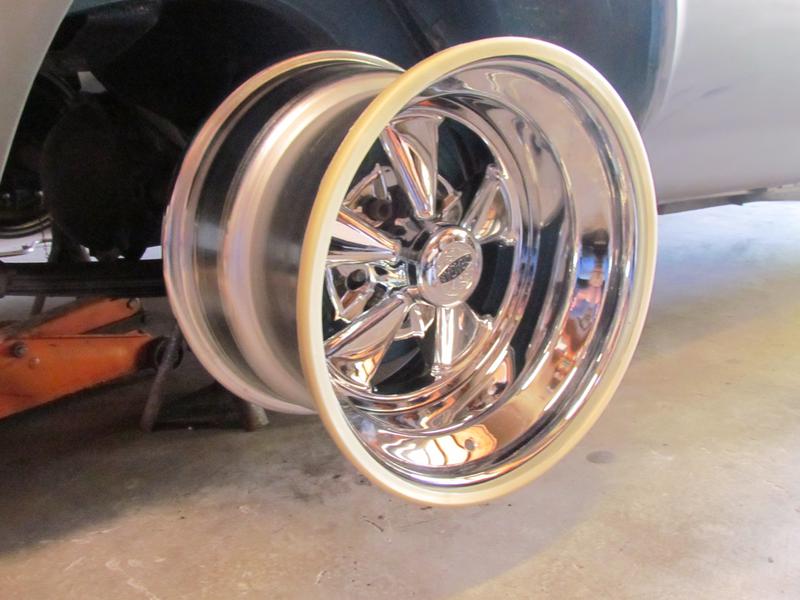
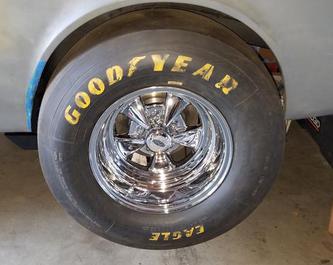
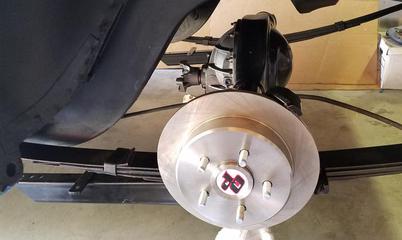
Like the original car the wheels are Cragar' SS Wheels in the front, 15'' x 4-1/2''.
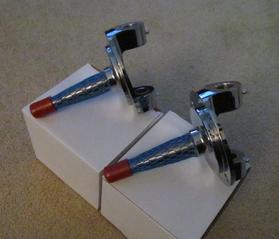
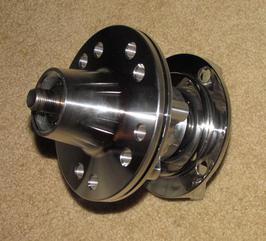
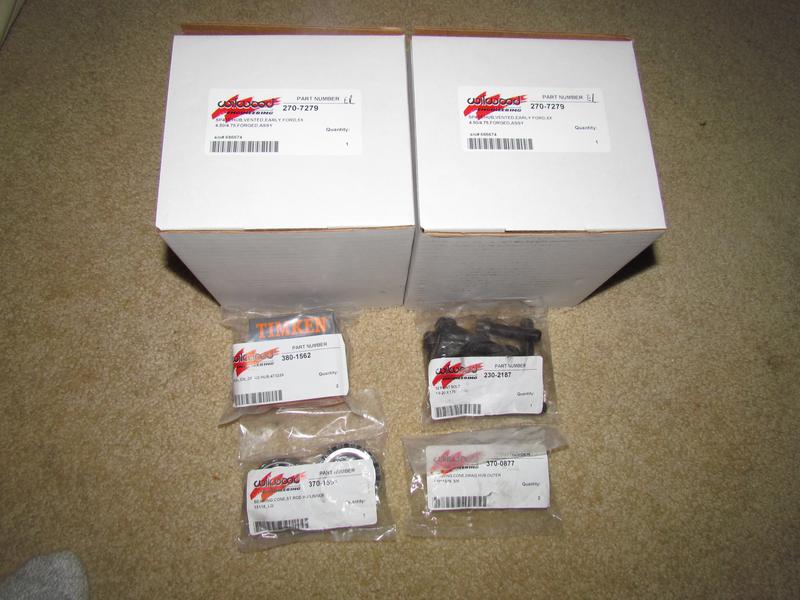
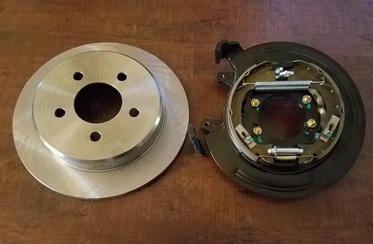
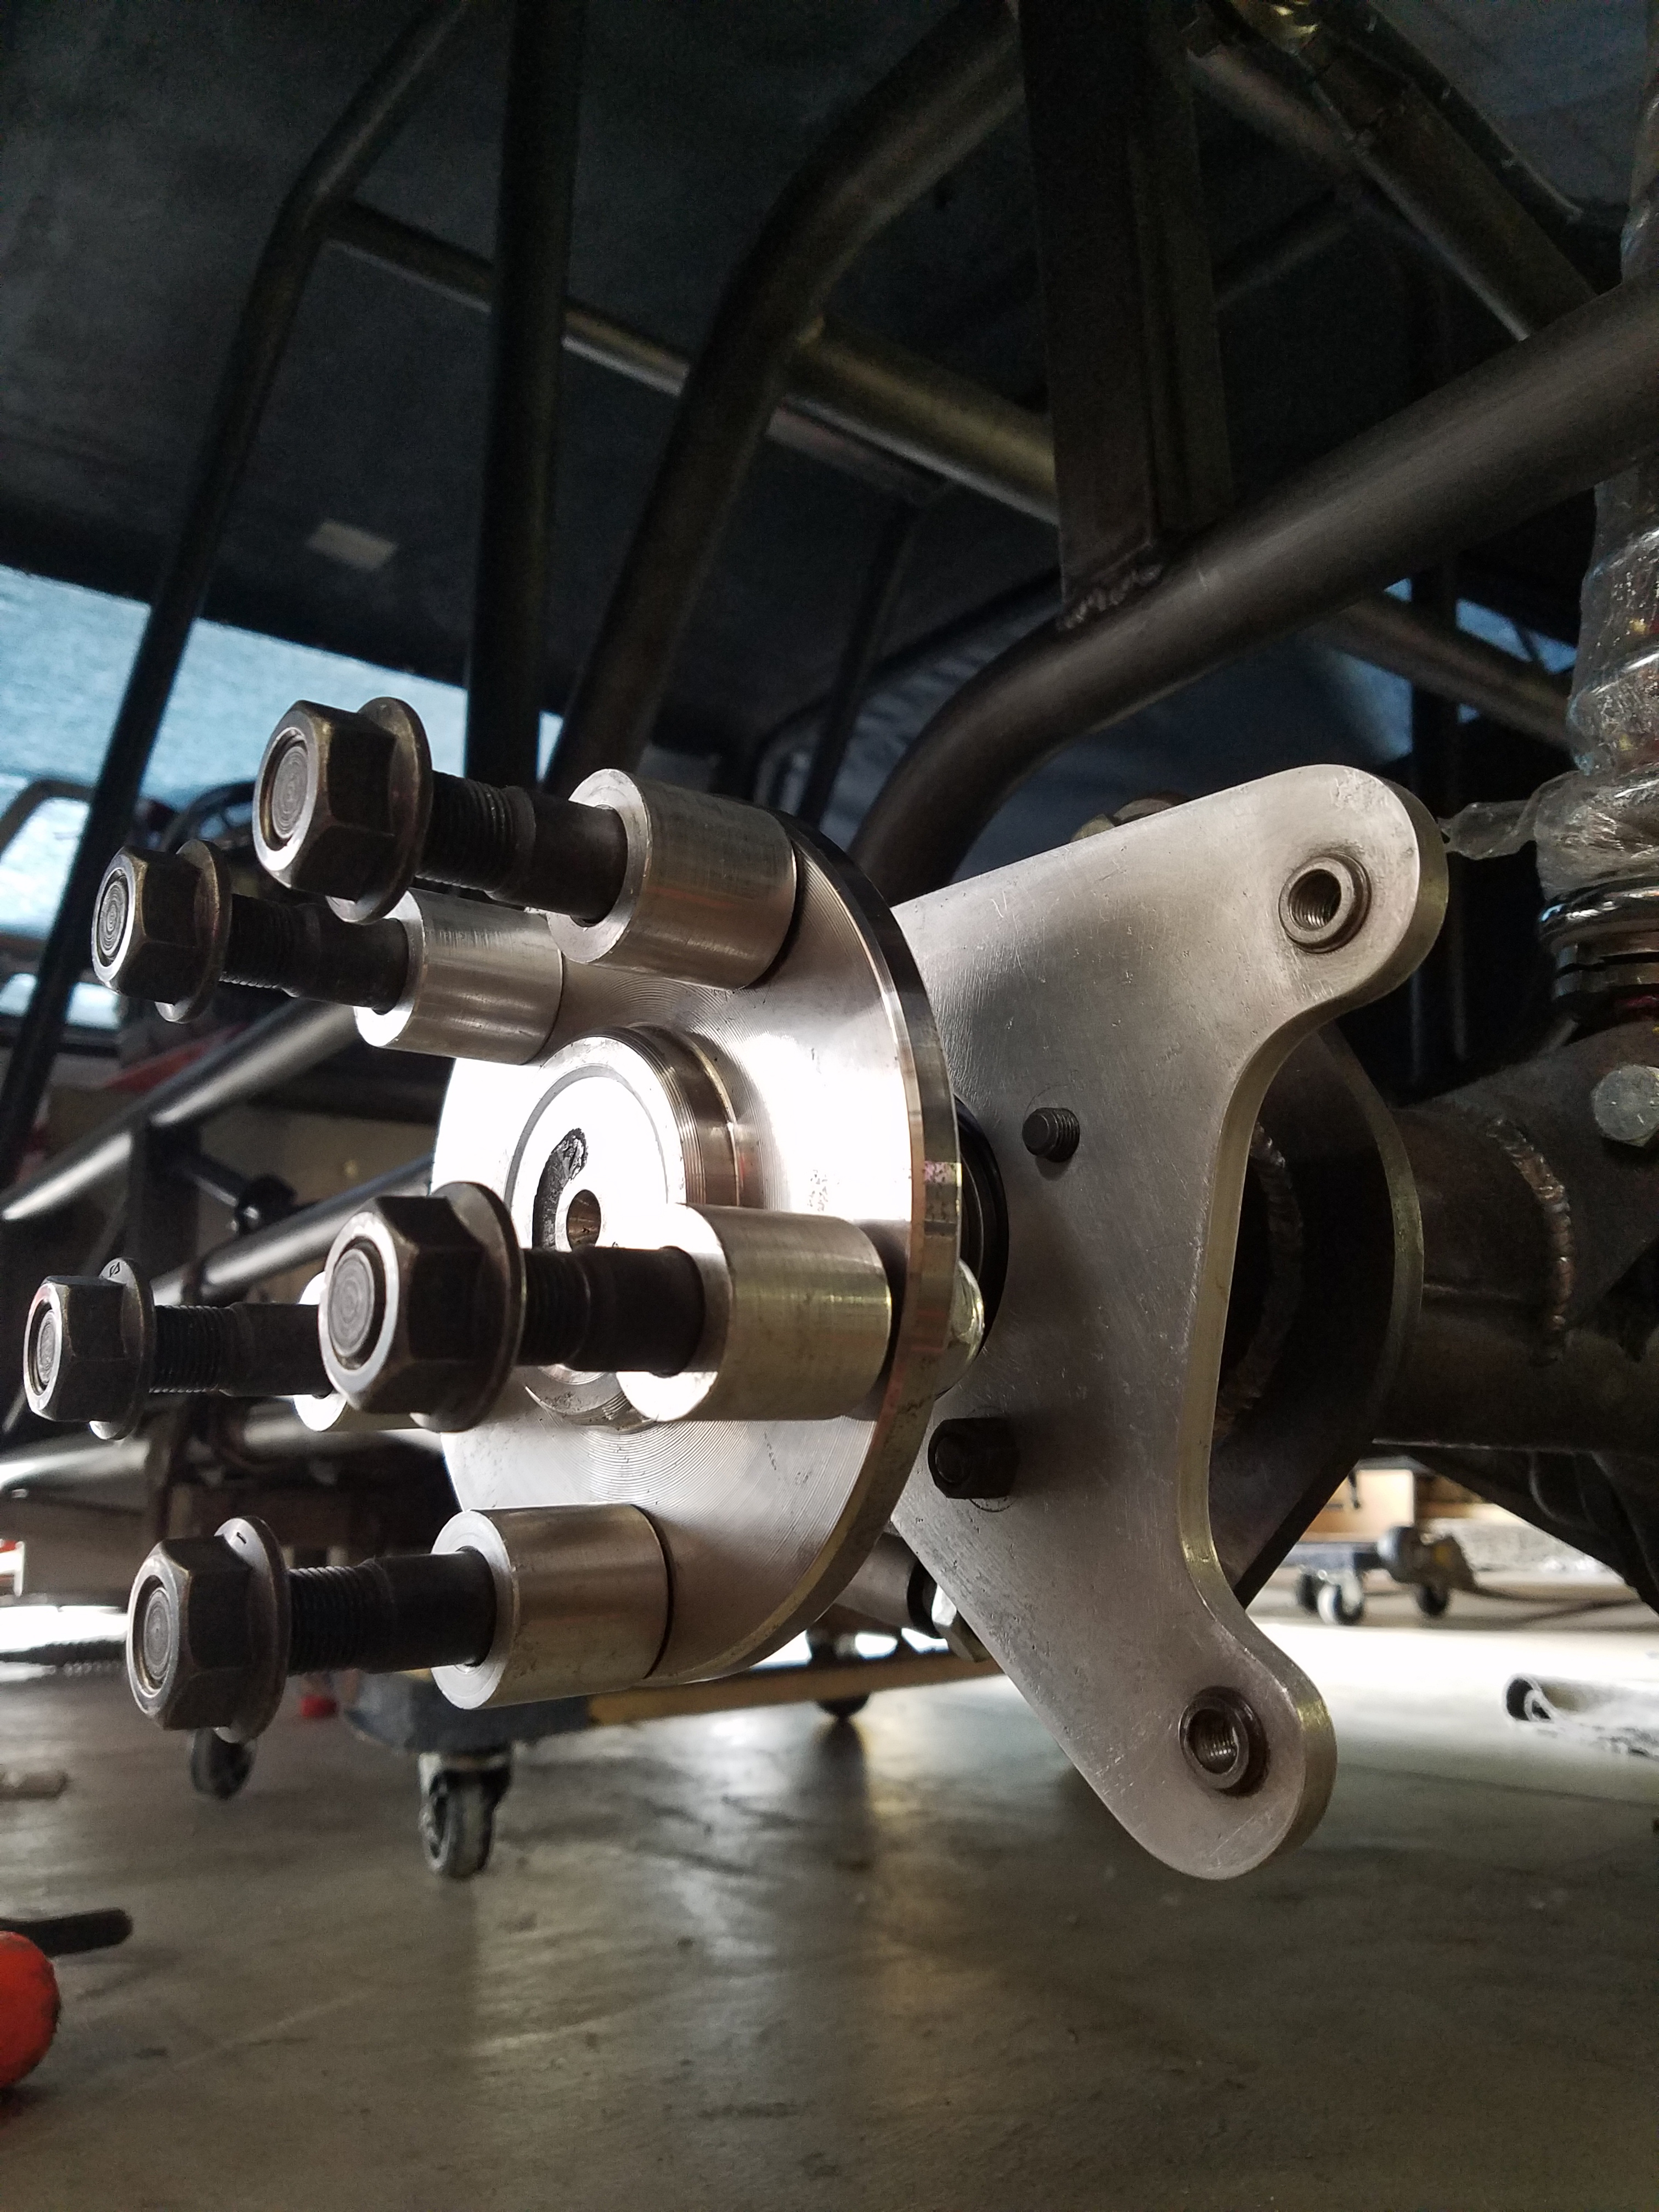
The original car had Jim Kirby front hubs. Very rare and I have not been able to located a pair so in the mean time I decided to go with the best hubs out there, Wilwood. In the future if I decide to use disc brakes they have provisions for rotors where as the Kirby' were not drilled. The original car did not run front brakes and I can tell you it was harry trying to stop the car sometimes at over 130 mph on only back drum brakes.
The spindles are 1942 thru 1948 ford which I used on the first car.
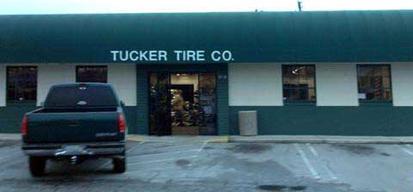
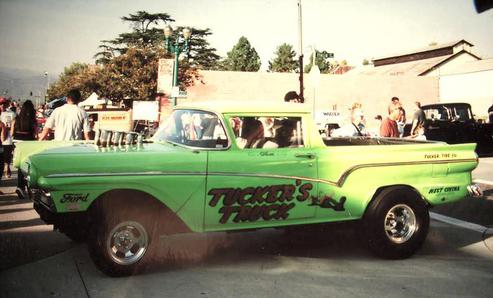
Tom Tucker and I have been friends since the Irwindale days back in 1974. His truck always ran great with the injectors and now sports a blower which he is dialing in. A lot of us San Gabriel Valley racers got our tires at Tucker Tires in Covina, CA. It's where I purchased the first set of tires and now I'm buying more for the new car. Tires are 135 R 15.
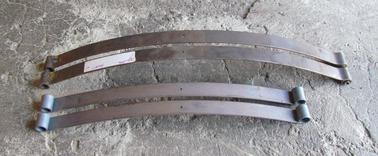
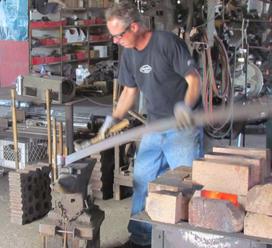
When I first built the car back in the early 1970's I went to the auto salvage yard and picked up a set of 1964 ford Econoline springs. I made another trip to the salvage yard and found another set of springs from an Econoline like before. I measured the car like before and needed to shorten them by about a foot. I found a spring company in Santa Ana called Deaver and drove down there with the springs.
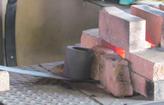
Stock Econoline springs on top and custom springs on bottom from Deaver Spring Co. They also made me a couple eyelets to the left to hang the spring. Notice I had the eyes of the spring reversed which allows the car to sit lower.
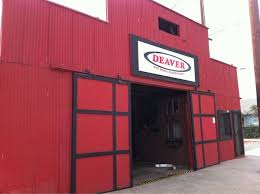
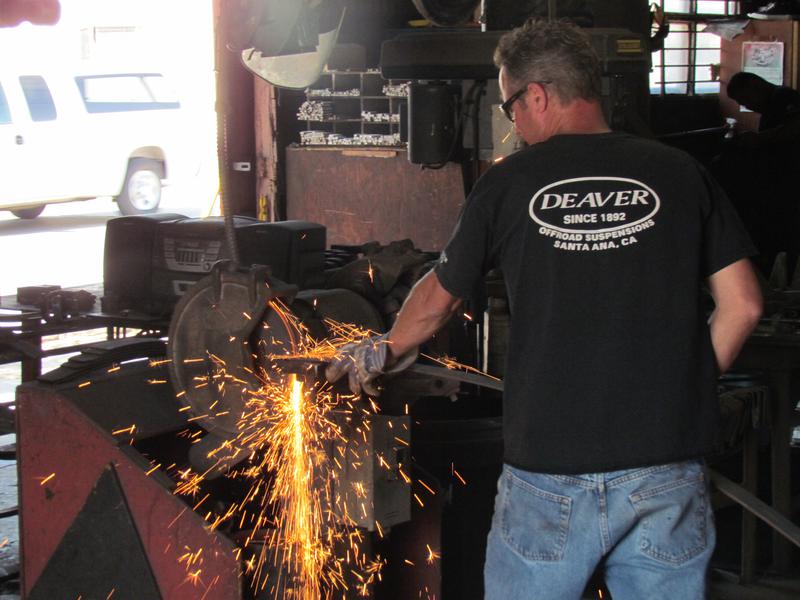
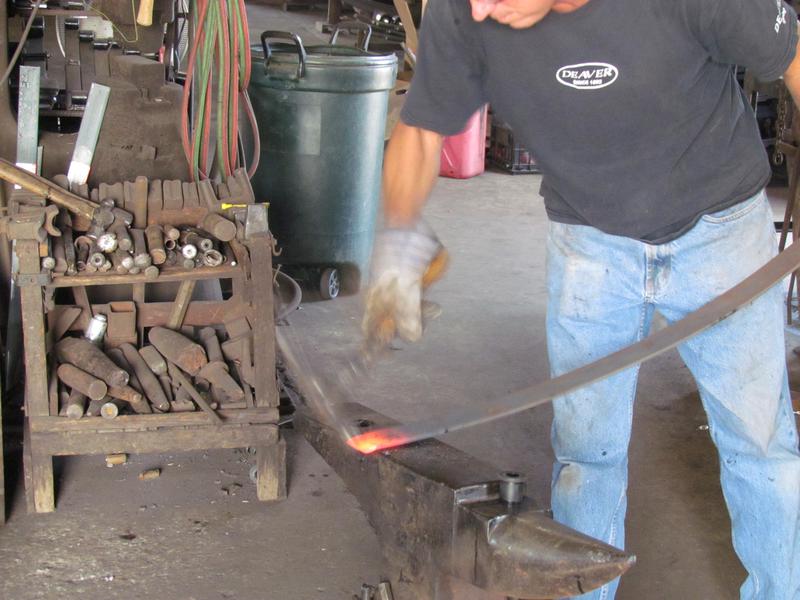
Locate a great spring company called Deaver in Santa Ana CA. They allowed me take tons of photos of the process of building my springs. Showing them the Econoline springs they told mee it would be better to use new material for the main leaf. They had the exact material to hand build the new springs. All hand done with a forge, rollers, hammers and other machinery in short order they they were two beautiful springs just the size I need.
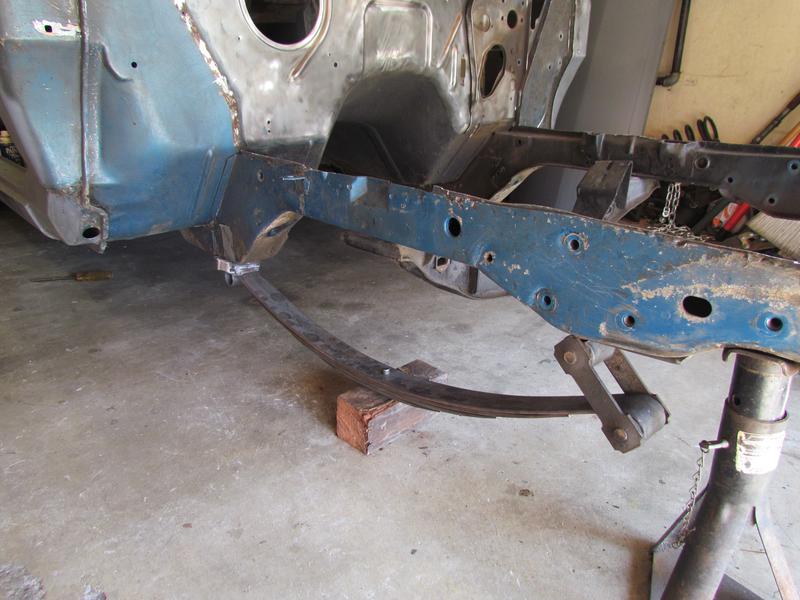
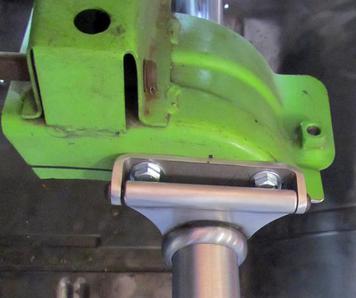
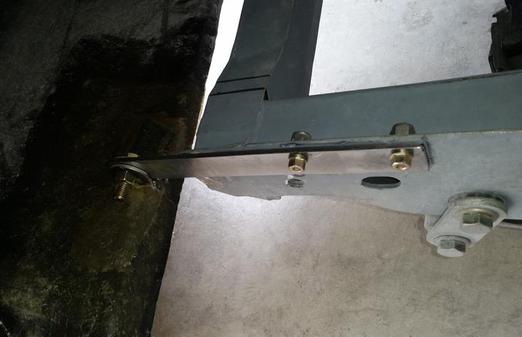
Mocking up the springs I noticed some issues. The brakets I used for the original car were made by my dad and fit around the frame then Welded. These spring hangers made the car sit higher which I didn't want.
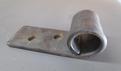
Looking at the situation I decided to use the frame rail and insert a bushing to secure the bolt. See Below
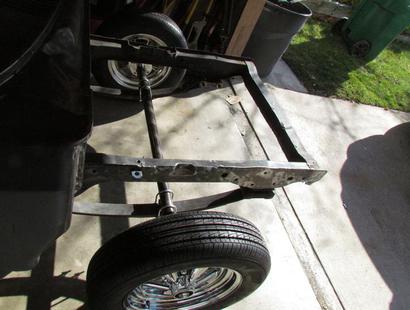
Along with the shorter shackle dropped about 4 inches. I may later make a little longer shackle to have a little more travel room. Notice that on both cars I placed the axle on top of the spring to add additional inches of drop. You have to careful to have enough oil pan clearance.
Here I am figuring out how to mount the springs to the frame rails.
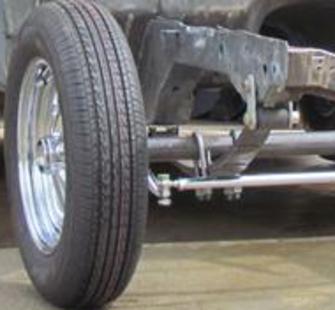
I purchased the drag link that goes between the hubs from Speedway along with the hardware. Another little trick is that I reverse the 1948 Ford spindles from side to side. The drag link now runs in front of the axle and I make use of the additional mounting bracket on the spindle for the steering on the drivers side.
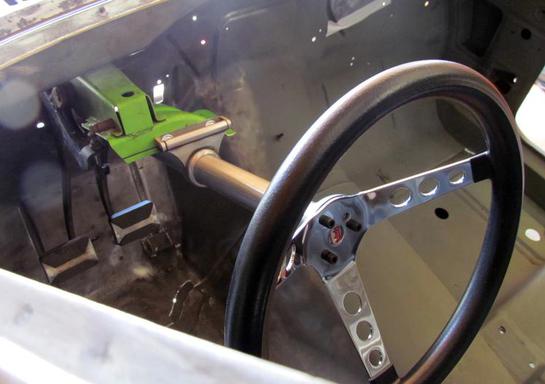
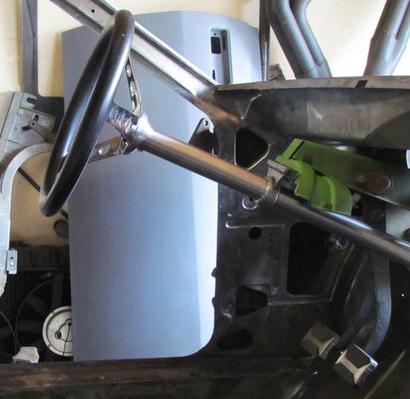
My dad built a single steering shaft with a bearing at the top of the steering column to hold it in place where you would bolt the column it. I decided to go with an Ididit column that was very light and attractive. I just cut off the lower part where the original column mounted, drilled two holes and mounted it there, very simple and easy. I'll mention it now, after I get everything in place I will then tear it back down and send out those parts to be chromed. I will also mention at this point that I used a stock manual steering box which I purchased new.
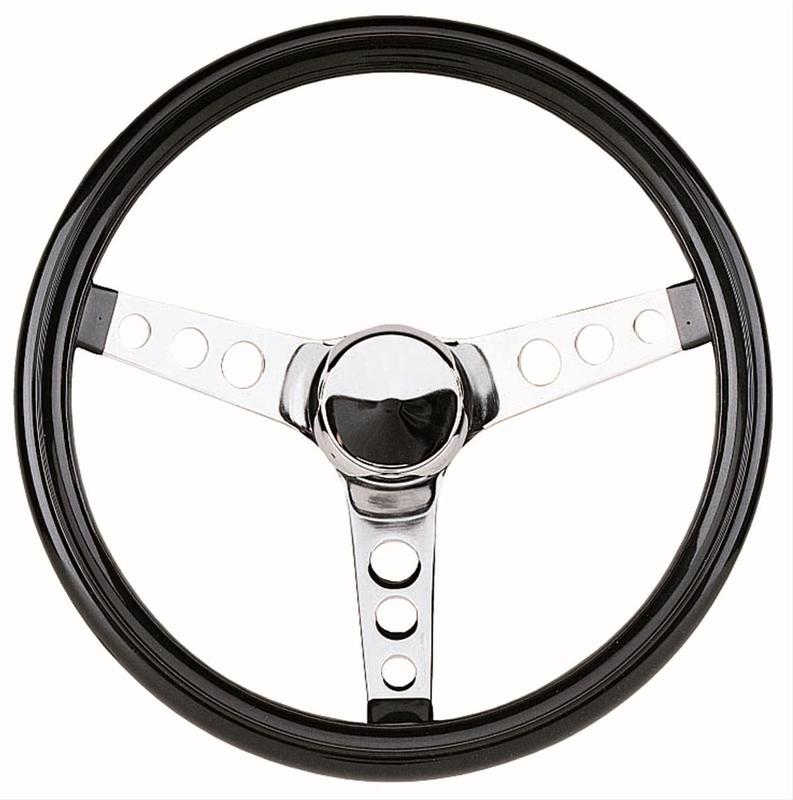
Grant, Chrome, 3-Spoke, Vinyl, Black Grip, 13.5 in. Diameter Steering wheel. When I look back over 50 years of building cars most of my cars all had Grant wheels.
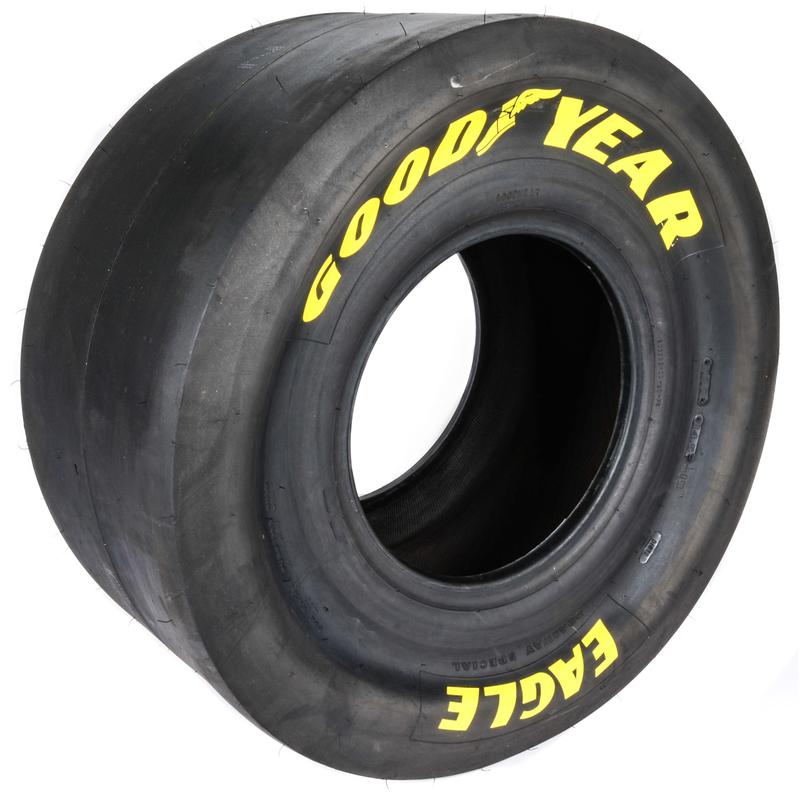
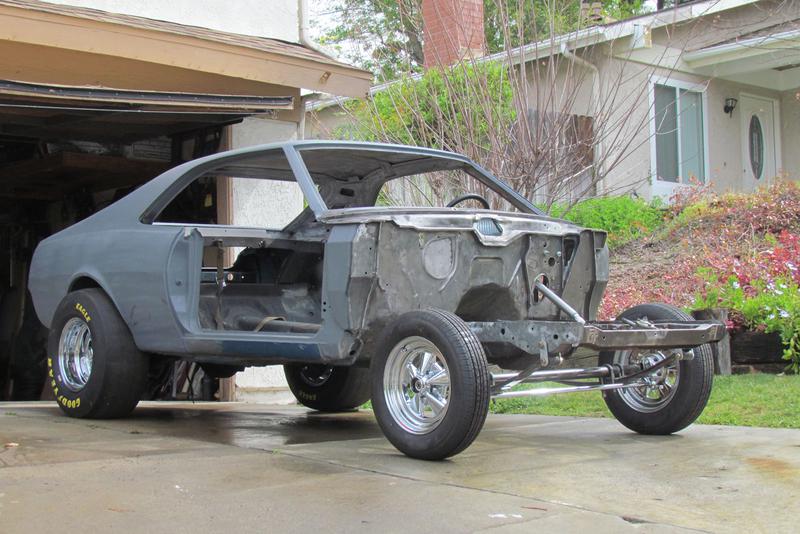
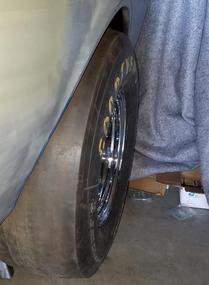
Purchased tires and rims from Jeg's for the rear. Originally the cat came with Crager's all the way around. Later I changed to slotted aluminum mags. For the build I'm going back to the Crager's because mainly looks.
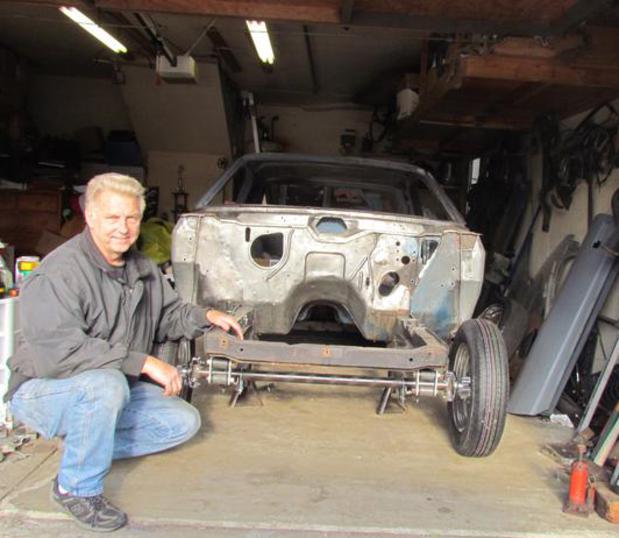
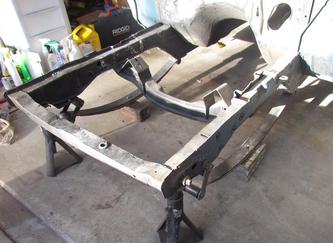
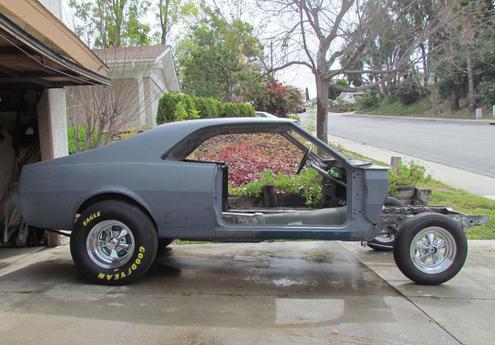
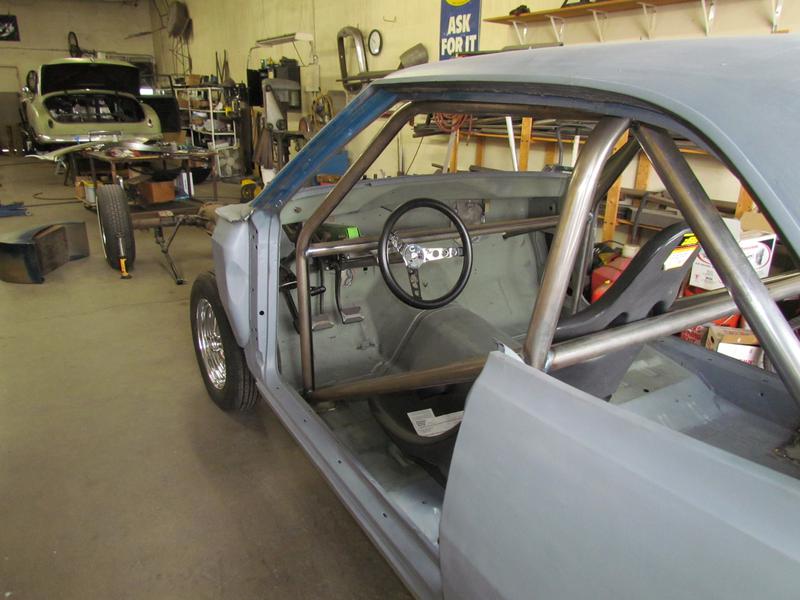
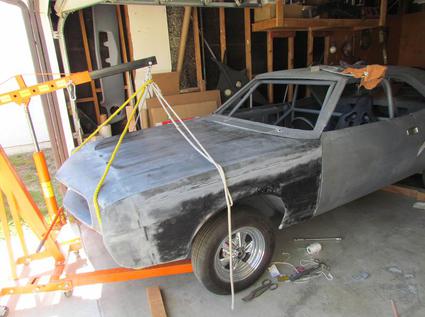
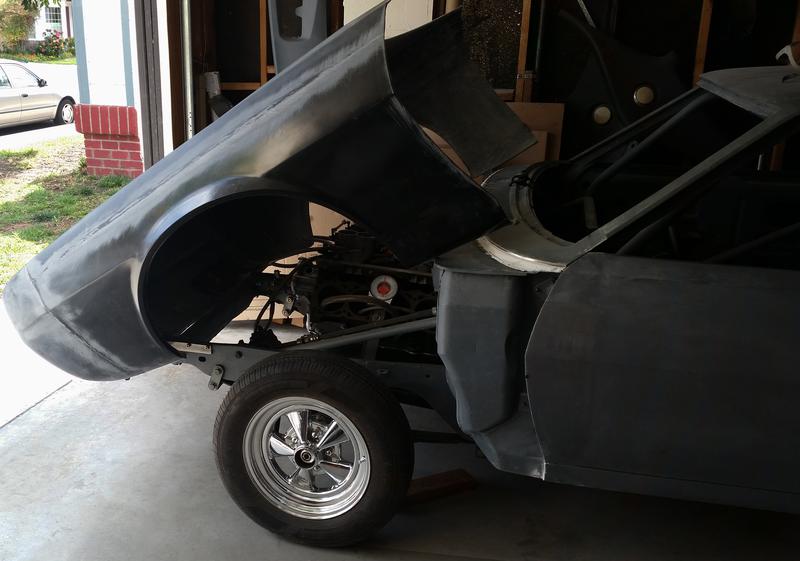
At this stage you can see the stance of the car. Later the whole car will come down a couple of inches when the engine and trans is installed. The car will have a very aggressive look once the front is installed, which is a story to itself.
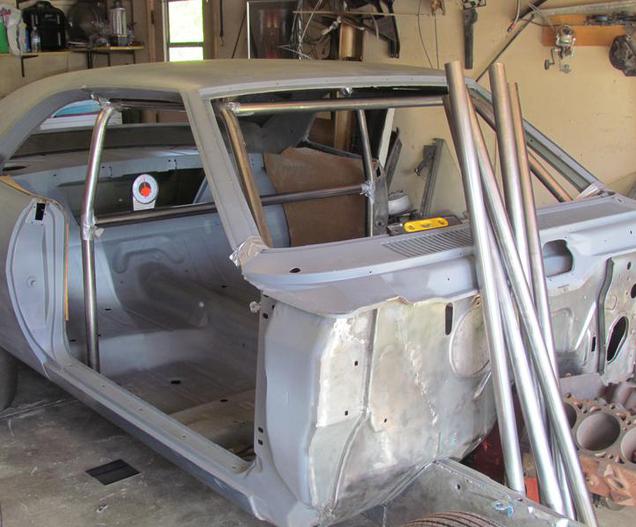
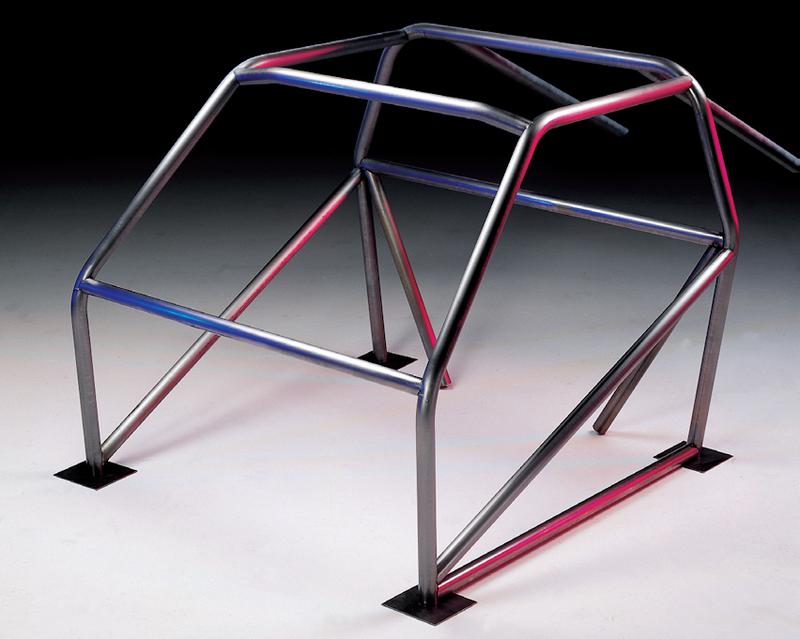
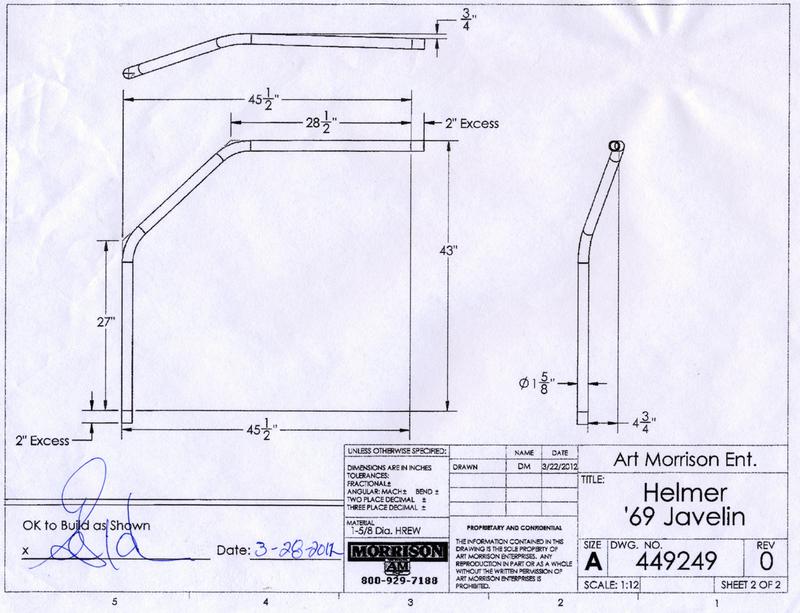
I checked with Art Morrison for my roll bar set up. They had something but if I remember it intruded in the dash some and I wanted it not to. I measured all the angles and sizes and had them bend it up for me and supply the straight tubing. I purchased a tube notcher from Harbor Freight and did the installation, that is all but welding. That was done by Mitch Howe a car fabricator out of Arcadia but now has a home shop in Fontana CA. near the Auto Club Speedway. Mitch is a great welder and at one time worked for Doug's Headers as a welder. So after cutting the tubing as you can see on the left I duct tapped it together and dropped the car off at Mitch's shop in Arcadia pictures below. He welded up the roll cage and a few other things for me.
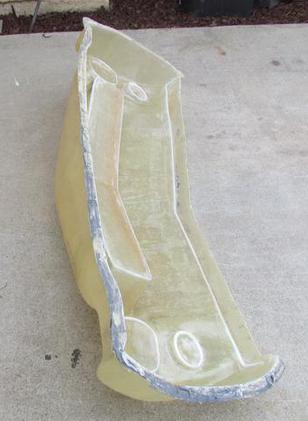
Now the part that has become the most time consuming for me, the fiberglass front end. Before tackling this project I was looking for one to purchase. Yes, there were a couple places that built them by putting together pieces but I want a real one piece front-end like the one I had with the original car. That original front end was given to me by Randell of Mesa Arizona. When I was looking for one somehow I got their number and spoke with, I believe Mike Randell. After telling him the story of the car and what I was looking for he told me he would give me a front-end, all I had to do is drive there and pick it up. I called my dad and we got a small trailer and drove the 500 miles that next day. When I arrived at the Randell dealership I spoke to Mike and he told me to go over to this lot across the street and it was in a crate. We loaded it up and drove back to California. It was a few years ago I found out that they built complete funny car bodies and it didn't occur to me until later that my front-end was out of the same mold that the Doug's Headers Javelin 1 and 2 bodies were from. Before I realized that I contact Greg at Greg's Restoration and he told me that he had purchased a new fiberglass front-end off E-Bay for the Javelin because the other one was in poor shape. It had been sitting outside all those years and the person who had it at one time was trying to put it on the street. He had cut out the grill area and the headlights to make it street legal. I thought it would still be easier to fit it then try to find one. Greg decided to keep it for some reason and wouldn't sell it to me.
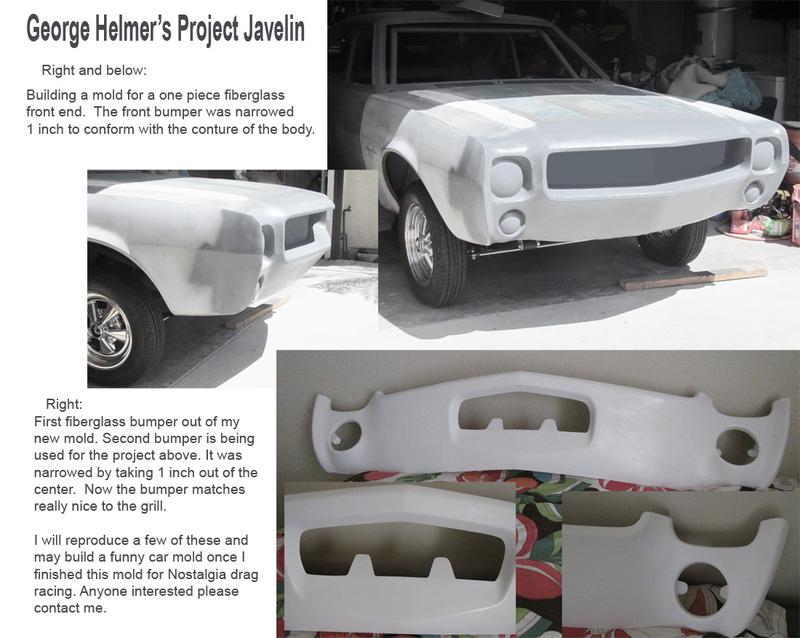
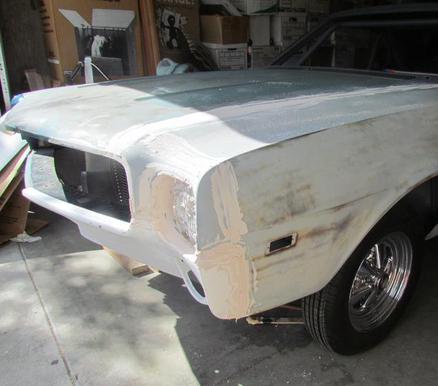
Back to square one. After reading and checking Youtube on how to build a fiberglass front-end I decided to make a few changes that I wish I had in the original car. The bumper was always a issue because of the license plate area was done poorly in the mold they came out kind of flat in that area. To attempt to do the front-end without having some experience was a bit overwhelming. I decided to undertake the bumper first and narrow it ti match the couture of the fenders and fix the license plate area. I also will be selling these as products in the future. It took a lot of work but the fiberglass bumpers came out great. After the mold was finish I took it down to San Diego and had some made up.
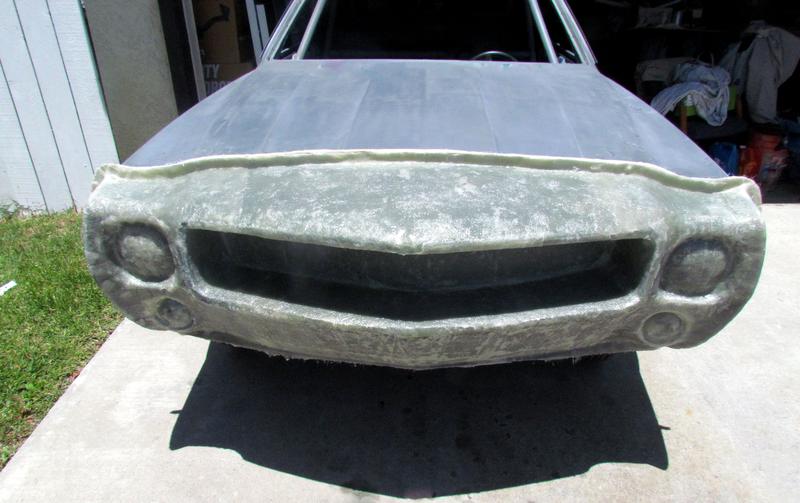
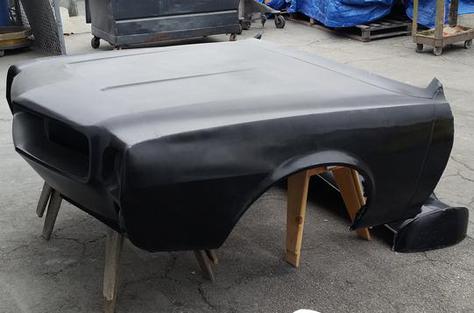
Now tackling the front-end you have to build a bulk, the part which the mold is made from. I matched the fenders, hood, AMX style grill, and narrowed the bumper. Installed in the headlights and parking lights and molded everything together. No easy task I can assure you with hundreds of hours using filler sanding and priming everything.
Ready to build the mold. Bulk dam at top to be able to pull the mold apart after finished. The white is very fine fiberglass mixed with resin to get into hard places for the fiberglass keeps from have air pockets.
Front noise piece completed and now ready to start on the hood.
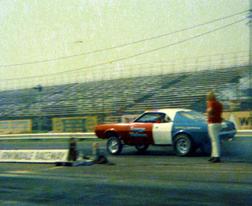
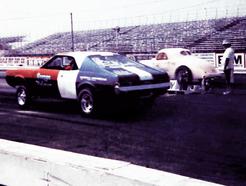
Testing out at Irwindale 1974
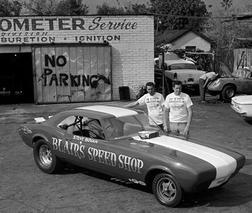
Camaro Funny Cars was owned by Don Blair and driven by Steve Bovan, who worked in the engine room at Blair's Speed Shop.
Glen Henry "Money Grabber" out at Irwindale. One of the race cars I painter in my garage 1974. Glen is Bob Eakins ex-brother-in-law .

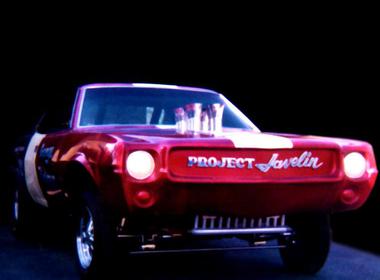
Project Javelin
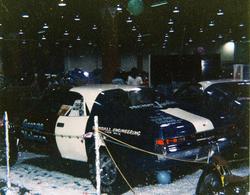
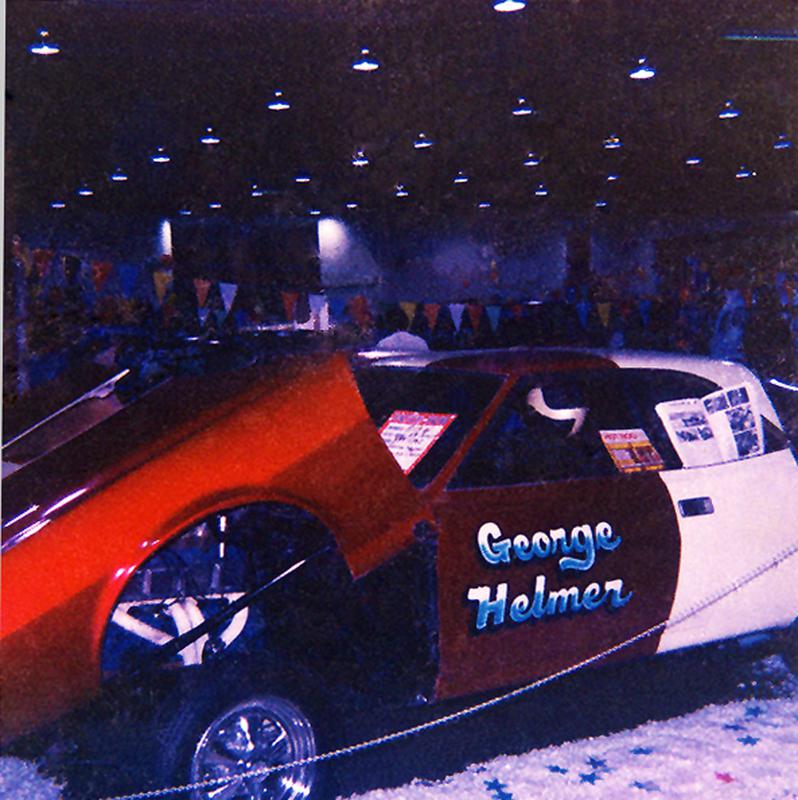
Anaheim Convention Center car show 1975
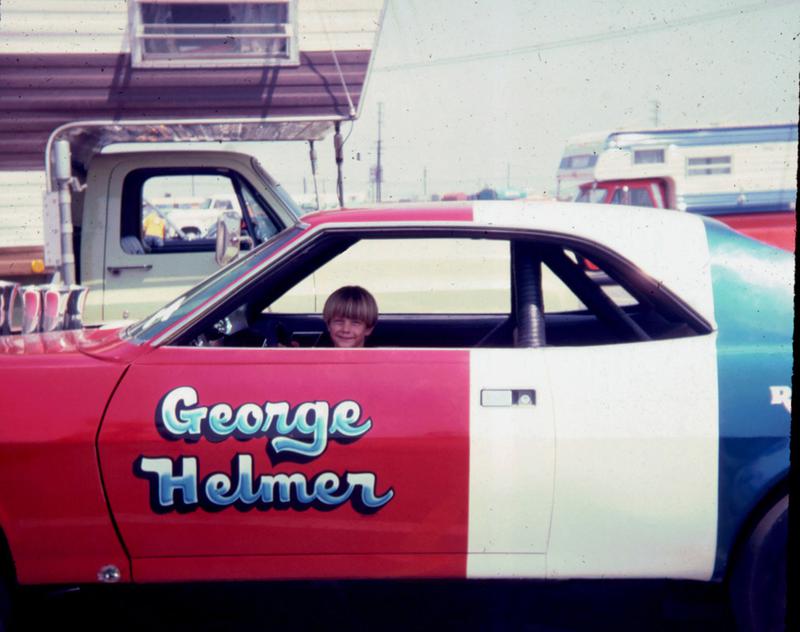
My son Tye sitting in car at Irwindale Raceway 1975.
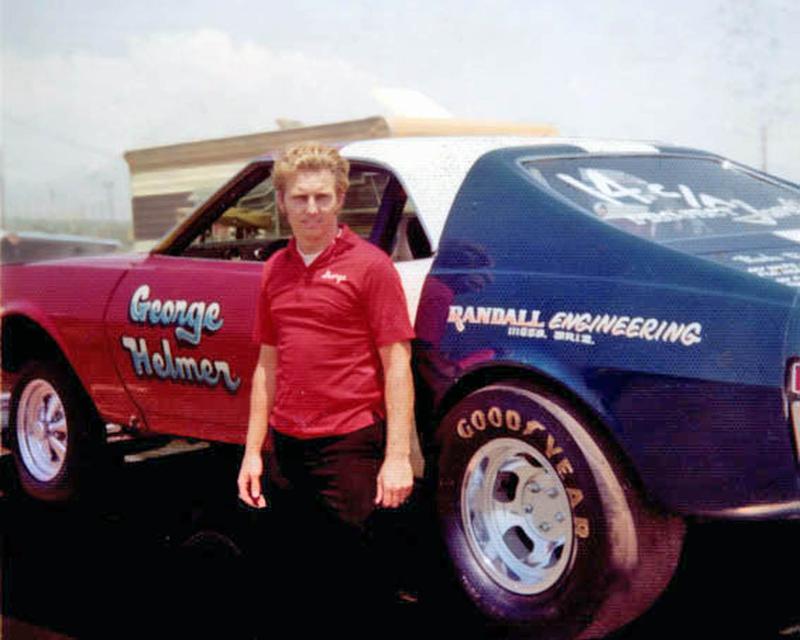
Between rounds at the track, Nice shirts.
Jim Kirby at Challenger race cars in Azusa, CA did all the welding, roll bar, axle and his own spindles.
I like this photo of the car up on the trailer.
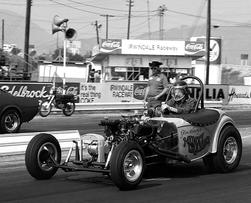
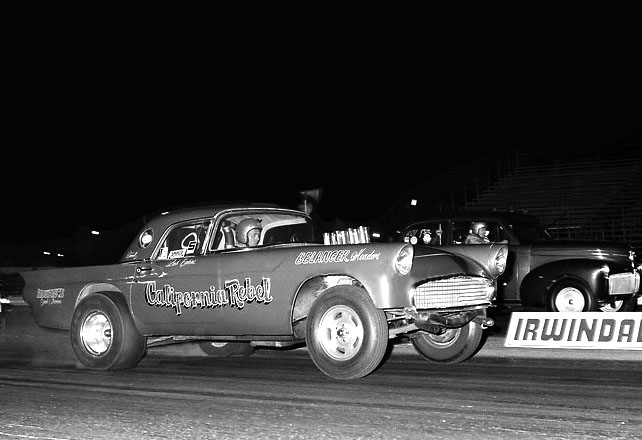
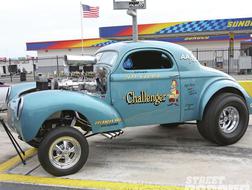
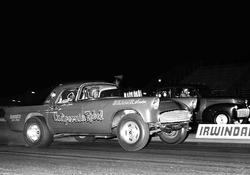
Racing a 41 Willy's coupe at Irwindale.

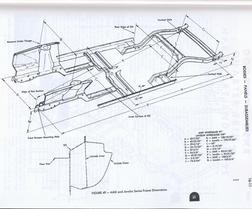
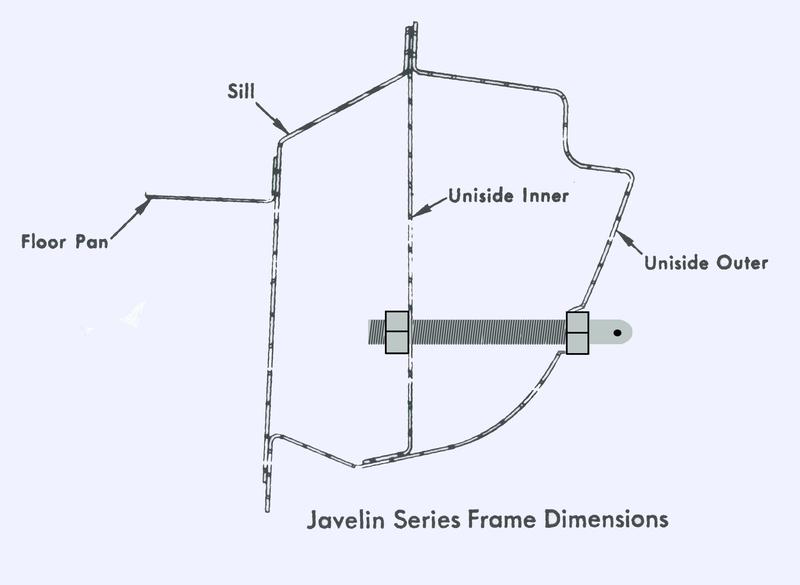
Javelin unibody frame and dimensions.
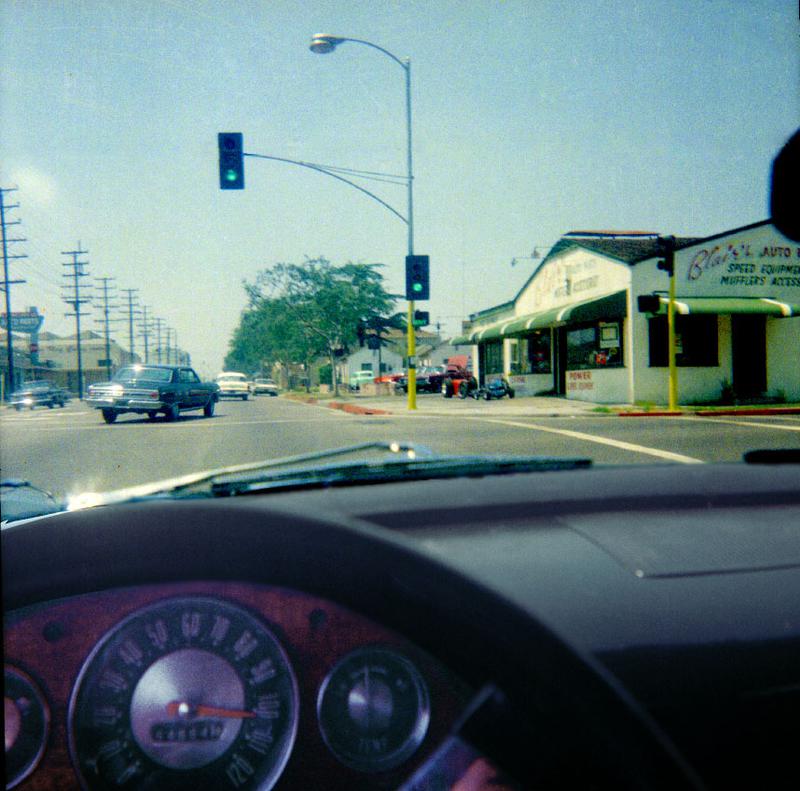
Blair's Speed shop across street. No, I'm not doing 100 mph speedometer is broken.
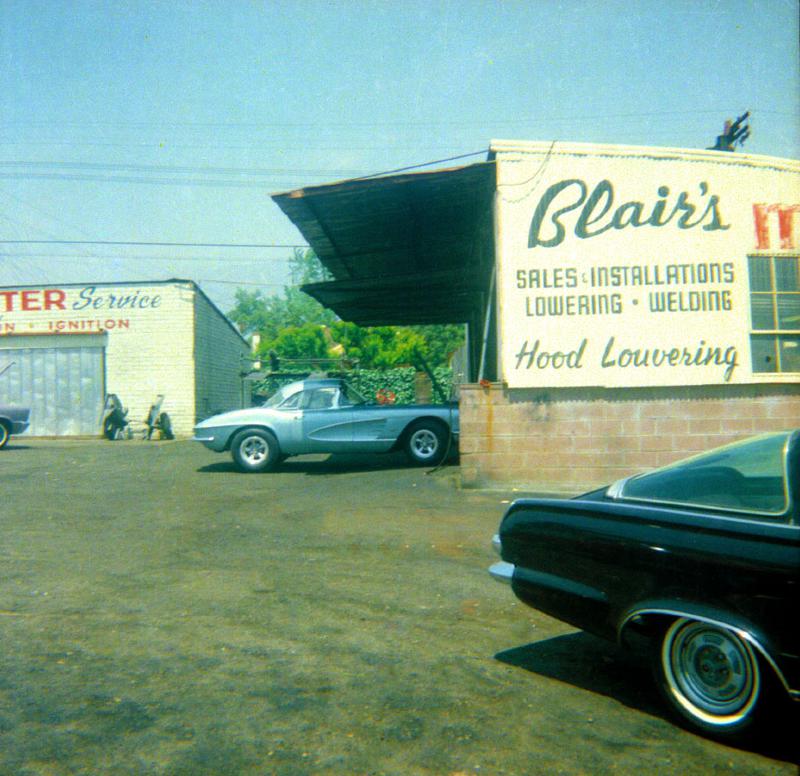
Always some cool stuff at Blair's back in the day. 1966
Bob Eakins ( East West Engineering) my next door neighbor in Covina. Look him up great race products.
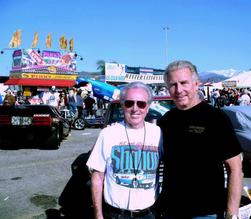
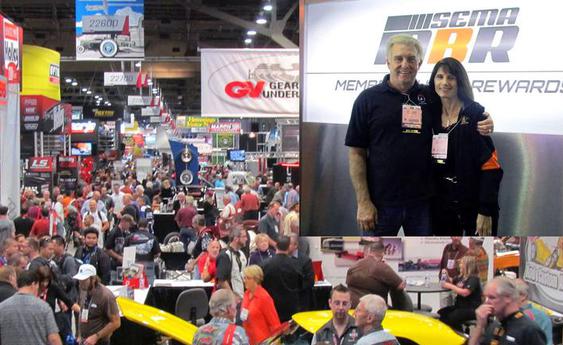
I'm with H.L. Shahan And at Winternationals 2012
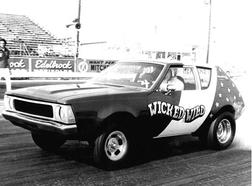
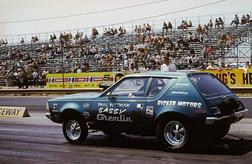
I'm racing the Wicked & Wild Gremlin out at Irwindale for my friend Tex Cox.
George Helmer Racing
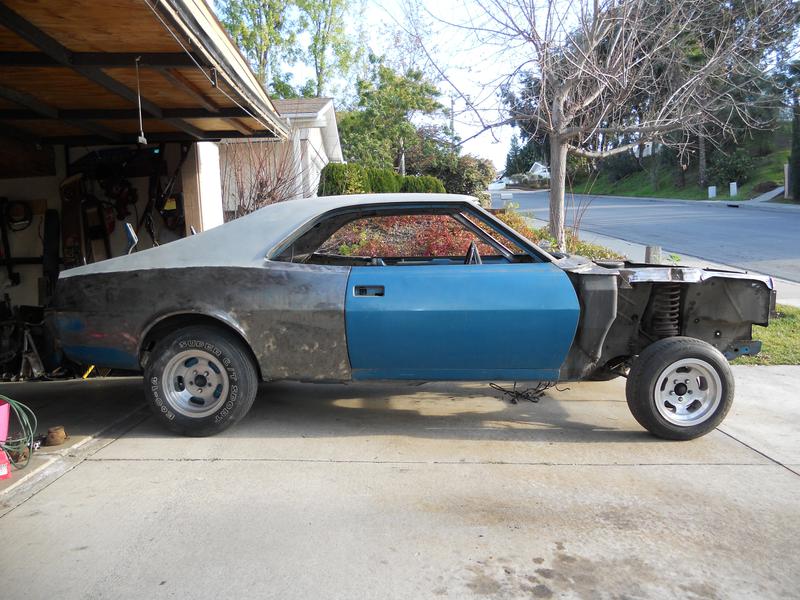
Started dissembling the javelin to start the work for the Trans-AM car.
Complete removal of inter fenderwells in the photo to the left. Make sure if you do this that you don't cut below the spot welds at the bottom of the panel, this is what holds the bottom of the unibody together.
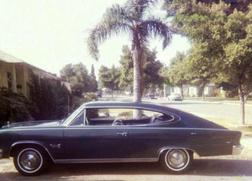
My parents 1965 Marlin.
Paul Pittman's BB/G Gremlin My friend Jim Bridgewater helped Paul with the car.

New Project Javelin at SocalAmc car show 2012
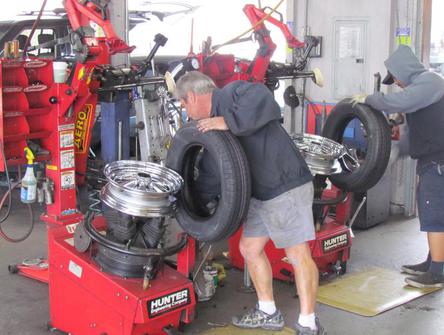
My tires coming from their warehouse and those are my two nearest the cab.
Both of my tires being mounted at the same time, great operation and no messing around here.
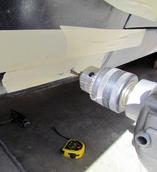
Now that I have all the components tires, wheels, hubs and spindles it's time to Measure for the tube axle. I ordered it through the internet and within a week it was here. I actually mocked up with the fenders on it to make sure of the clearance.
Left: You can see the issue with the height of hanging the spring. The eyelets and the stock spring shackle adds about 3 inches to the height.
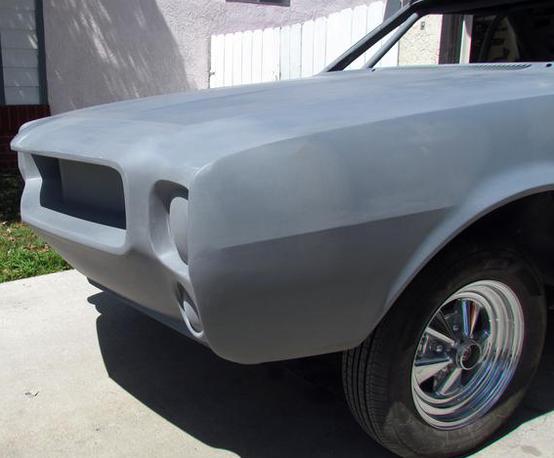
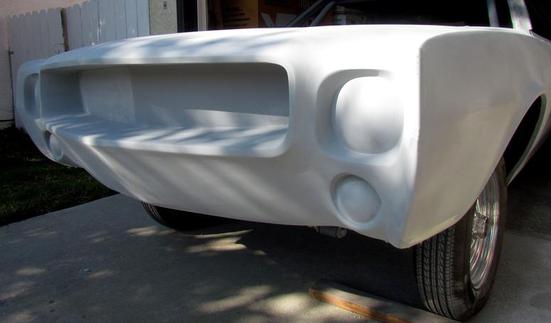
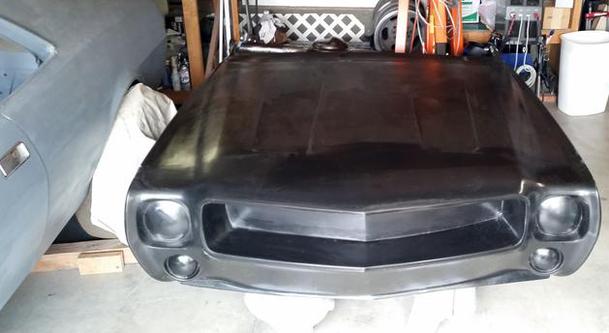
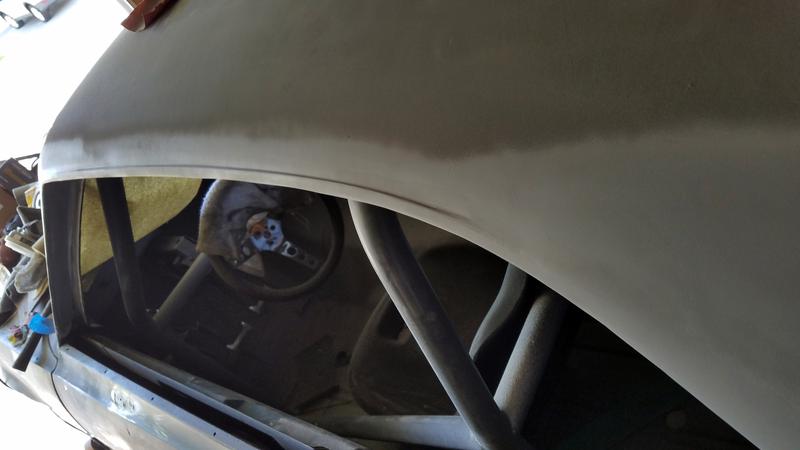
Notice how nice the contours are everything looks like it should. The grill is at stock depth and if someone wanted for racing could put a flat piece of fiberglass or Plexiglas to make it flush with the front of the grill. For me I like it the way it is makes it look like a predator.
More photos to come ..........

All AMC car show put on by SocalAMC at the Automobile Driving Museum in El Segundo, CA. Near LAX
Put down three layers of fiberglass on the hood, First the gel coat then comes a layer of fiberglass cloth which I found out by trial and error easier to get it to lay down in the corners. Next a layer of fiberglass mat to give it bulk then the finial layer of cloth.
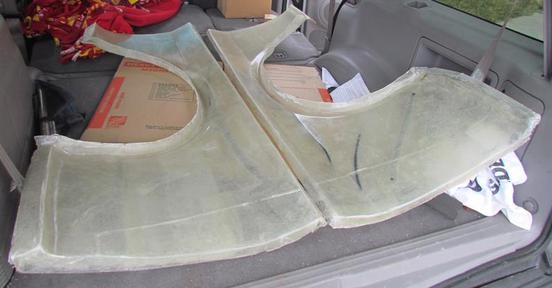
Ready to start with the drivers side lower fender glassing. I guess I should tell you that in building the Bulk (the part which you're going to mold) must be perfect in every respect. After you're ready to mold the part it must be clean and smooth. You will need to purchase some high quality car wax or mold release wax. You can use either wax or opted to use PVA mold release. Put three coats of wax on the mold or the PAV mold release. I opted to use both the wax and a coat of PAV mold release. I applied the gel coat resin to the mold with a brush. Spraying the gel coat would have been easier but I'm doing it in my garage and didn't want to be a nuisance to my neighbors. Speaking of being a nuisance, polyester resin has a very strong smell and would drive my neighbors crazy. I went with epoxy resin which has little smell it any. It is more expensive but better to keep the piece in the neighborhood.
Removed the 4 molded pieces from the bulk and drove to MGM Plastics in San Marcos California to have the one piece fiberglass front-end made. They will bolt the pieces together then make the front-end. Will have the new front-end in about a month because of production time at MGM. We will offer the front-end in two forms.
The street version will be made of blown chopped strand fiberglass mat that weighs a little more but is more durable for street applications.
The race version will be made of hand laid fiberglass cloth which will be thinner still strong but lighter . Both are the same price one with more material used and the other has more labor in the fabrication process.
As of now it looks like the front ends will be around $2,299.00 plus shipping.
The third product off the shelf will be a wall mount front end that will be off the mold shown on the upper left photo. Great for your man cave or garage wall.
 | ||||||
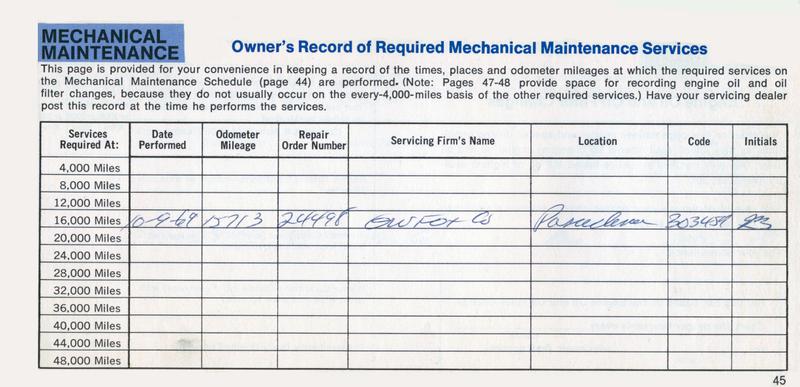
Owners Manual for Project Javelin Original car. Orren Fox Co. 1969
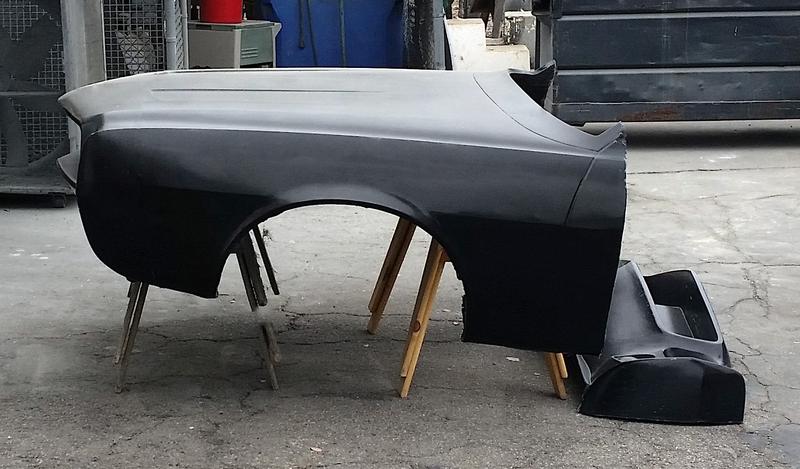
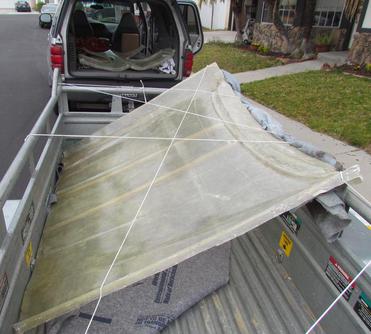
Above & left: The new fiberglass part just out of the mold at MGM Plastics today looking great. Not only did I have the new front-end made I also had the noise piece made for a wall hanger for the man cave. I will be selling both in the near future.
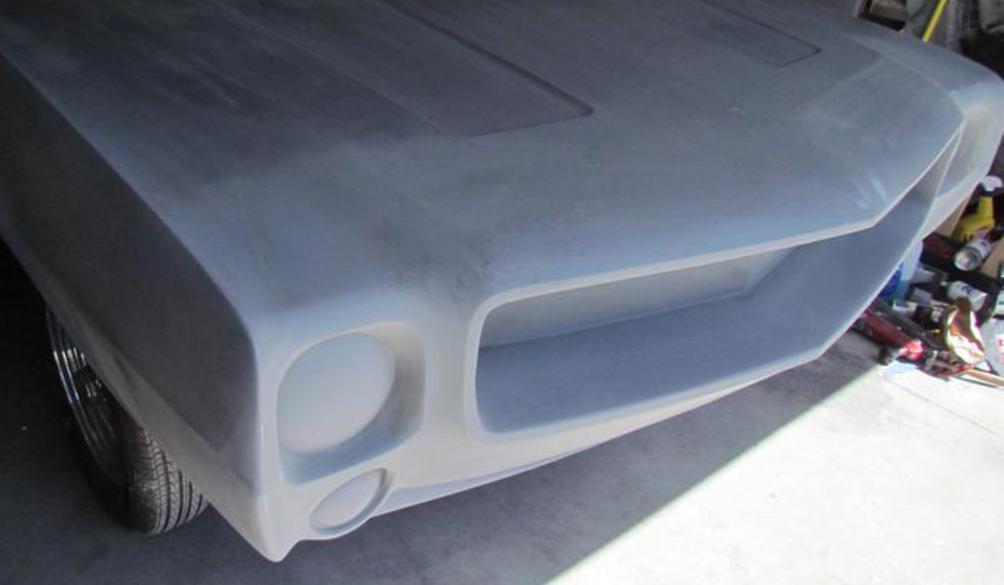
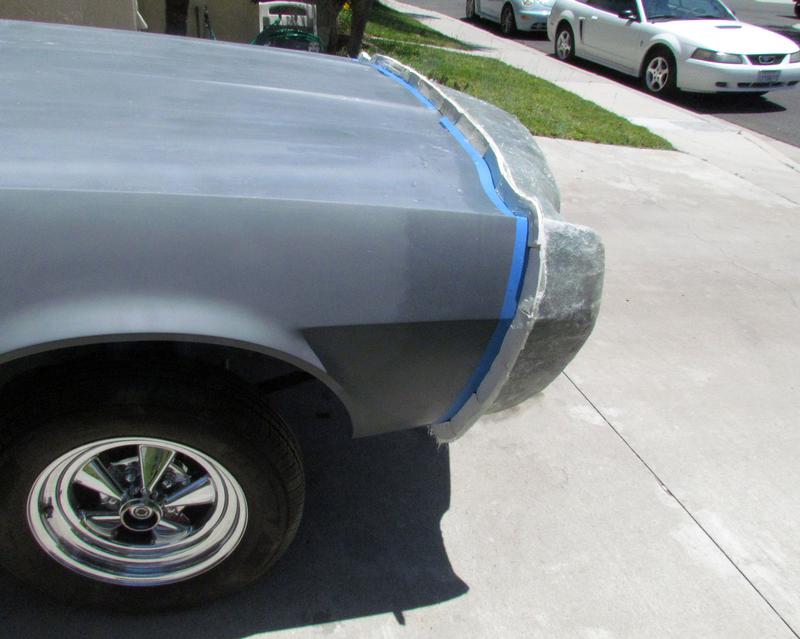
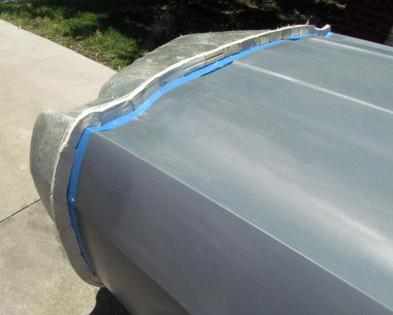
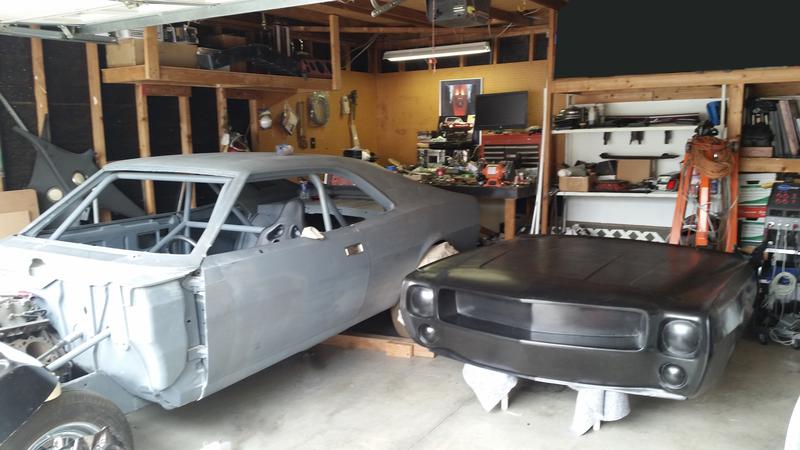
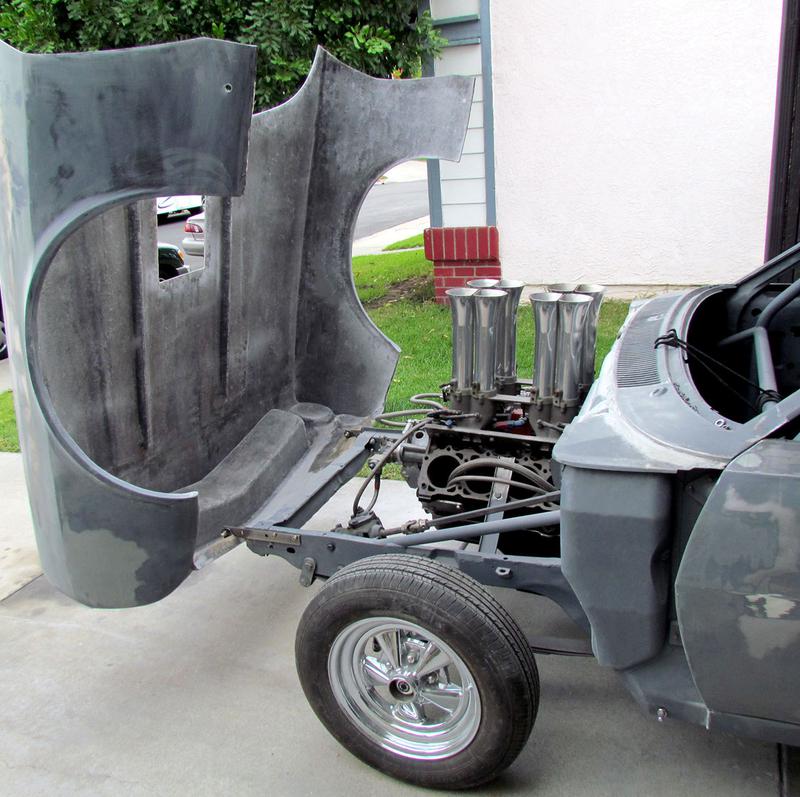
Below: I brought the front-end home and now sitting in the garage. You can see I made the mold to go all the way up to the window post but will trim it to the back of the hood and doors.
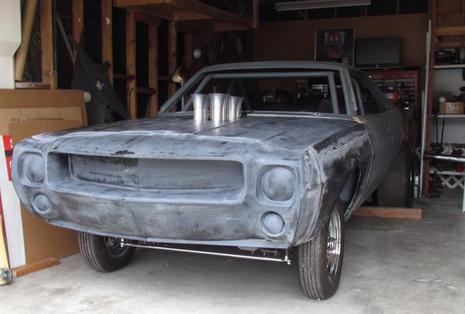
First fitting of the front end. Cut hole in hood for stacks and trimmed the hack of hood and doors. Sanded the seems and measured the brackets for tilt front end. Starting to look like the Original car.
Made brackets for tilt front-end. Nicer and stronger then the ones I built back in 1973.
Right: 1973 bracket.
Left: Front-end half tilted upward during 1974 major car show held at Anaheim Convention Center.
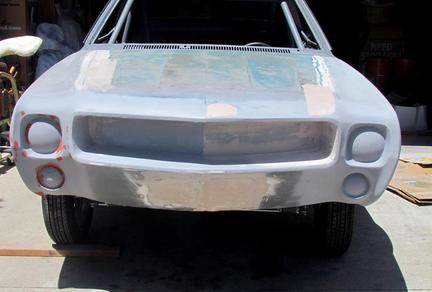
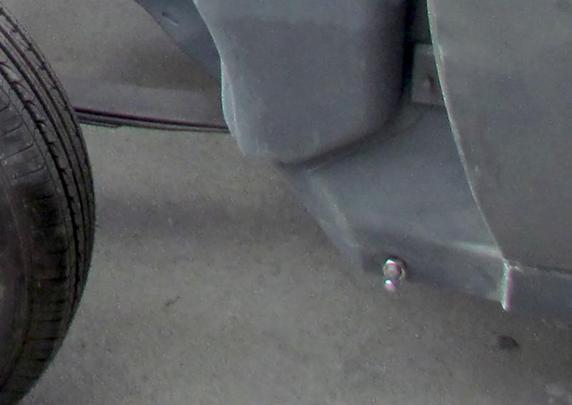
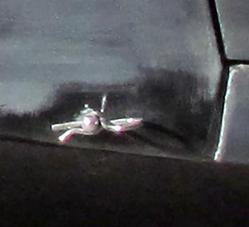
The next stage is to install the hood pins to the bottom of the fenders. I purchased simple hood pins from Jeg's for $20.00. After measuring them I found out that they were too long. I cut them down used a hacksaw and then rethreading them up to the pin hole. Using masking tape and a marker I marked the location for the holes. Then using my electricd drilled I drilled a single hole through the fiberglass fender and into the steel body. The nice thing is that this spot in the body has two layers. Each layer is seperated by about an inch. This keeps the pins straight and supported. An access hole at the bottom of the frame will allow you to install the washer and nut on the back side of the pin. Very simple solution that allows you to fasten the fiberglass front end to the steel body. Photos below to show you the process. Also noticed how nice the fiberglass matches to the body. It will even be better after finishing the bodywork.
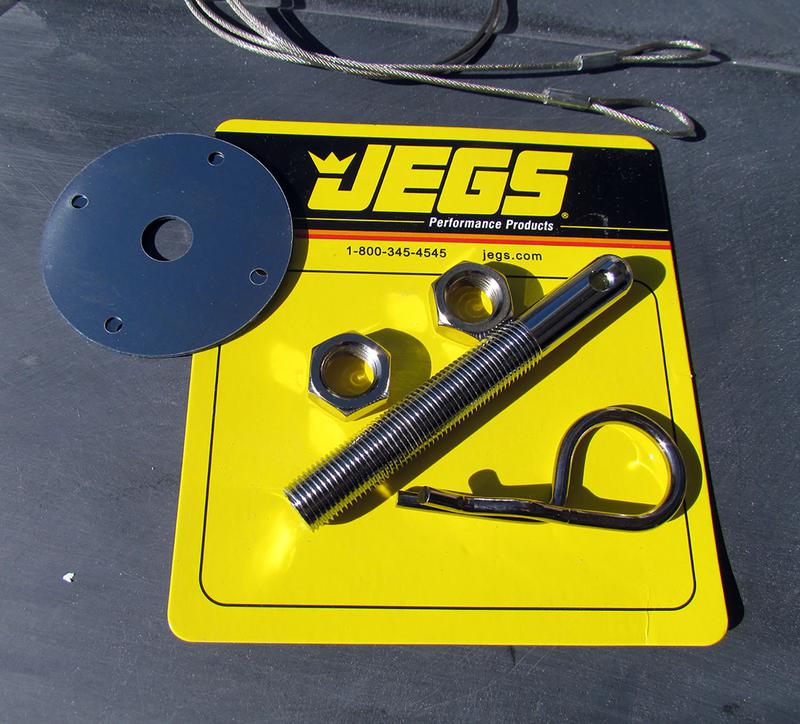

Jeg's hood pin
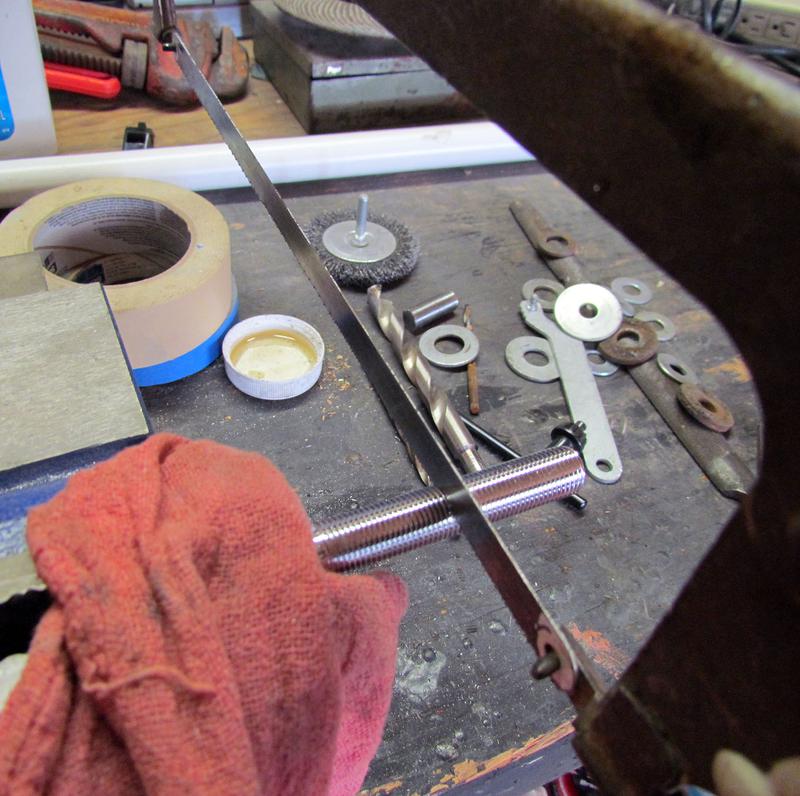
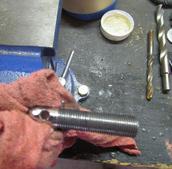
Shorten pin
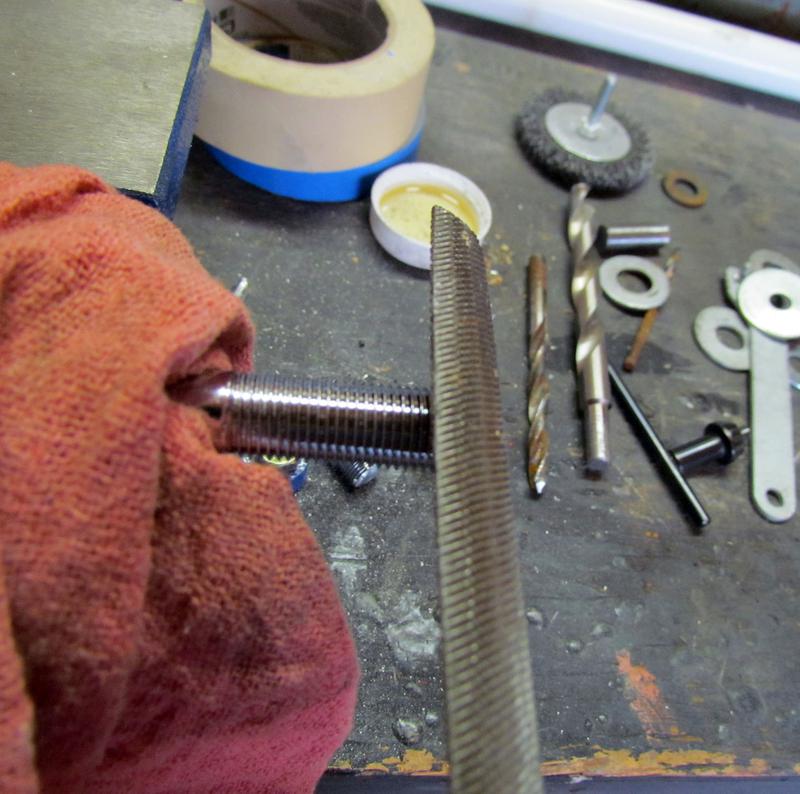
File pin
File pin on edge
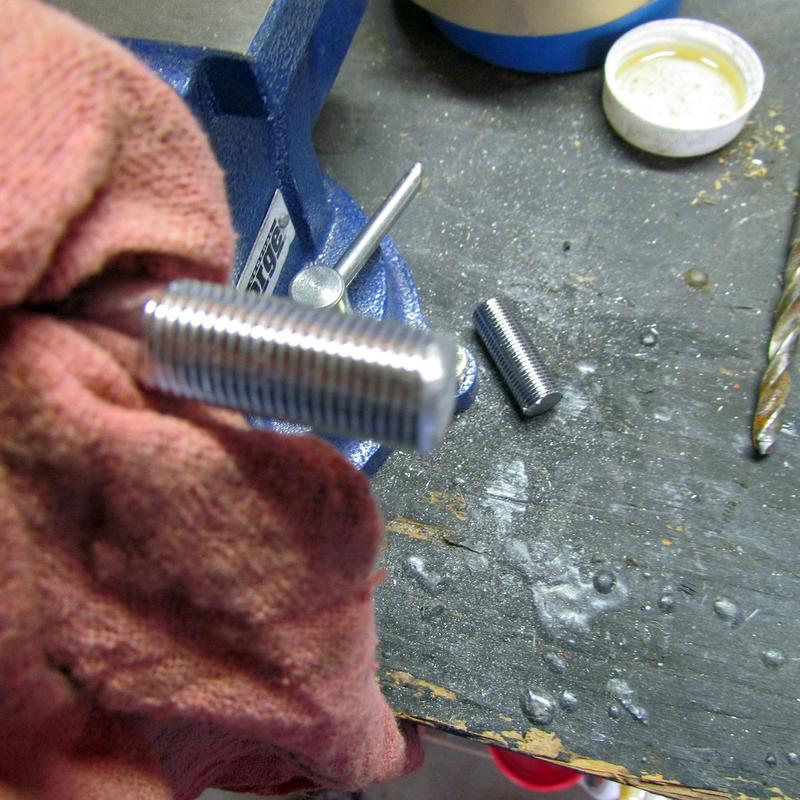
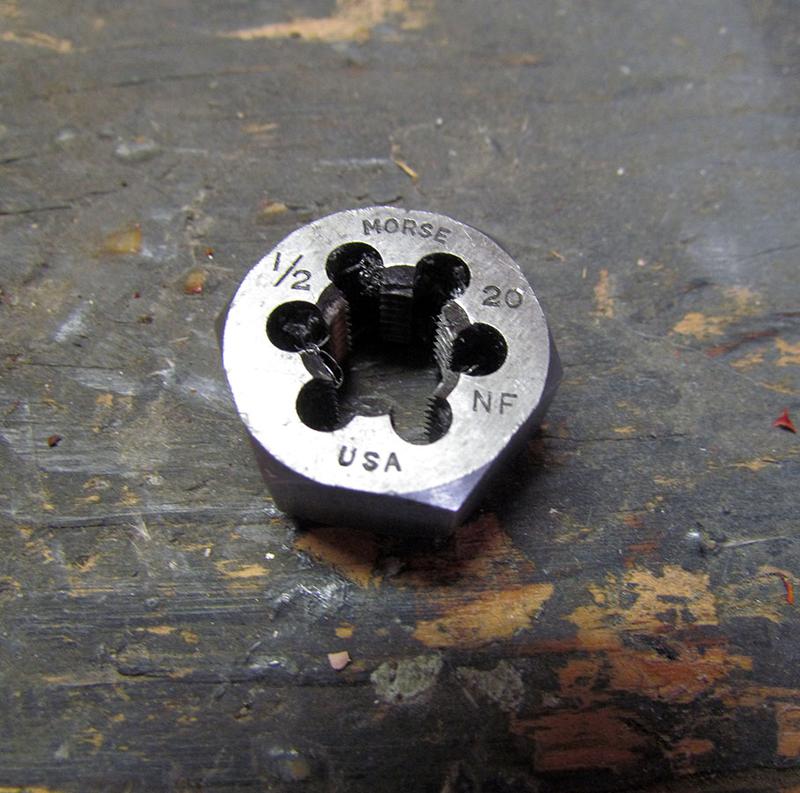
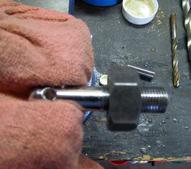
Die 1/2 20 NF
Starting die nut
Finished die cutting
Marking hole
drilling hole
showing hole in fender and body fender is lifted up
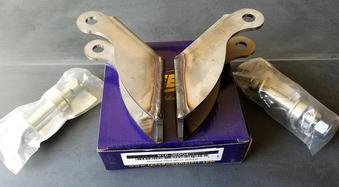
Engine Mounts
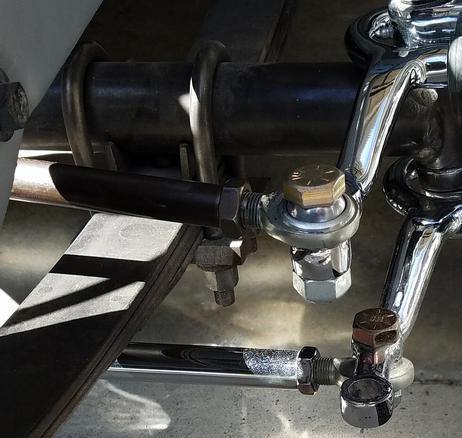
Sterring Arms
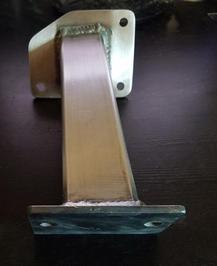
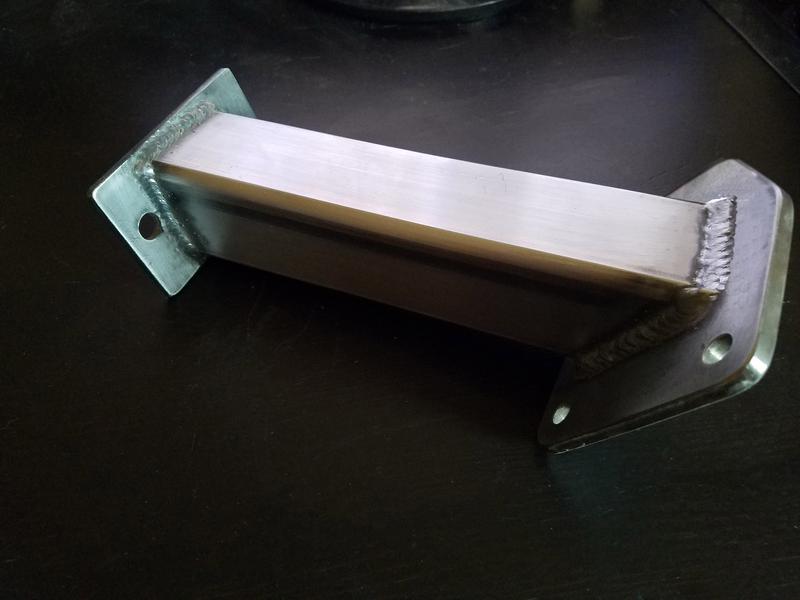
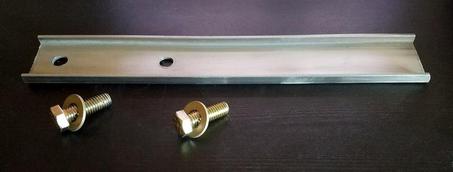
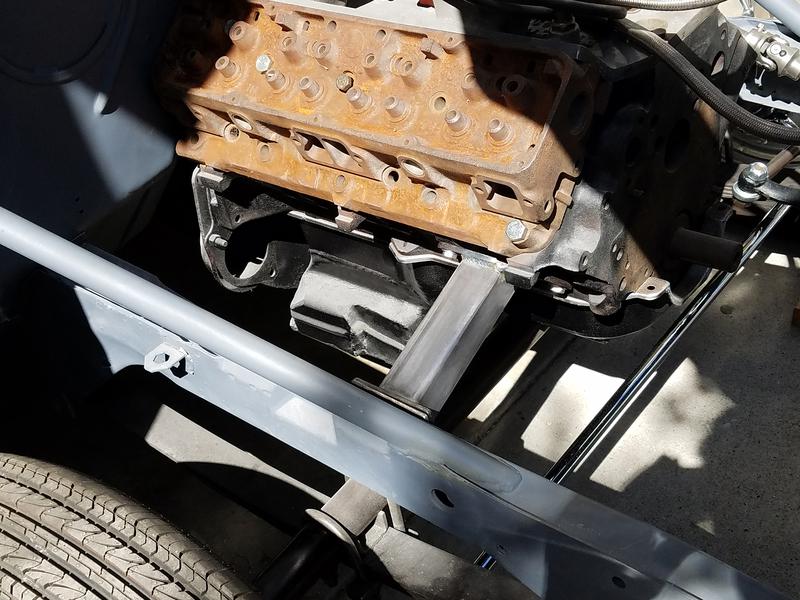
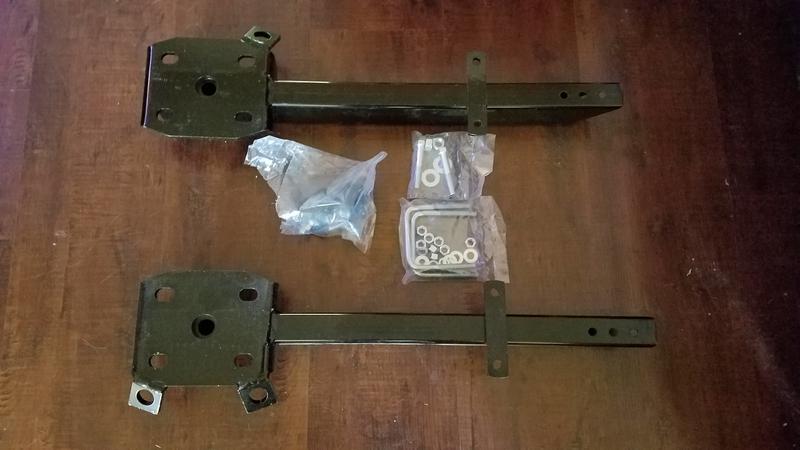
Before designing and fabricating the new engine mounts I made these temporary ones that are just a piece of channel iron that attaches to the heads and sits on the frame rails. Simple and effective lets you work designing the new mounts and is out of your way plus it keeps everything from moving around.
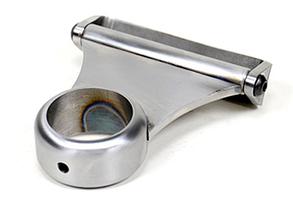
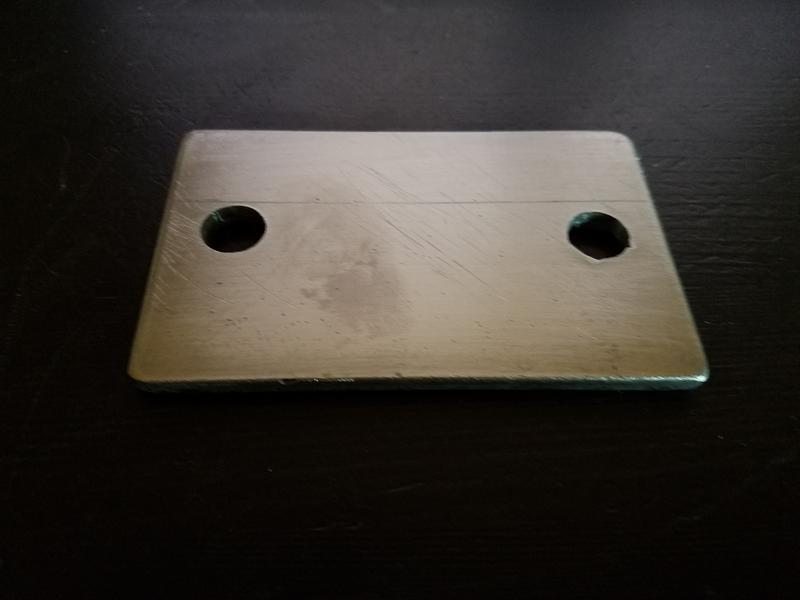
In designing the new engine mounts, I used the following:
1/4” 4”x5” steel plate with 3/4” bolt holes. This attaches to the engine.
3/16” 4”x 2 ½” steel plate with ¾” holes. This attaches to the frame rail. Used an extra one on the outside of the fram rail for attachment.
The main tube was a 2” boxed tube 9” at its longest point. Both ends are on different angles.
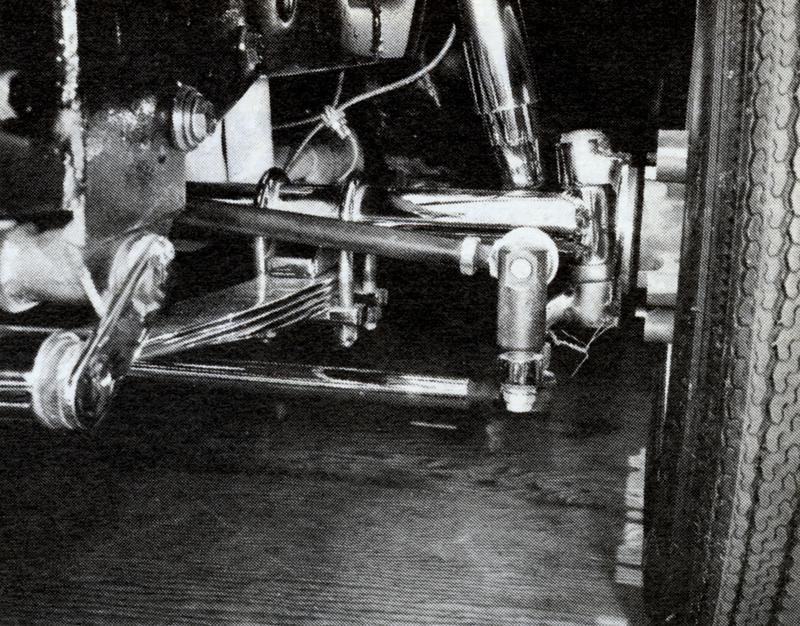
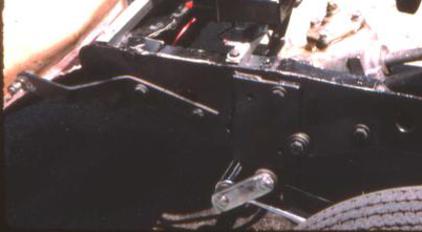
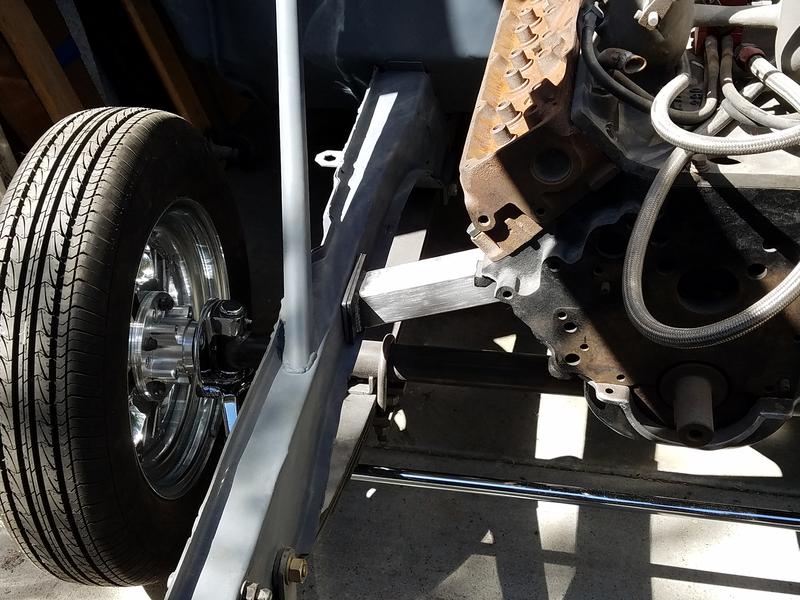
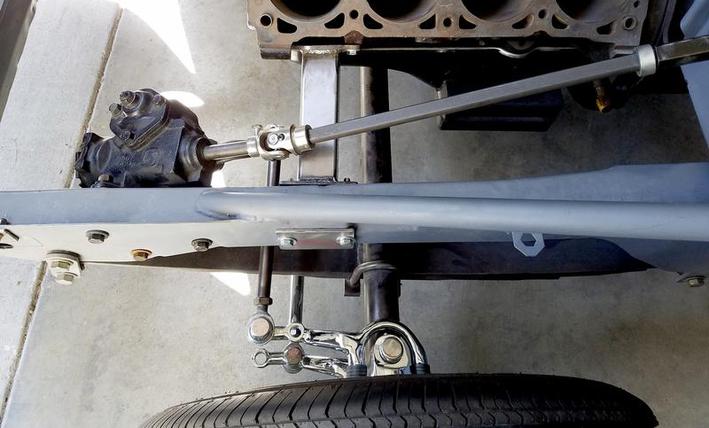
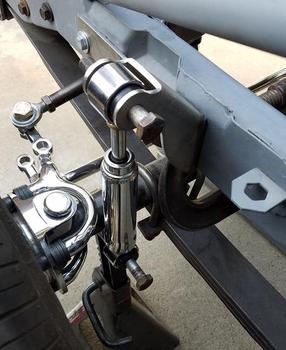
Above: Steering arm setup 1975.
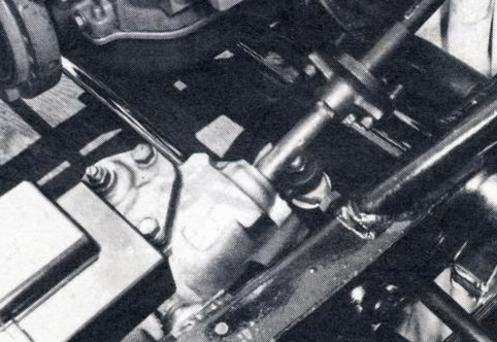
Below: New setup.
The way the steering was set up in my original Project Javelin is much the same as the new car except the steering tie rod arms. On the original lower tie rod arm, I made a piece that attached to it in the secondary hole then attached the tie rod to the steering box arm. Never like this much because it put too much stress on the piece and it flexed the lower tie rod a little.
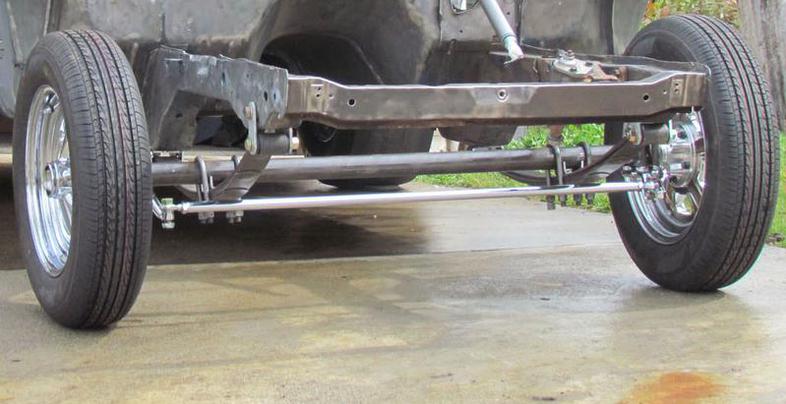
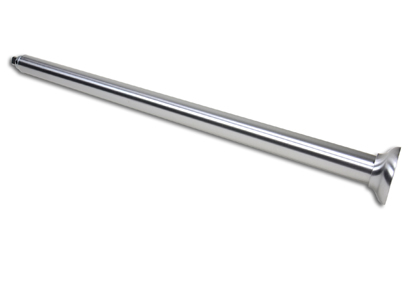
Because of the steering geometry, the tie rod arm must go at least 6” in forward of the center of the spindle. This eliminates the standard tie rod arm because it comes straight out from the center of the spindle. I used the 1928 thru 1948 Ford spindles which I purchased from Speedway Motors that fit the axel I also purchased from them. The arms are forged chrome plated 1 ¾ drop. I purchased two sets because I need three, but they only sell them in pairs, oh well.
Normally the passenger side (Right side) of the car uses the two holes on the tie rod arm where as the driver side (Left side) uses on one hole. I reversed them using the double hole on the driver side that allowed me to use one of the holes for the steering. Another benefit was that it moved the tie rod from under the oil pan to in front of it. I decided to leave it that way even though I could reverse it back. The holes on the tie rods are tapered, I used a 5/8 drill to make the straight, very easy. I also had to make two small 1" spacers to fit the top attachment points because they had to go around the spindle king pin boss which extend out further on top.
This set up is much better in many ways then the first, I wish that I would have thought of it when I was twenty-five.
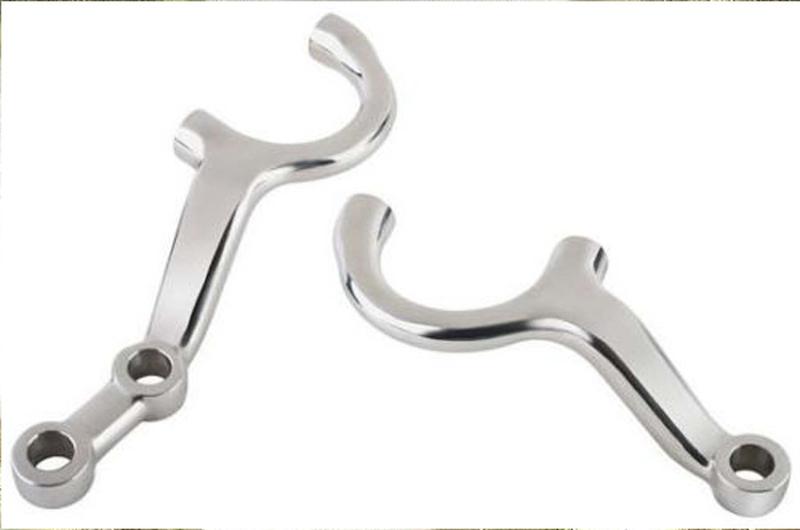

Chrome Tie Rod Arms from Speedway Motors
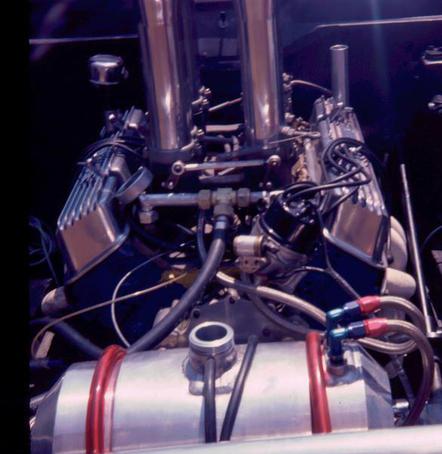
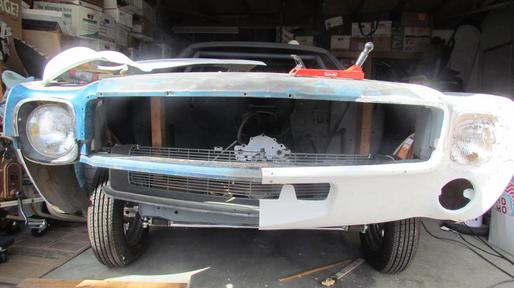
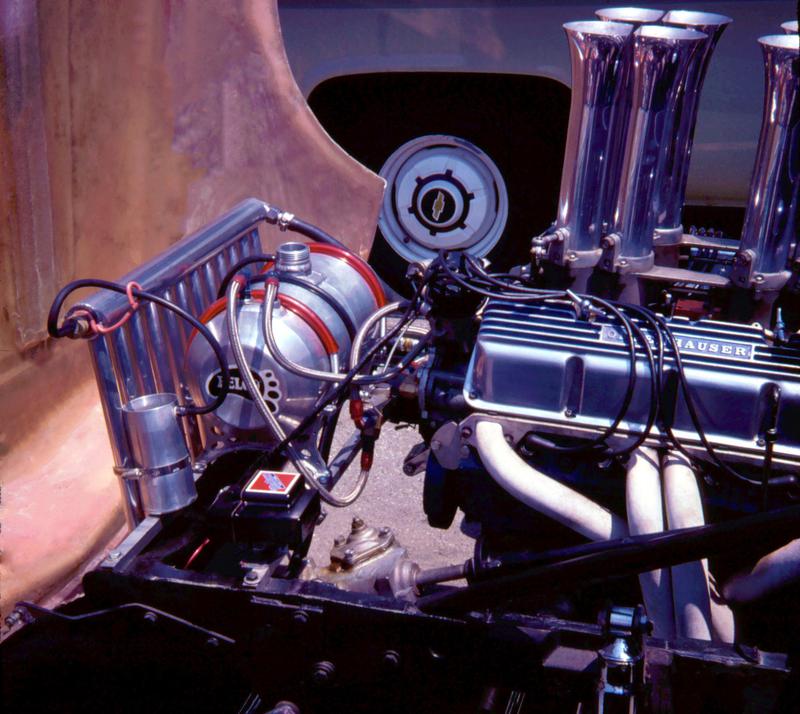
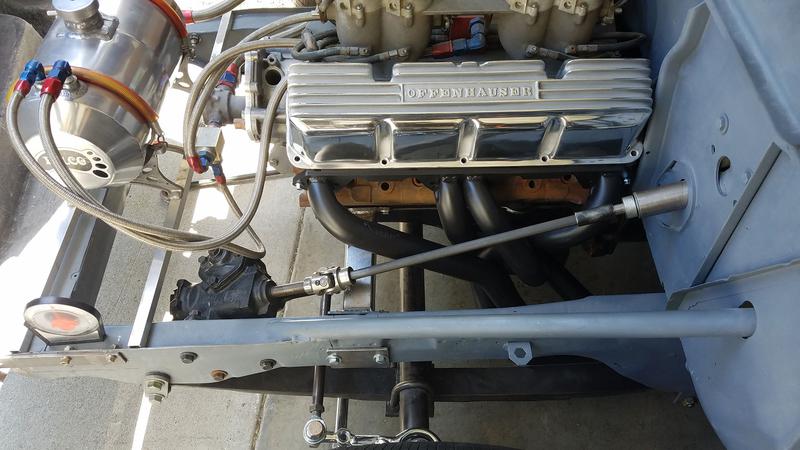
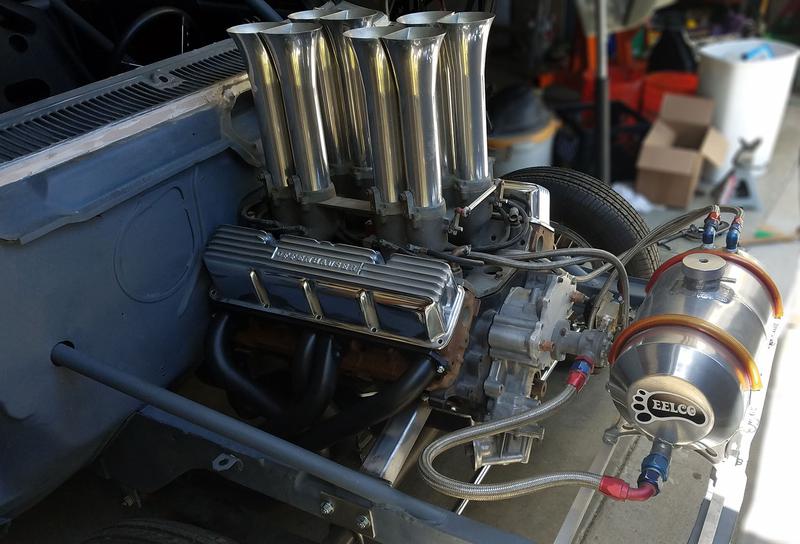
Above & Balow. Original 1974 photo of how the front looked
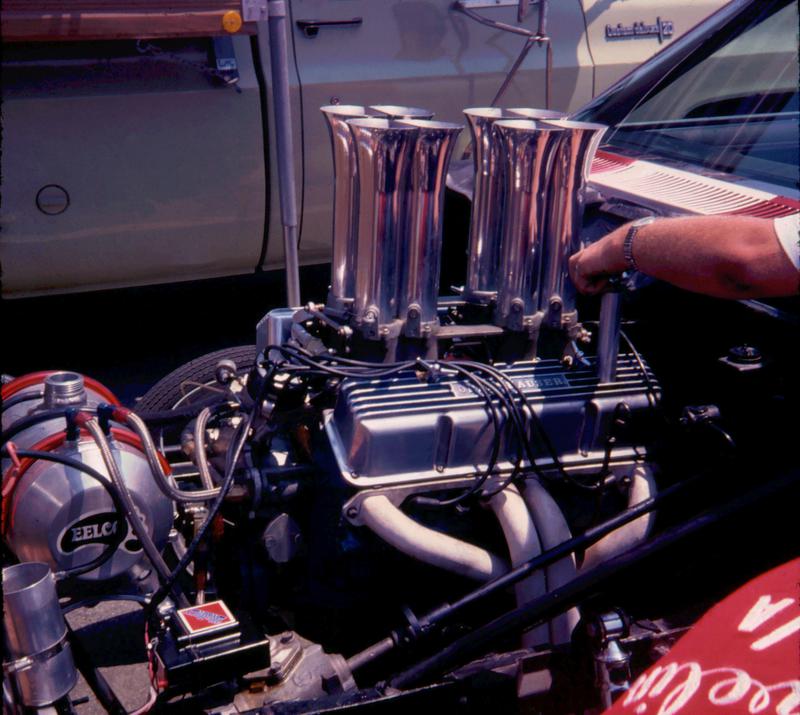
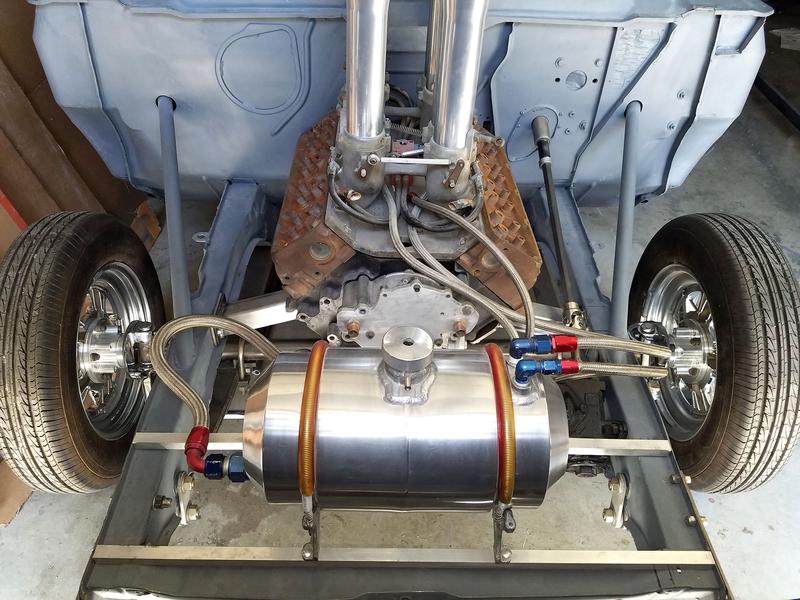
Above & Below. New Front with original injectors, injector pump and fuel tank.
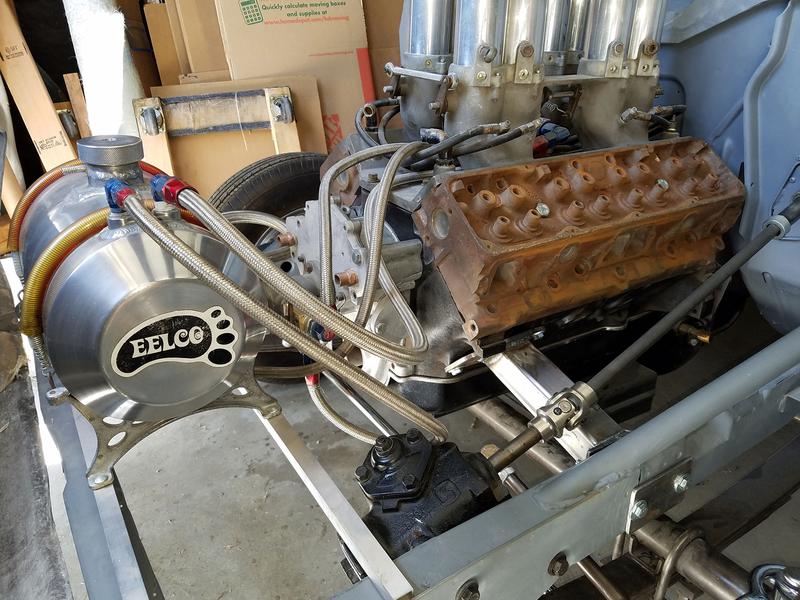
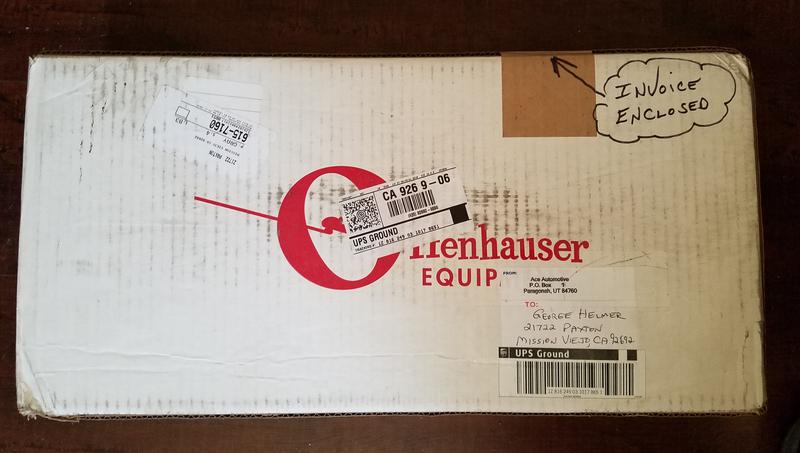

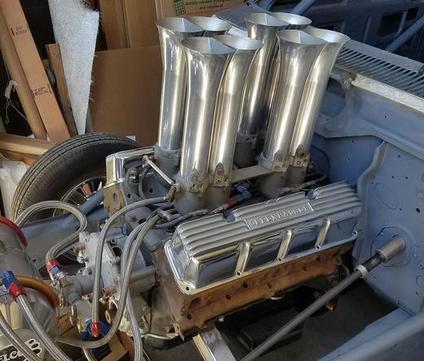
The original car used Offenhauser finned valve covers. I decided to keep the engine with the original look. Since they don't cast many of these each year I took a drive over to Offenhauser in Alhambra California to their offices and Wearhouse. Only to find out that they hadn't had any for a long time and were not sure when they were going to make a new run of them. I asked if they knew of anyone who would have a new set. They suggested that I contact Ace Automotive in Paragonah Utah who may have a set. I contacted them, and I was lucky they had two sets. The cost was $306.00 but well worth every cent. In my opinion the Offenhauser valve covers are the best finned valve covers still out there.
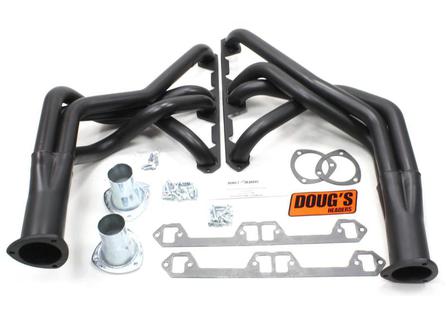
Purchased a pair of 1 7/8 inch tube headers from Doug's Headers which were on the original car.
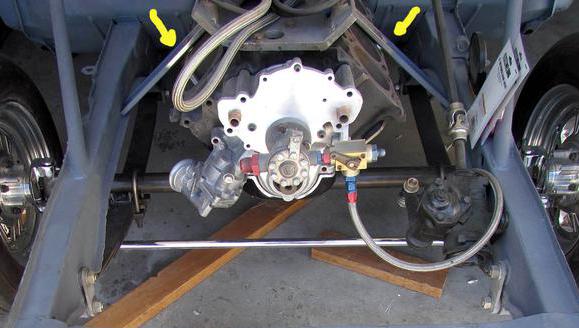
Front Shock Mounts
Coming soon, the installation of the shock towers and shocks I purchased from Speedway Motors. I will show the details as I complete them.
Site last updated on 08/06/2022
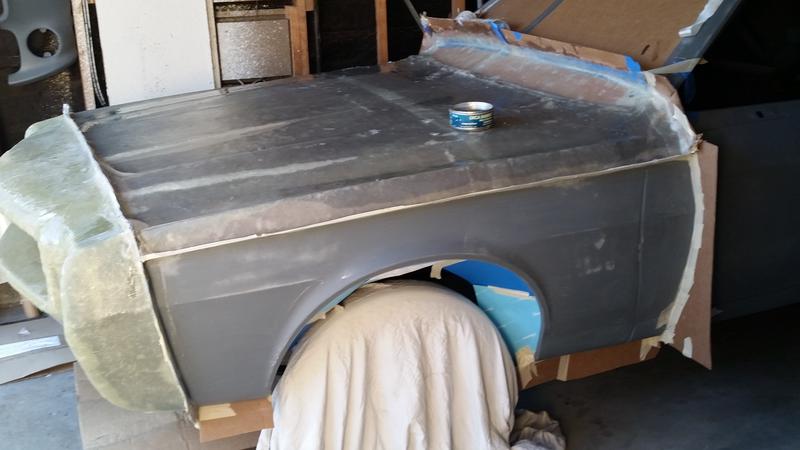
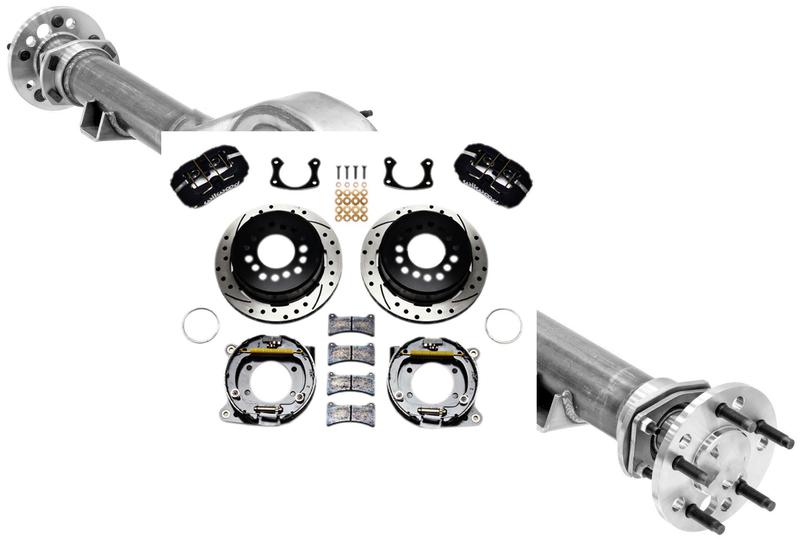
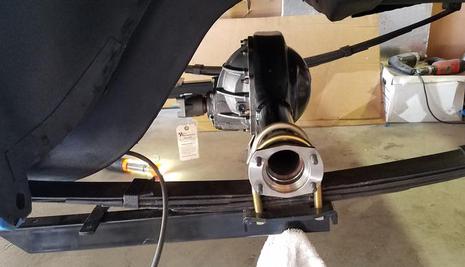
The last week I have been doing some finial bodywork to the rear of the car and moving forward. Knowing I was going to have to narrow the rear-end housing because the tires were sticking out too much I decided to put a Ford 9 inch under it for several reasons. First it is easier to get parts for at a reasonable price and I can change the rear gears much easier with the 9 inch. I'm keeping the car looking the same as the original car but doing some upgrades I would have made to that car shortly before I sold it. Did not want to tub the body in the wheel wells so I measured so I could maximize the tires inside the existing space. The rear-end will also feature a set of disc brakes and stronger axles. Not sure what gears I'll be running, I’ll have to figure that out when everything is put together. The rear-end will be here next week and I will show the installation.
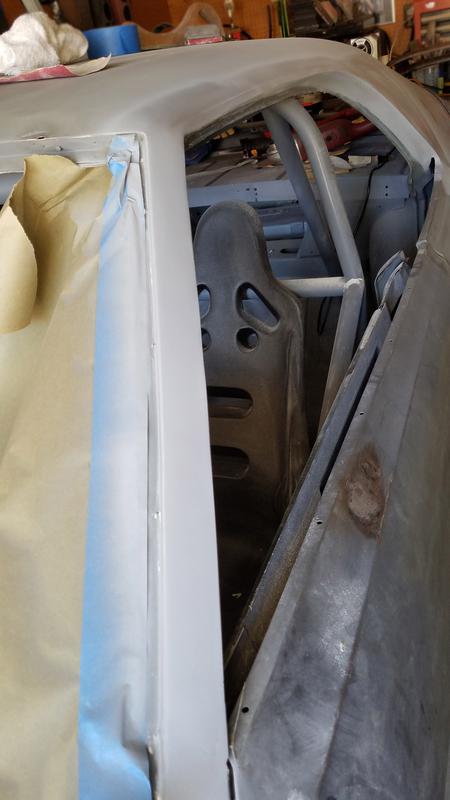
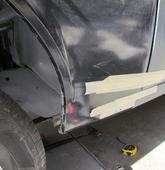
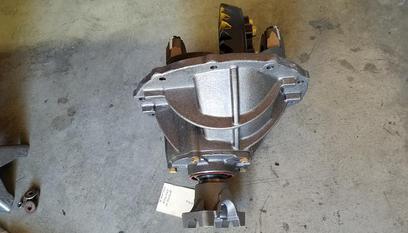
While I'm waiting for the 3rd member to get here I decided to do some body modifications. Love it or hate it, it had to be done because I cut off the front of them when I built the fiberglass mold. I had one but the other disappeared. If I don't like the effect I will build new ones out of stainless in the shape of a L attached to the inside. But after doing it I like it.
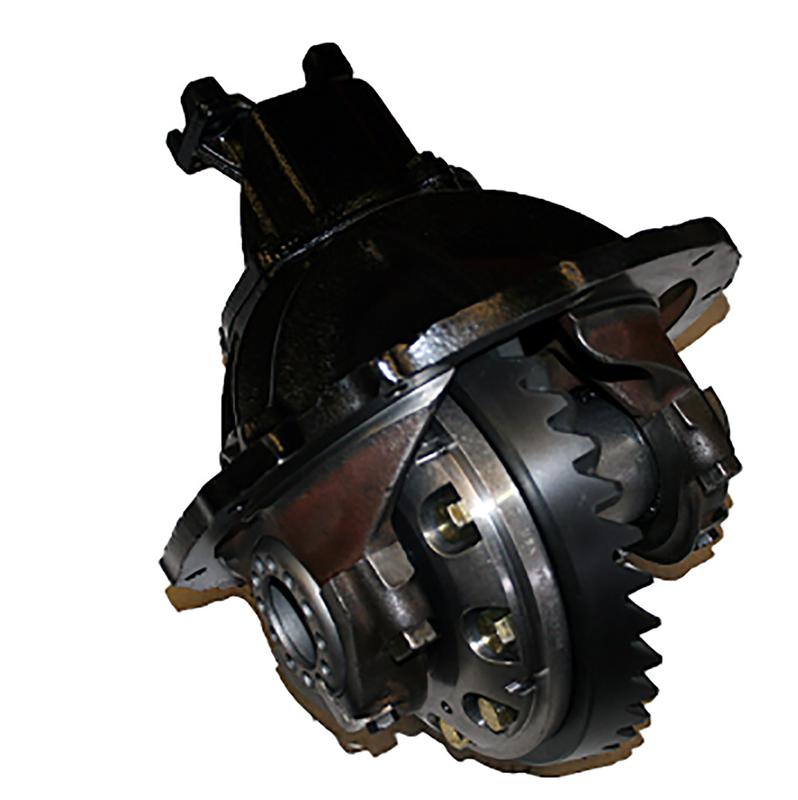
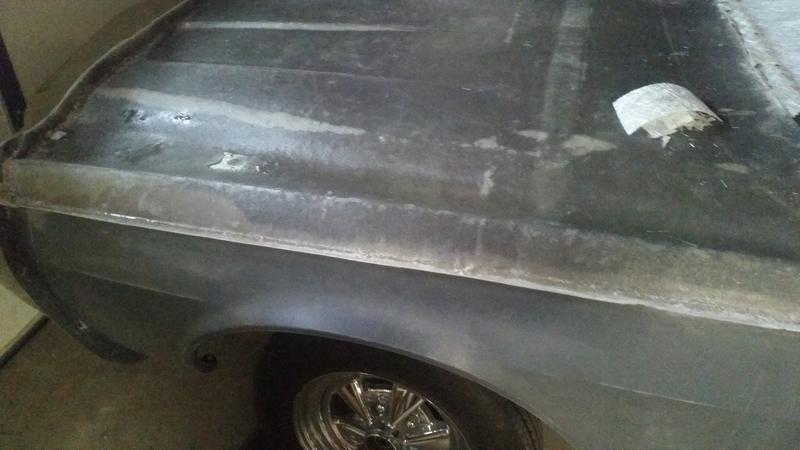
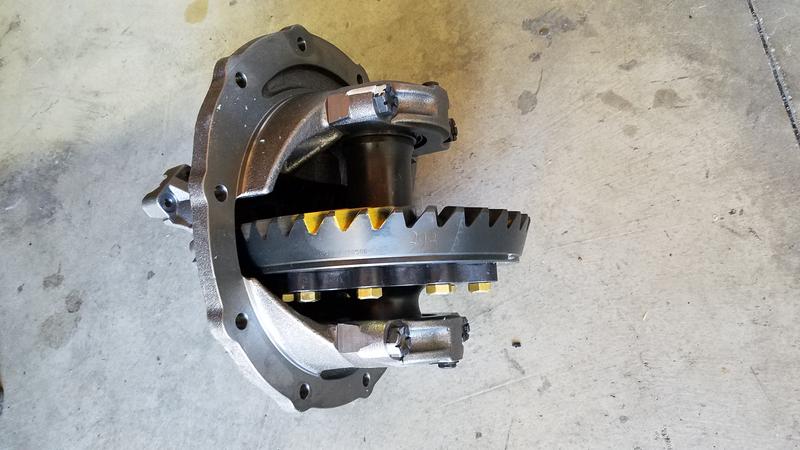
The 3rd member is a 31 spline with 5.0 gears and a spool. Custom axles that was narrowed to accommodate the deep rims and 11.5 x 30 in tall tires. Both tires are within a 1/2 inch of the springs which keeps the tires tucked inside the top of the rear fender opening. It also has disc brakes with a drum parking brake.
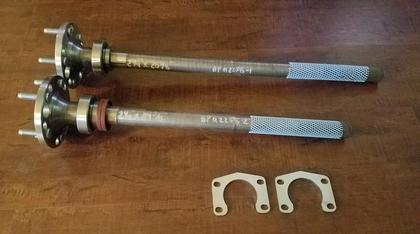
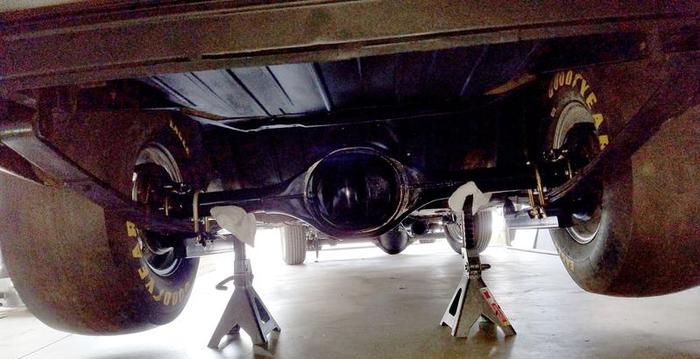
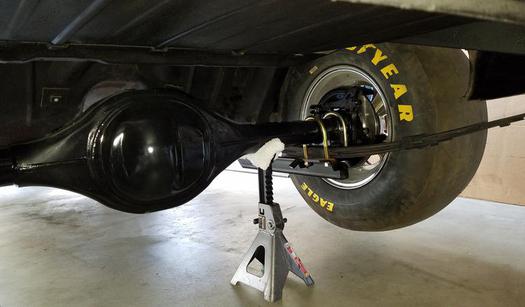
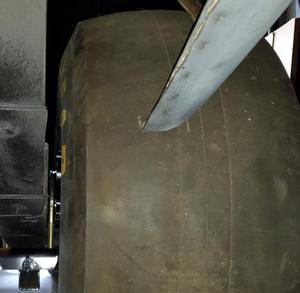
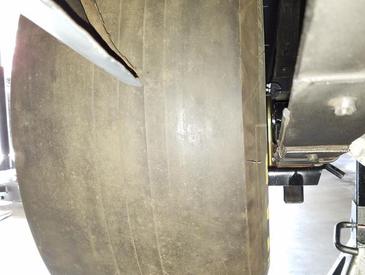
Purchased a set of traction bars much like the ones I used on the orignal Javelin. You can see how much tire I got under the fenders without cutting the rear wheel openimgs

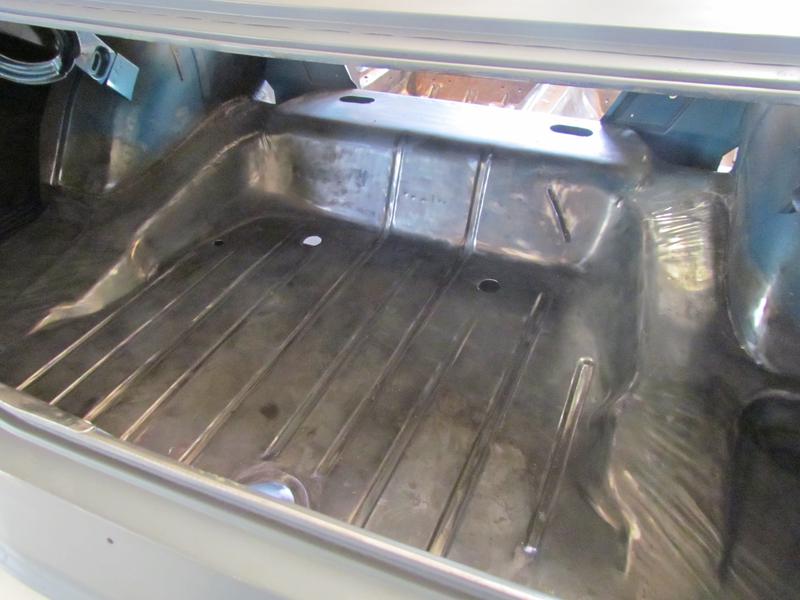
Working on bodywork and rebulding the Hurst vertical gate shifter. Since this body was an automatic it was nice that I could cut out the floor correctly. The engine and trans were moved back as far as I could move them without cutting the firewall. This ment that the shifter location was back and I just cleared the floor support.
It took awhile cutting a small hole and kept inlarging it until everything just fit. I had an original 4-speed shifter cover and had to modify it a bit so it would fit correctly. Next the brakes.
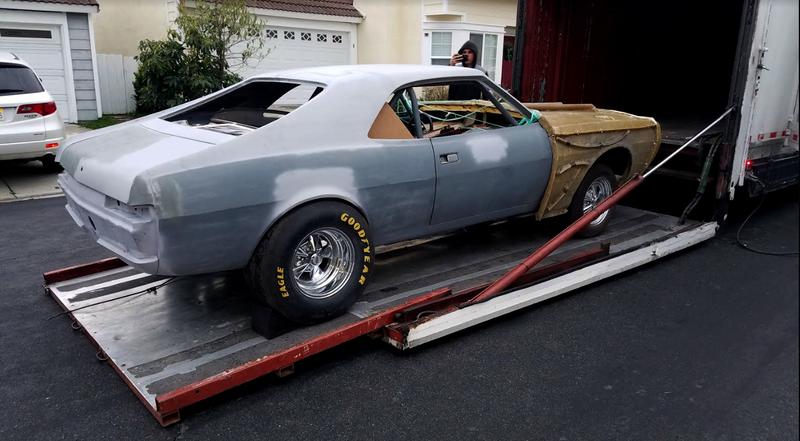
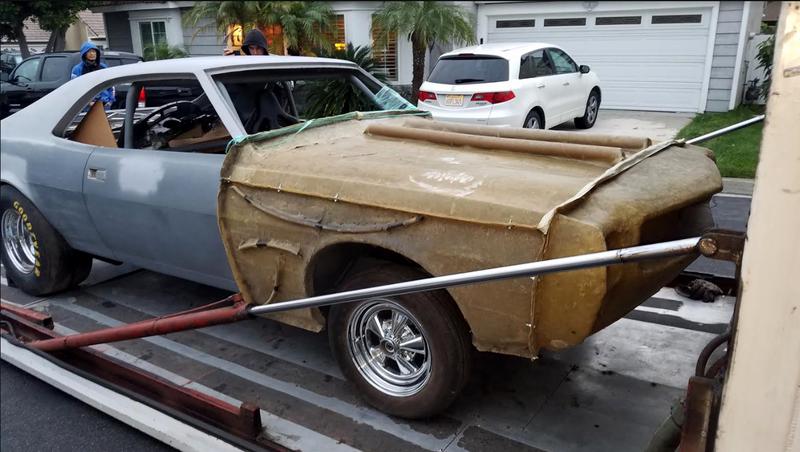
While continuing the build on Project Javelin, Philip Thomas who owns the Sassy Gremlin asked me if I wanted to purchase his car? Sure, but I can't work on three cars at the same time for many reasons not lease that my wife would probably divorce me. Because I had been looking for this car for the last 20 years, I just couldn't pass up the opportunity, so I sold my Project Javelin in its current uncompleted form to Jim's Tooling Soultion's LLC in Michigan.They will complete the car as I restore the Gremlin. The Sassy Gremlin is a National Recorder in NHRA BB/Gas. I will continue bring you updates from time to time on Project Javelin. Car is scheduled to be transported tomorrow to Jim's Tooling Solutions, in Orfordville, WI 53576
UPDATE ON THE SALE OF PROJECT JAVELIN
Car was transported to Jim's Tooling Solutions LLC, in Orfordville, WI 53576 3/19/20
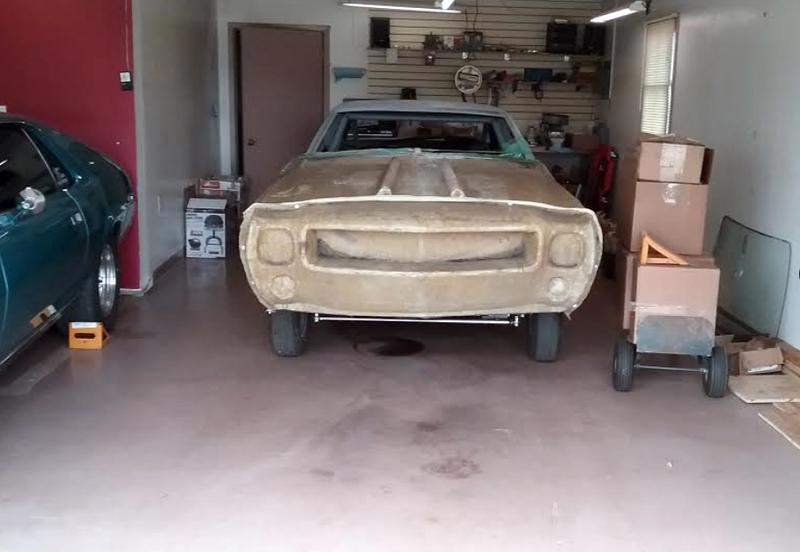
Project Javelin now sitting in Jim's Tooling Solution's garage and its new home. I will keep posting photos as they sends them.